

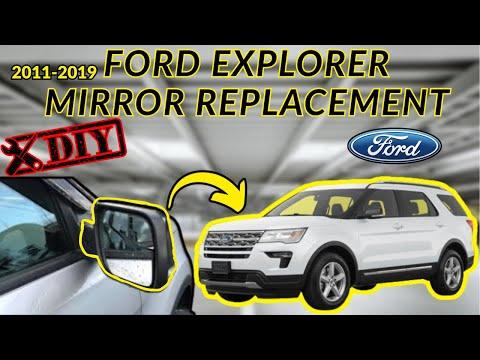





How to Replace Side View Mirrors on a 2016-2019 Ford Explorer
Step-by-step door panel removal, mirror installation, tools, parts, and torque specs for 2016, 2017, 2018, 2019
How to Replace Side View Mirrors on a 2016-2019 Ford Explorer
Step-by-step door panel removal, mirror installation, tools, parts, and torque specs for 2016, 2017, 2018, 2019


🔧 Side View Mirrors - Replacement
Replacing the side view mirror on your Explorer requires removing the interior front door trim panel, unplugging the mirror wiring connector, and unbolting the mirror from the door. This is a good beginner-to-intermediate repair if you work slowly, because the main risk is breaking plastic trim clips or scratching the painted door.
Difficulty Level: Intermediate | Estimated Time: 1-2 hours per side
⚠️ Safety & Precautions
- ⚠️ Disconnect the negative battery cable before unplugging door electrical connectors.
- ⚠️ Door trim panels use plastic clips that can break if pried in the wrong spot.
- ⚠️ Support the mirror with one hand before removing the final mounting nut so it does not fall and damage the paint.
- ⚠️ If your replacement mirror has blind spot, heated glass, puddle lamp, or turn signal features, it must match the original mirror equipment.
- ⚠️ Do not close the door with loose trim or wiring hanging near the door latch area.
🔧 Required Tools
You'll need the following tools for this repair:
- 10mm socket
- 7mm socket
- 8mm socket
- 1/4-inch drive ratchet
- 1/4-inch drive 6-inch extension
- Trim panel removal tool set
- Small flat-blade screwdriver
- Phillips screwdriver
- Torque wrench inch-pound 1/4-inch drive
- Painter's tape
- Magnetic parts tray
- Safety glasses
- Nitrile gloves
🔩 Required Parts
HowToo sells all the parts you need for this repair:
- Driver side view mirror assembly - Qty: 1, if replacing left side
- Passenger side view mirror assembly - Qty: 1, if replacing right side
- Front door trim panel clips - Qty: 4-8, recommended
- Mirror mounting nuts - Qty: 3, replace if damaged or corroded
📋 Before You Begin
- Park your Explorer on level ground and turn the ignition off.
- Lower the window on the door you are working on. This gives you a better grip and prevents accidental glass damage.
- Apply painter's tape around the outside mirror base to protect the paint.
- Move the front seat rearward for more room to work.
- Disconnect the negative battery cable using a 10mm socket. Wait at least 2 minutes before unplugging door connectors.
- A trim panel removal tool is a wide plastic pry tool that helps pop clips loose without gouging the panel.
🔨 Step-by-Step Instructions
Follow these steps in order:
Step 1: Protect the Door and Remove Small Trim Covers
- Use painter's tape around the painted mirror base and upper door edge.
- Use a small flat-blade screwdriver to gently remove the small screw covers in the door pull/handle area.
- Wrap the screwdriver tip with painter's tape if you are worried about marks.
- Go slow near visible trim.
Step 2: Remove Door Panel Screws
- Use a 7mm socket with a 1/4-inch drive ratchet to remove the lower and hidden door trim screws.
- Use an 8mm socket if your door pull fasteners are the larger style.
- Place all screws in a magnetic parts tray so none are lost.
- Some fasteners may be behind small plastic covers near the interior handle and armrest.
Step 3: Release the Door Trim Panel Clips
- Use a trim panel removal tool at the lower rear edge of the door panel.
- Slide the tool between the panel and the metal door, then pry straight outward to pop the first clip loose.
- Continue around the lower and side edges with the trim panel removal tool until all clips release.
- Do not pull from the top yet; the panel hooks over the window ledge.
Step 4: Lift Off the Door Trim Panel
- Use both hands to lift the door panel straight upward off the window ledge.
- Support the panel close to the door because wiring is still attached.
- Use a small flat-blade screwdriver to release locking tabs on the window switch connector and courtesy lamp connector.
- If equipped, disconnect the interior handle cable by rotating the cable end out of the handle lever.
Step 5: Remove the Mirror Access Area
- Use the trim panel removal tool to gently remove the triangular sail trim at the inside front corner of the door.
- The sail trim is the small triangle-shaped plastic cover opposite the mirror.
- Use a flashlight to locate the mirror wiring connector and mounting nuts.
Step 6: Disconnect the Mirror Wiring
- Use a small flat-blade screwdriver to press the locking tab on the mirror electrical connector.
- Pull the connector straight apart by the plastic body, not by the wires.
- Check that the replacement mirror connector matches the original connector before removal.
Step 7: Remove the Old Mirror Assembly
- Support the outside mirror with one hand.
- Use a 10mm socket with a 1/4-inch drive ratchet and 6-inch extension to remove the 3 mirror mounting nuts.
- Carefully pull the mirror straight away from the outside of the door.
- Guide the wiring harness through the opening without scraping the paint.
Step 8: Install the New Mirror Assembly
- Feed the new mirror wiring harness through the door opening by hand.
- Set the mirror studs into the door holes while holding the mirror flat against the door.
- Start all 3 mirror mounting nuts by hand to avoid cross-threading.
- Use a 10mm socket and torque wrench to tighten the mirror nuts evenly.
- Torque to 8 Nm (71 in-lbs)
Step 9: Connect and Test the Mirror
- Reconnect the mirror electrical connector by hand until it clicks.
- Temporarily reconnect the negative battery cable using a 10mm socket.
- Turn the ignition on and test mirror glass movement, heat, turn signal, puddle lamp, and blind spot indicator if equipped.
- Turn the ignition off and disconnect the negative battery cable again using a 10mm socket before reinstalling the door panel.
- Test before closing everything up.
Step 10: Reinstall the Sail Trim and Door Panel
- Use your hands to press the triangular sail trim back into place until the clips seat.
- Reconnect the door panel electrical connectors by hand until each one clicks.
- Reconnect the interior handle cable by hand if it was removed.
- Hang the top of the door panel over the window ledge first.
- Use the palm of your hand to press around the panel edges until the clips snap into the door.
Step 11: Reinstall Door Panel Screws
- Use a 7mm socket with a 1/4-inch drive ratchet to reinstall the door trim screws.
- Use an 8mm socket for any larger door pull fasteners if equipped.
- Snug the screws only; do not over-tighten plastic trim fasteners.
- Torque to 2.5 Nm (22 in-lbs)
- Use your fingers to snap the small screw covers back into place.
Step 12: Reconnect the Battery
- Use a 10mm socket to reconnect the negative battery cable.
- Tighten the terminal so it does not rotate by hand.
- Torque to 5 Nm (44 in-lbs)
✅ After Repair
- Turn the ignition on and test the mirror adjustment switch in all directions.
- Lock and unlock the vehicle to confirm the door electronics work normally.
- If equipped, test the heated mirror after the rear defrost is turned on.
- If equipped, confirm turn signal and puddle lamp operation.
- Drive carefully and confirm visibility before normal driving.
- If a blind spot warning fault appears, scan the body/driver assist system with a Ford-capable scan tool.
💰 DIY vs Shop Cost
Shop Cost: $350-$850 per side (parts + labor)
DIY Cost: $120-$500 per side (parts only)
You Save: $150-$350 per side by doing it yourself!
Shop labor rates vary but typically run $100-$150/hour. This repair takes a shop approximately 1-2 hours per side.
🎯 Ready to get started?
HowToo makes it easy: same-day/2-day shipping on every part, plus all the tools and specialty tools you need! Check out the parts and tools sections below to add everything to your cart.