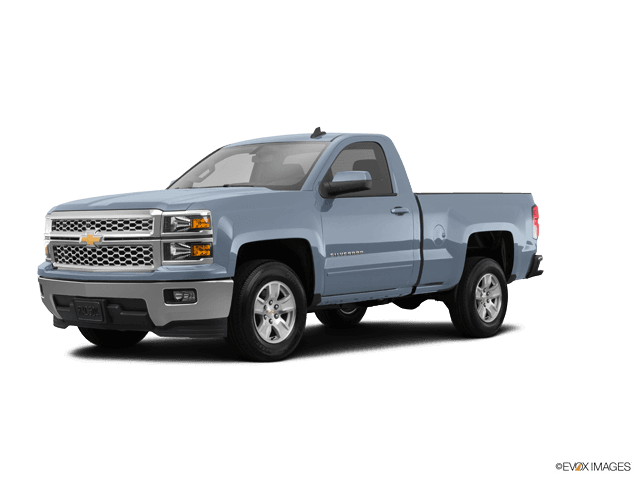

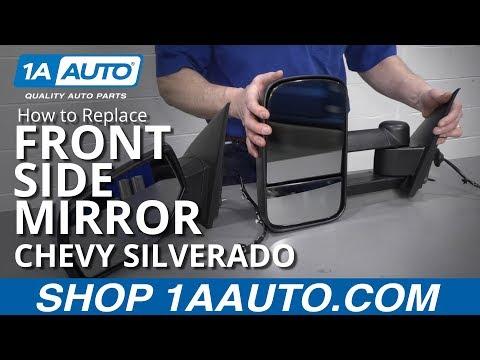






How to Replace Side View Mirrors on a 2015 Chevy Silverado 1500
Step-by-step Silverado mirror replacement guide with tools, wiring tips, torque specs, and beginner-friendly safety steps for 2015, 2016, 2017, 2018, 2019
How to Replace Side View Mirrors on a 2015 Chevy Silverado 1500
Step-by-step Silverado mirror replacement guide with tools, wiring tips, torque specs, and beginner-friendly safety steps for 2015, 2016, 2017, 2018, 2019


Silverado 1500 - Side View Mirror Replacement 🚚
Got it—you want to replace the side mirrors on your Silverado LT. I’ll walk you through the full process for a front door mirror (both sides are basically the same).
Quick Questions ❓
Before we lock in the exact steps, tell me:
- 🔧 Does your mirror have power adjustment only, or also heated glass / turn signal / power fold?
- 🔧 Are you replacing the entire mirror assembly or just the glass?
If you’re not sure, say “entire mirror assembly, power only” and I’ll assume that.
Tools & Supplies Needed 🧰
- 🔧 Socket set (metric):
- 10 mm socket – main mirror nuts
- 7 mm socket – door panel screws
- 🔧 Ratchet and a short extension
- 🔧 Trim removal tool (plastic pry tool; used to pop off panels without scratching)
- 🔧 Small flathead screwdriver – to lift plastic covers / clips
- 🔧 T20 Torx driver – some trucks use this on door trim screws
- 🔧 Needle-nose pliers – to help with stubborn clips (optional)
- 🔧 Painter’s tape – to protect paint around mirror area (optional but helpful)
- 🔧 Magnet pickup tool – in case a nut falls inside the door (optional)
Safety First ⚠️
- ⚠️ Key off and remove it from the ignition before unplugging mirror connectors.
- ⚠️ If your mirror has turn signals or puddle lamps, you’re dealing with wiring—handle connectors gently, never pull on the wires.
- ⚠️ Work on one door at a time so you can look at the other side as a reference.
Overview – What You’ll Do 📝
- 🔧 Remove small trim pieces near the mirror.
- 🔧 Remove the door panel enough to access the mirror connector (on some trucks you can reach it without fully removing the panel, but this method is safer for a beginner).
- 🔧 Unplug the mirror wiring.
- 🔧 Remove the three mirror mounting nuts.
- 🔧 Install the new mirror, plug it in, and reassemble.
Step 1 – Prepare the Truck 🧼
- 🔧 Park on a flat surface, set the parking brake.
- 🔧 Turn the ignition off and remove the key.
- 🔧 Lower the window on the side you’re working on. This makes it easier to grab the mirror and door panel.
- 🔧 Put some painter’s tape around the base of the mirror on the door to protect the paint.
Step 2 – Remove Interior Trim at Mirror Corner 🪟
- 🔧 At the top front corner of the door panel (inside), there’s a small triangular trim cover over the mirror mounting area.
- 🔧 Use a plastic trim tool to gently pry this triangle cover away from the door:
- Start at the top edge and work your way down.
- It’s held by plastic clips—pull straight out, not sideways.
- 🔧 Set the trim piece aside somewhere safe.
Step 3 – Remove Door Panel Fasteners 🔩
You’ll remove a few screws and then pop the panel off its clips.
- 🔧 Door pull handle screw:
- Look inside the main grab handle (where you pull the door closed).
- There’s a small plastic cover. Pry it up gently with a small flathead screwdriver.
- Remove the 7 mm screw underneath.
- 🔧 Armrest / switch area screw:
- Some trucks have a screw near the window switch panel or armrest.
- Look for a small cover; pry it up and remove the 7 mm or T20 Torx screw.
- 🔧 Lower door screws:
- Check along the bottom edge of the door panel for 1–2 more 7 mm screws.
- Remove them.
Step 4 – Release the Door Panel 📦
- 🔧 Slide your fingers or a trim tool between the bottom edge of the door panel and the metal door.
- 🔧 Gently pull outward to pop the first plastic clip. It will make a popping sound—that’s normal.
- 🔧 Work your way around the sides of the panel, popping clips one by one.
- 🔧 Once all clips are loose, lift the panel straight up to unhook it from the window ledge.
- 🔧 Don’t yank it away yet—there are still wiring connectors attached.
Step 5 – Disconnect Door Panel Wiring 🔌
- 🔧 Support the panel with your knee or a box so it doesn’t hang by the wires.
- 🔧 Unplug:
- Window/lock switch connector – press the tab and pull the plug straight out.
- Any courtesy light connector at the bottom of the panel.
- 🔧 Set the door panel aside somewhere clean.
Step 6 – Locate and Unplug the Mirror Connector 🧠
- 🔧 Look near the front upper area of the door, behind where the mirror sits.
- 🔧 You’ll see the mirror wiring harness coming through the door and plugging into a connector.
- 🔧 Press the locking tab on the connector and pull it apart. Never pull on the wires themselves.
Step 7 – Remove the Old Mirror 🪞
- 🔧 From inside the door, look at the mirror mounting area (behind the triangle trim you removed).
- 🔧 You’ll see three 10 mm nuts holding the mirror studs.
- 🔧 Support the mirror with one hand from the outside so it doesn’t fall.
- 🔧 Use a 10 mm socket and ratchet to remove the three nuts:
- Loosen them evenly.
- Be careful not to drop them inside the door—use a magnet if needed.
- 🔧 Once the nuts are off, gently pull the mirror away from the door from the outside, guiding the wiring harness through the hole.
Step 8 – Install the New Mirror 🔁
- 🔧 Feed the wiring harness of the new mirror through the opening in the door.
- 🔧 Position the mirror against the door, lining up the studs with the holes.
- 🔧 From inside, install the three 10 mm nuts by hand first to avoid cross-threading.
- 🔧 Tighten the nuts with the 10 mm socket:
- Typical torque is about 8–10 N·m (71–89 in-lb) – snug, not “gorilla tight”.
- Alternate between nuts so the mirror seats evenly.
Step 9 – Reconnect Wiring and Test ✅
- 🔧 Plug the mirror connector back into the door harness until it clicks.
- 🔧 Temporarily reconnect the window/lock switch connector to the door panel (you can just let the panel hang close).
- 🔧 Turn the ignition to ON (engine off is fine) and test:
- Power adjustment in all directions.
- Heated mirror (if equipped) – turn on rear defrost and feel after a minute.
- Turn signal / puddle lamp (if equipped).
- Power fold (if equipped).
- 🔧 Turn ignition off again before reassembly.
Step 10 – Reinstall Door Panel 🧩
- 🔧 Reconnect all door panel wiring connectors (window/lock switch, courtesy light, etc.).
- 🔧 Hang the top of the door panel on the window ledge first, making sure it sits in the groove.
- 🔧 Once aligned, push the panel straight in along the edges to snap all the clips back into place.
- 🔧 Reinstall:
- Lower edge screws (7 mm).
- Armrest / switch area screw.
- Grab handle screw and its plastic cover.
- 🔧 Reinstall the triangular mirror trim cover by lining up the clips and pressing it into place.
Step 11 – Final Checks 👀
- 🔧 Open and close the door to make sure nothing rubs or rattles.
- 🔧 Confirm all:
- Window switches
- Door locks
- Mirror functions
- 🔧 Remove any painter’s tape from the door.
Tips & Tricks for a Beginner 🧠
- 🔧 Do the easier side first (usually passenger side, less traffic stress) to practice.
- 🔧 Keep screws and clips in small labeled cups or bags so you remember where they go.
- 🔧 If a clip stays in the door instead of the panel, use needle-nose pliers to move it back to the panel before reinstalling.
If you reply with what type of mirror you have (power only, heated, turn signal, power fold), I can add any extra connector or option-specific notes for your exact setup.
HowToo makes it easy: below this answer you’ll see recommended replacement mirrors and any tools you might be missing. You can add them to your cart right from the parts section for fast shipping. 🚚