

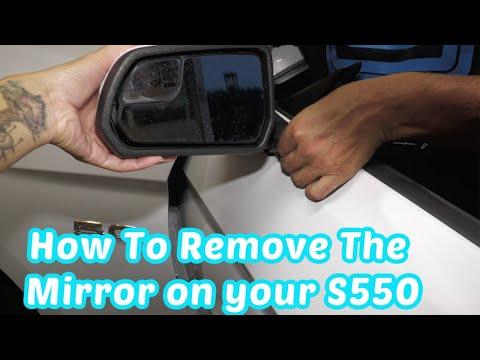






How to Replace Side View Mirrors on a 2015-2020 Ford Mustang (Body: Coupe)
Step-by-step DIY guide with door panel removal, wiring, tools, parts, and torque specs for 2015, 2016, 2017, 2018, 2019, 2020
How to Replace Side View Mirrors on a 2015-2020 Ford Mustang (Body: Coupe)
Step-by-step DIY guide with door panel removal, wiring, tools, parts, and torque specs for 2015, 2016, 2017, 2018, 2019, 2020


🔧 Mustang - Side View Mirror Replacement
Replacing a side view mirror on your Mustang means removing the front door trim panel, unplugging the mirror wiring, unbolting the mirror, and installing the new one. This is a good beginner-friendly repair if you work slowly and protect the paint and interior trim.
Difficulty Level: Beginner | Estimated Time: 1-2 hours per side
⚠️ Safety & Precautions
- ⚠️ Disconnect the negative battery cable before unplugging mirror wiring.
- ⚠️ Do not pry against painted surfaces without tape or a plastic trim tool.
- ⚠️ Support the mirror with one hand while removing the last nut so it does not fall and scratch the door.
- ⚠️ If your mirror has blind spot monitoring, handle the wiring connector carefully and do not pull on the wires.
- ⚠️ Avoid turning the ignition on while door wiring is disconnected.
🔧 Required Tools
You'll need the following tools for this repair:
- 10mm socket
- 7mm socket
- Ratchet
- 6-inch extension
- Torque wrench inch-pound
- Trim panel removal tool set
- Small flat-blade screwdriver
- Pick tool
- Painter’s tape
- Shop towels
- Safety glasses
- Mechanic gloves
🔩 Required Parts
HowToo sells all the parts you need for this repair:
- Side view mirror assembly - Qty: 1 per side
- Door trim panel clips - Qty: 1 set per side
- Mirror mounting nuts - Qty: 3 per side if damaged or missing
📋 Before You Begin
- Park your Mustang on level ground and set the parking brake.
- Lower the front window on the side you are repairing before disconnecting the battery.
- Place a shop towel over the outer door skin below the mirror to protect the paint.
- Apply painter’s tape around the mirror base if the old mirror is loose or damaged.
- Use a 10mm socket to disconnect the negative battery cable.
- A trim panel removal tool is a plastic pry tool that helps pop clips loose without scratching panels.
🔨 Step-by-Step Instructions
Follow these steps in order:
Step 1: Disconnect the Battery
- Open the hood.
- Use a 10mm socket and ratchet to loosen the negative battery terminal nut.
- Lift the negative cable off the battery post and move it aside so it cannot touch the terminal.
- Take a quick photo first.
Step 2: Remove the Small Mirror Trim Cover
- Open the door fully.
- Use a trim panel removal tool to gently pry off the small triangular trim cover at the inside front corner of the door.
- Pull the cover straight inward to release the clips.
- Set the cover on a shop towel.
Step 3: Remove Door Panel Screw Covers
- Use a small flat-blade screwdriver or pick tool to open the small screw covers in the door pull and handle area.
- Use painter’s tape on the screwdriver tip if you are worried about scratches.
- Keep all covers together so they do not get lost.
Step 4: Remove Door Panel Screws
- Use a 7mm socket, ratchet, and 6-inch extension to remove the door trim panel screws.
- Check the pull handle pocket, interior handle area, and lower door panel edge for fasteners.
- Place the screws in a small cup or on a clean shop towel.
Step 5: Release the Door Trim Panel Clips
- Use a trim panel removal tool at the lower edge of the door panel.
- Pry gently outward until the first clip releases.
- Work around the lower and rear edges of the panel one clip at a time.
- Once the clips are free, lift the panel upward to unhook it from the window ledge.
- Slow pressure prevents broken clips.
Step 6: Disconnect Door Panel Wiring
- Support the door panel with one hand.
- Use a small flat-blade screwdriver or pick tool to unlock the electrical connector tabs.
- Unplug the window switch, lock switch, courtesy lamp, and speaker connectors if equipped.
- Do not pull on the wires; pull on the connector body.
- Set the door panel on a clean towel.
Step 7: Peel Back the Door Water Shield
- Use a plastic trim panel removal tool to gently peel back the foam or plastic water shield near the mirror area.
- Only peel back enough to access the mirror connector and mounting nuts.
- Keep the sticky sealer clean so it can be reused.
Step 8: Unplug the Mirror Connector
- Locate the side view mirror wiring connector inside the upper front section of the door.
- Use a small flat-blade screwdriver or pick tool to release the connector lock.
- Pull the connector straight apart by hand.
- If the connector is clipped to the door, use the trim panel removal tool to release the retainer.
Step 9: Remove the Mirror Mounting Nuts
- Have one hand ready outside the door to support the mirror.
- Use a 10mm socket, ratchet, and 6-inch extension to remove the mirror mounting nuts.
- Remove the lower nut first, then the upper nuts.
- Hold the mirror firmly while removing the final nut.
Step 10: Remove the Old Mirror
- From outside the door, pull the mirror straight away from the door.
- Guide the wiring harness through the hole carefully.
- Use a shop towel to clean dirt from the mirror mounting area.
- Do not scrape the paint with metal tools.
Step 11: Install the New Mirror
- Feed the new mirror wiring harness through the door opening.
- Align the mirror studs with the holes in the door.
- Hold the mirror flat against the door with one hand.
- Start all mirror mounting nuts by hand to avoid cross-threading.
Step 12: Tighten the Mirror Mounting Nuts
- Use a 10mm socket and ratchet to snug the mirror nuts evenly.
- Use a torque wrench inch-pound and 10mm socket to tighten the mirror nuts to Torque to 9 Nm (80 in-lbs).
- Do not overtighten; the mirror base and door mounting area can crack or distort.
Step 13: Connect the Mirror Wiring
- Plug the mirror connector in by hand until it clicks.
- Use the trim panel removal tool to reinstall any wiring retainer clips into the door.
- Make sure the harness is routed away from the window glass path.
Step 14: Test the Mirror Before Reassembly
- Use a 10mm socket to temporarily reconnect the negative battery cable.
- Turn the ignition on without starting the engine.
- Use the mirror switch to test up, down, left, and right movement.
- If equipped, test mirror heat using the rear defrost button.
- If equipped, confirm the blind spot indicator lights briefly during startup.
- Turn the ignition off.
- Use a 10mm socket to disconnect the negative battery cable again before reinstalling the door panel.
Step 15: Reattach the Door Water Shield
- Press the water shield back into place by hand.
- Make sure the sticky sealer is fully sealed around the opening.
- If the sealer no longer sticks, use butyl sealing tape to reseal it.
Step 16: Reconnect Door Panel Wiring
- Hold the door panel near the door.
- Reconnect the window switch, lock switch, courtesy lamp, and speaker connectors by hand.
- Listen for each connector to click.
- Make sure no wires are trapped behind clip locations.
Step 17: Reinstall the Door Trim Panel
- Hook the top of the door panel over the window ledge by hand.
- Line up the panel clips with the holes in the door.
- Press around the panel edges by hand until all clips snap in.
- Use a 7mm socket to reinstall the door panel screws.
- Use a torque wrench inch-pound and 7mm socket to tighten the door panel screws to Torque to 2-3 Nm (18-27 in-lbs).
Step 18: Reinstall Trim Covers
- Snap the small screw covers back into place by hand.
- Install the triangular mirror trim cover by lining up the clips and pressing inward by hand.
- Wipe fingerprints from the mirror glass with a clean shop towel.
Step 19: Reconnect the Battery
- Use a 10mm socket to reconnect the negative battery cable.
- Use a torque wrench inch-pound and 10mm socket to tighten the terminal nut to Torque to 5 Nm (44 in-lbs).
- Do not overtighten the battery terminal.
✅ After Repair
- ✅ Test mirror adjustment in all directions.
- ✅ Test mirror heat if equipped by turning on rear defrost.
- ✅ Test blind spot warning indicator if equipped.
- ✅ Confirm the front window moves fully up and down without hitting wiring.
- ✅ Check that the door locks, window switch, speaker, and courtesy lamp work.
- ✅ Make sure the door panel sits flush with no loose clips or rattles.
💰 DIY vs Shop Cost
Shop Cost: $350-$850 per side (parts + labor)
DIY Cost: $120-$500 per side (parts only)
You Save: $230-$350 per side by doing it yourself!
Shop labor rates vary but typically run $100-$150/hour. This repair takes a shop approximately 1.0-1.5 hours per side.
🎯 Ready to get started?
HowToo makes it easy: same-day/2-day shipping on every part, plus all the tools and specialty tools you need! Check out the parts and tools sections below to add everything to your cart.