

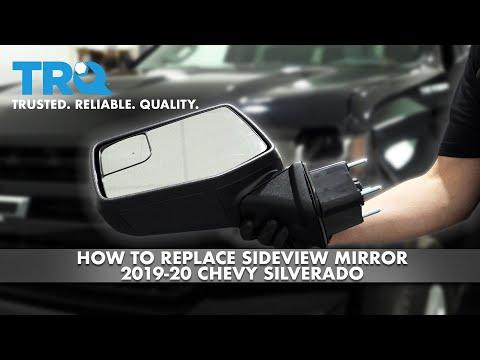






How to Replace Side View Mirrors on a 2015-2019 Chevrolet Silverado 1500
Step-by-step instructions with required tools, parts, torque specs, safety tips, and feature checks for 2015, 2016, 2017, 2018, 2019
How to Replace Side View Mirrors on a 2015-2019 Chevrolet Silverado 1500
Step-by-step instructions with required tools, parts, torque specs, safety tips, and feature checks for 2015, 2016, 2017, 2018, 2019


🔧 Silverado 1500 - Side View Mirror Replacement
Replace the complete mirror by removing the interior door panel, disconnecting the mirror wiring, and removing three mounting nuts. Buy a mirror with every feature your original has, especially the camera, blind-spot indicator, heat, memory, turn signal, puddle lamp, and power folding.
Assumption: These instructions cover a complete factory-style mirror assembly, not mirror glass alone.
Difficulty Level: Intermediate | Estimated Time: 1-2 hours per side
The mirror aisle is open, but the complete assemblies currently shown don’t list all High Country features. I wouldn’t trade working features for a cheaper mirror. That bargain gets expensive fast.
⚠️ Safety & Precautions
- ⚠️ Switch the ignition off and keep the key away from your Silverado.
- ⚠️ Disconnect the negative battery cable before unplugging mirror or door electrical connectors.
- ⚠️ Support the mirror before removing its final mounting nut so it cannot fall against the door.
- ⚠️ Don’t switch on the ignition while door connectors are disconnected.
- ⚠️ Protect painted surfaces with masking tape and a clean towel.
- ⚠️ Handle broken mirror glass with cut-resistant gloves.
🔧 Required Tools
You'll need the following tools for this repair:
- 10mm socket
- 7mm socket
- 1/4-inch drive ratchet
- 1/4-inch drive 6-inch extension
- Inch-pound torque wrench
- Plastic trim removal tool set
- Small flat-blade screwdriver
- Masking tape
- Clean fender-cover towel
- Cut-resistant work gloves
- Safety glasses
🔩 Required Parts
HowToo sells all the parts you need for this repair:
- Feature-matched side-view mirror assembly - Qty: 1 per damaged side
- Door trim retaining clips - Qty: As needed
- Mirror mounting nuts - Qty: 3 if damaged or missing
Match the replacement connector and every mirror function before installation. A mirror without the correct camera or blind-spot equipment may create warnings or permanently remove that function.
📋 Before You Begin
- Park your Silverado on level ground, shift into Park, and apply the parking brake.
- Lower the window. This gives you another safe place to hold the door while lifting its trim panel.
- Move the window glass fully down before disconnecting the battery.
- Use the 10mm socket to disconnect the negative battery terminal, then isolate the cable for at least two minutes.
- Compare the replacement mirror with the original before removing anything. Check the connector, mounting studs, camera, lamps, glass symbols, and folding mechanism.
- Apply masking tape around the mirror base and upper door trim to protect the paint.
🔨 Step-by-Step Instructions
Follow these steps in order:
Step 1: Remove the Interior Handle Trim
- Use a plastic trim removal tool to release the trim surrounding or covering the interior door-release handle.
- Work from the provided notch and pry gently. Don’t force the painted or chrome edges.
- Set the trim aside where its retaining tabs won’t be crushed.
Step 2: Remove the Door-Pull Fasteners
- Use a plastic trim removal tool to lift the small cover inside the door-pull or armrest area.
- Remove the exposed screws with the correctly fitting 7mm socket and 1/4-inch drive ratchet.
- Remove any additional exposed lower-door-panel screw with the 7mm socket.
- Keep the screws arranged by location because their lengths may differ.
Step 3: Release the Door Panel Clips
- Insert a plastic trim removal tool between the lower door panel and metal door shell.
- Twist the tool near each retaining clip until the clip releases.
- Continue around the bottom and both sides. Pull near each clip rather than bending the panel.
- Work beside each clip, not between them.
Step 4: Lift Off the Door Panel
- Hold the panel with both hands and lift it straight upward to unhook it from the window ledge.
- Don’t pull the panel away abruptly because wiring and the interior handle cable remain attached.
- Use a small flat-blade screwdriver only where needed to depress electrical connector locks.
- Disconnect the window-switch, lock-switch, courtesy-light, speaker, and other attached connectors.
- Release the interior door-handle cable from its retaining bracket and lever.
- Place the panel on a clean towel with its finished surface facing upward.
Step 5: Expose the Mirror Wiring
- Carefully peel back only the upper front corner of the moisture barrier using your hands and a plastic trim removal tool.
- Don’t cut or tear the barrier. It keeps rainwater away from the door panel and electronics.
- Locate the mirror harness and disconnect it by pressing its locking tab.
- Release the harness from its door clips so it can pass through the opening.
Step 6: Remove the Original Mirror
- Support the mirror from outside with one hand or have a helper hold it.
- Use the 10mm socket, 6-inch extension, and 1/4-inch drive ratchet to remove the three mirror mounting nuts.
- Keep each nut under control. Dropping one inside the door turns a short job into an unwanted fishing trip.
- Feed the electrical connector through the opening and lift the mirror away from the door.
- Clean the mounting surface with the clean fender-cover towel. Don’t disturb painted surfaces with metal tools.
Step 7: Install the Replacement Mirror
- Confirm the mirror gasket sits flat against the mirror base without folds or gaps.
- Feed the mirror connector and wiring through the door opening.
- Guide the mounting studs into the door while supporting the mirror from outside.
- Start all three nuts by hand to prevent cross-threading.
- Use the 10mm socket and in-lb torque wrench to tighten the nuts evenly to 9 Nm (80 in-lbs).
- Don’t overtighten the nuts. Excess force can crack the mirror base or distort the door skin.
Step 8: Connect and Route the Wiring
- Connect the mirror harness until its lock clicks.
- Secure the harness in every original clip and route it away from the window regulator and glass.
- Press the moisture barrier back into its original adhesive all the way around the opened area.
Step 9: Reconnect the Door Components
- Reconnect the interior door-handle cable and verify its housing locks into the bracket.
- Reconnect every electrical plug until its locking tab clicks.
- Inspect the door panel and replace any bent or broken retaining clips by hand or with the plastic trim removal tool.
Step 10: Reinstall the Door Panel
- Position the upper edge over the window ledge and press it fully downward.
- Align each retaining clip with its hole before pressing around the panel perimeter.
- Press directly over each clip with your palm until it seats.
- Install the door-panel screws with the 7mm socket and tighten them snugly by hand. Don’t overtighten screws threaded into plastic retainers.
- Reinstall the door-pull cover and interior-handle trim using the plastic trim removal tool or your hands.
Step 11: Restore Battery Power
- Use the 10mm socket and 1/4-inch drive ratchet to reconnect the negative battery cable.
- Tighten the terminal securely without crushing or twisting the battery post.
- Remove the masking tape and protective towel.
✅ After Repair
- Turn the ignition on and test mirror adjustment in all four directions.
- Test power folding, mirror heat, turn signal, puddle lamp, memory recall, blind-spot indicator, and surround-view camera if equipped.
- Start the engine and check the instrument panel for camera, blind-zone, or driver-assistance warnings.
- Verify the window, door lock, speaker, courtesy lamp, and interior handle all work correctly.
- Run the window completely down and up to confirm the mirror harness isn’t contacting the glass or regulator.
- Adjust the mirror for a clear driving view before moving your Silverado.
- If the mirror contains a surround-view camera and the image is distorted or camera warnings remain, professional calibration may be required.
💰 DIY vs Shop Cost
Shop Cost: $500-$1,500 per side (parts + labor)
DIY Cost: $290-$1,100 per side (parts only, depending on factory features)
You Save: $150-$400 by doing it yourself!
Local labor rates vary. This repair takes a shop approximately 1-2 hours, with calibration billed separately when required.
🎯 Ready to get started?
HowToo makes it easy: same-day/2-day shipping on every part, plus all the tools and specialty tools you need! Check out the parts and tools sections below to add everything to your cart.