

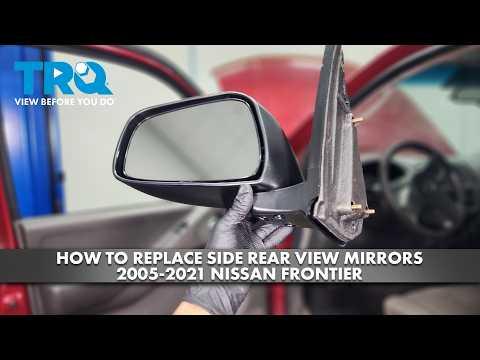



How to Replace Side View Mirrors on a 2005-2021 Nissan Frontier (Body: Extended Cab Pickup)
Step-by-step mirror replacement guide with tools, parts, torque specs, and safety tips for 2005, 2006, 2007, 2008, 2009, 2010, 2011, 2012, 2013, 2014, 2015, 2016, 2017, 2018, 2019, 2020, 2021
How to Replace Side View Mirrors on a 2005-2021 Nissan Frontier (Body: Extended Cab Pickup)
Step-by-step mirror replacement guide with tools, parts, torque specs, and safety tips for 2005, 2006, 2007, 2008, 2009, 2010, 2011, 2012, 2013, 2014, 2015, 2016, 2017, 2018, 2019, 2020, 2021


🔧 Frontier - Side View Mirror Replacement
Replacing a side view mirror on your Frontier involves removing the inside door trim panel enough to access the mirror mounting nuts and electrical connector. This is a good beginner repair if you work slowly and protect the paint and trim.
Difficulty Level: Beginner | Estimated Time: 45-90 minutes per side
⚠️ Safety & Precautions
- ⚠️ Wear safety glasses and gloves to protect against sharp plastic edges and broken mirror glass.
- ⚠️ Disconnect the negative battery cable before unplugging the mirror connector.
- ⚠️ Support the mirror with one hand before removing the last mounting nut so it does not fall and scratch the door.
- ⚠️ Do not pry on painted surfaces with metal tools.
- ⚠️ If your replacement mirror has a different connector or features, do not force the plug together.
🔧 Required Tools
You'll need the following tools for this repair:
- 10mm socket
- Ratchet handle
- 6-inch socket extension
- Phillips #2 screwdriver
- Small flat-head screwdriver
- Plastic trim removal tool set
- Needle-nose pliers
- Painter’s tape
- Magnetic parts tray
- Torque wrench rated 5-25 Nm
- Mechanic gloves
- Safety glasses
🔩 Required Parts
HowToo sells all the parts you need for this repair:
- Side view mirror assembly - Qty: 1 per side
- Door trim panel retaining clips - Qty: 3-6
- Mirror mounting nuts - Qty: 3 if damaged or missing
- Foam mirror gasket - Qty: 1 if not included with mirror
📋 Before You Begin
- Park your Frontier on level ground and set the parking brake.
- Turn the ignition off and remove the key.
- Use painter’s tape around the mirror base and door edge to help prevent scratches.
- Disconnect the negative battery cable with a 10mm socket.
- A trim removal tool is a plastic pry tool that pops panels loose without scratching them.
- A torque wrench tightens fasteners to the correct tightness so the mirror is secure without cracking plastic.
🔨 Step-by-Step Instructions
Follow these steps in order:
Step 1: Disconnect the Battery
- Use a 10mm socket and ratchet handle to loosen the negative battery cable clamp.
- Move the cable away from the battery post so it cannot touch accidentally.
- Keep the key out of the ignition.
Step 2: Remove the Inside Mirror Trim Cover
- Open the door fully.
- Use a plastic trim removal tool set to gently pry off the triangular inner cover at the front upper corner of the door.
- Pull straight outward to release the clips.
- Place the cover somewhere safe.
Step 3: Remove Door Panel Screw Covers
- Use a small flat-head screwdriver to lift the small trim covers in the pull handle and inside door handle area.
- Wrap the screwdriver tip with painter’s tape first to avoid marks.
- Put the covers in a magnetic parts tray.
Step 4: Remove Door Panel Screws
- Use a Phillips #2 screwdriver to remove the door trim screws.
- Common screw locations are inside the pull handle, behind the inside handle trim, and along the lower trim area.
- Store all screws in the magnetic parts tray.
Step 5: Release the Door Trim Panel Clips
- Use a plastic trim removal tool set at the lower edge of the door panel.
- Pry outward gently to pop the first clip free.
- Continue around the sides and bottom until the panel is loose.
- Lift the panel upward to unhook it from the window ledge.
- Slow pressure prevents broken clips.
Step 6: Disconnect Door Panel Connectors and Cables
- Support the panel with one hand.
- Use a small flat-head screwdriver to press the lock tabs on the electrical connectors.
- Unplug the window and lock switch connectors by pulling on the connector body, not the wires.
- If a handle cable or rod is attached, use needle-nose pliers to release it carefully.
- Set the door panel on a clean surface.
Step 7: Locate the Mirror Connector
- Use a work light if needed to see inside the upper front area of the door.
- Follow the mirror wiring from the mirror base into the door.
- Use a small flat-head screwdriver to unlock the connector tab.
- Unplug the mirror connector by hand.
Step 8: Remove the Mirror Mounting Nuts
- Hold the outside mirror with one hand.
- Use a 10mm socket, 6-inch socket extension, and ratchet handle to remove the mirror mounting nuts.
- Remove the lower nut first, then the upper nuts.
- Keep the last nut threaded a few turns until you are ready to lift the mirror away.
Step 9: Remove the Old Mirror
- Support the mirror from outside the door.
- Use the 10mm socket to remove the final mounting nut.
- Pull the mirror straight away from the door.
- Feed the wiring harness through the door opening by hand.
- Remove the old foam gasket if it stayed stuck to the door.
Step 10: Install the New Mirror
- Make sure the foam mirror gasket is seated flat on the new mirror base.
- Feed the new mirror wiring through the door opening by hand.
- Set the mirror studs into the door holes.
- Start all mirror mounting nuts by hand to avoid cross-threading.
- Use a 10mm socket and ratchet handle to snug the nuts evenly.
- Use a torque wrench rated 5-25 Nm with the 10mm socket to tighten the mirror nuts to Torque to 7-9 Nm (62-80 in-lbs).
Step 11: Connect and Test the Mirror
- Plug the mirror connector in by hand until it clicks.
- Reconnect the negative battery cable temporarily using a 10mm socket.
- Turn the ignition to ON.
- Test mirror adjustment in all directions using the door switch.
- If equipped, test mirror heat with the rear defogger switch.
- Turn ignition OFF and disconnect the negative battery cable again with a 10mm socket before reinstalling the door panel.
Step 12: Reinstall the Door Panel
- Reconnect the handle cable or rod using needle-nose pliers if removed.
- Reconnect the door electrical connectors by hand until they click.
- Hook the top of the panel over the window ledge.
- Line up the trim clips with their holes.
- Press around the edges by hand to snap the clips into place.
- Replace any broken clips with new door trim panel retaining clips.
Step 13: Reinstall Screws and Trim Covers
- Use a Phillips #2 screwdriver to reinstall the door panel screws.
- Do not overtighten the screws because the plastic can crack.
- Press the screw covers back in by hand.
- Snap the triangular inner mirror trim cover back into place by hand.
Step 14: Final Battery Connection
- Use a 10mm socket and ratchet handle to reconnect the negative battery cable.
- Tighten it snugly so it does not rotate by hand.
✅ After Repair
- ✅ Test mirror adjustment left, right, up, and down.
- ✅ Test door lock, window switch, speaker, and inside door handle operation.
- ✅ Check that the mirror sits flat against the door with no gaps in the gasket.
- ✅ Drive at low speed and listen for wind noise near the mirror base.
- ✅ If wind noise is present, recheck gasket seating and mirror nut torque.
💰 DIY vs Shop Cost
Shop Cost: $250-$550 (parts + labor)
DIY Cost: $80-$300 (parts only)
You Save: $170-$250 by doing it yourself!
Shop labor rates vary but typically run $100-$150/hour. This repair takes a shop approximately 0.8-1.3 hours.
🎯 Ready to get started?
HowToo makes it easy: same-day/2-day shipping on every part, plus all the tools and specialty tools you need! Check out the parts and tools sections below to add everything to your cart.