

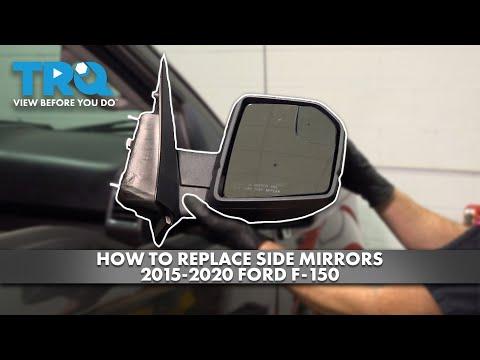






How to Replace Side View Mirror Assemblies on a 2015-2017 Ford F-150
Step-by-step instructions with required tools, parts, torque specs, and safety tips for 2015, 2016, 2017
How to Replace Side View Mirror Assemblies on a 2015-2017 Ford F-150
Step-by-step instructions with required tools, parts, torque specs, and safety tips for 2015, 2016, 2017


🔧 F-150 - Side View Mirror Assembly Replacement
This procedure replaces the complete exterior mirror assembly, not just the mirror glass. On your F-150, the interior front door panel must be loosened or removed to reach the mirror electrical connector and three mounting nuts.
Difficulty Level: Beginner | Estimated Time: 1-2 hours per side
Assumption: Install a mirror matching the original heating, power-fold, memory, turn-signal, spotlight, puddle-lamp, and blind-spot features.
⚠️ Safety & Precautions
- ⚠️ Wear safety glasses and gloves because door-panel clips can release suddenly.
- 🔋 Disconnect the negative battery cable before unplugging door electronics.
- ⏱️ After disconnecting the battery, wait at least one minute before working inside the door.
- 🪟 Lower the window first so you can safely hold the mirror from both sides.
- 🚫 Do not operate the power window while the door panel is loose.
- 🤝 Large towing mirrors are heavy; have a helper support the mirror while removing its mounting nuts.
- 📷 A mirror-mounted camera may require calibration after replacement.
🔧 Required Tools
You'll need the following tools for this repair:
- 7mm socket
- 8mm socket
- 10mm deep socket
- 1/4-inch-drive ratchet
- 1/4-inch-drive 6-inch extension
- Torque wrench rated 2-20 Nm
- Plastic trim-removal tool set
- Small flat-blade screwdriver
- Magnetic pickup tool
- Painter’s masking tape
- Fender cover
- Clean microfiber cloth
- Mechanic’s gloves
- Safety glasses
- Ford-compatible diagnostic scan tool (specialty)
🔩 Required Parts
HowToo sells all the parts you need for this repair:
- Driver-side complete mirror assembly with matching factory features - Qty: 1 if replacing
- Passenger-side complete mirror assembly with matching factory features - Qty: 1 if replacing
- Mirror mounting gasket - Qty: 1 per mirror if not supplied
- Front door trim-panel retainers - Qty: 3-5 per door as needed
Compare the electrical connectors and listed features before installation. A basic power mirror cannot directly replace a power-fold, memory, spotlight, camera, or blind-spot-equipped mirror without losing functions.
📋 Before You Begin
- 🅿️ Park your F-150 on level ground, select Park, and apply the parking brake.
- 🪟 Lower the window completely, switch the ignition off, and keep the key away from the truck.
- 🧣 Place a fender cover or clean cloth over the painted door edge.
- 🔋 Use a 10mm deep socket to disconnect the negative battery terminal, then isolate the cable for at least one minute.
- 📱 Save any desired radio settings before disconnecting the battery.
- 🔍 Confirm that the replacement mirror has the same connector layout, glass type, cap style, and electronic features as the removed mirror.
🔨 Step-by-Step Instructions
Follow these steps in order:
Step 1: Protect the Door and Support the Mirror
- Apply painter’s masking tape around the mirror base using your hands so the housing cannot scratch the paint.
- Place a clean microfiber cloth on the window ledge.
- For a large towing mirror, have a helper hold the mirror before any mounting nuts are removed.
Step 2: Remove the Interior Mirror Sail Panel
- The sail panel is the small triangular trim piece directly opposite the mirror.
- Insert a plastic trim-removal tool behind the upper edge and gently release the retaining clips.
- Lift the panel away without bending it sharply.
- If a tweeter speaker is attached, press its connector lock with a small flat-blade screwdriver and unplug it.
- Pull near each clip, not at the corner.
Step 3: Remove the Door-Handle Trim
- Use a plastic trim-removal tool to release the small trim cover behind the interior door-release handle.
- Use a 7mm socket, extension, and ratchet to remove the exposed screw.
- Keep the screw in a safe place because the door-panel fasteners may differ in length.
Step 4: Remove the Armrest and Switch Trim
- Use a plastic trim-removal tool to lift the window-switch panel from the rear edge.
- Press each connector locking tab with a small flat-blade screwdriver, then unplug the switch connectors by holding their plastic bodies.
- Do not pull on the wires.
- Use a 7mm or 8mm socket, as fitted to the original fastener, with the ratchet and extension to remove the armrest screws exposed beneath the trim.
Step 5: Release the Front Door Panel
- Use a 7mm socket and ratchet to remove any remaining screws along the lower and side edges of the door panel.
- Insert a plastic trim-removal tool between the panel and metal door near a lower corner.
- Work around the sides and bottom, releasing each plastic retainer.
- Lift the complete panel straight upward to unhook it from the window ledge.
- Support the panel while disconnecting any remaining electrical connectors with the small flat-blade screwdriver.
- If necessary, release the interior handle cable from its bracket by hand. Note its routing before removal.
Step 6: Expose and Disconnect the Mirror Wiring
- Carefully peel back only the upper-front corner of the moisture barrier using your fingers.
- The moisture barrier is the water-resistant sheet behind the door panel; do not cut or tear it.
- Follow the mirror wiring to its door-harness connector.
- Press the connector lock with a small flat-blade screwdriver and unplug it.
- Release the mirror harness from its retaining clips using a plastic trim-removal tool.
Step 7: Remove the Original Mirror
- Have a helper support the mirror from outside the door.
- Use a 10mm deep socket, extension, and ratchet to remove the three mirror mounting nuts.
- Use a magnetic pickup tool if a nut drops into the door cavity.
- Hold the mirror firmly while removing the final nut.
- Guide the wiring and connector through the opening, then lift the mirror away from the door.
- Do not allow the mirror studs or connector to strike the painted surface.
Step 8: Inspect the Mounting Area
- Use a clean microfiber cloth to wipe dirt from the door mounting surface.
- Check that the replacement mirror gasket is flat, undamaged, and correctly seated around the mirror base.
- Compare the old and new connectors before mounting the replacement.
- Do not drill the door or force together nonmatching connectors.
Step 9: Install the Replacement Mirror
- Guide the replacement mirror connector and wiring through the door opening.
- Seat the mirror gasket evenly against the door while a helper supports the housing.
- Install all three nuts by hand before using a tool. This prevents crossed threads.
- Use a 10mm deep socket and torque wrench to tighten the nuts evenly in stages.
- Torque the mirror mounting nuts to 9 Nm (80 in-lbs).
- Do not overtighten the nuts because the mirror base and door sheet metal can be damaged.
Step 10: Connect and Route the Mirror Harness
- Route the wiring exactly like the original harness, keeping it away from the window glass and regulator.
- Secure the harness in each original retainer using your fingers.
- Push the connector together by hand until its lock clicks.
- Gently pull on the connector bodies to confirm they are locked.
- Press the moisture barrier back onto its original adhesive using your fingers.
Step 11: Reinstall the Door Panel
- Replace any damaged retainers by pressing new ones into the door panel by hand.
- Reconnect the interior handle cable and all door-panel connectors by hand.
- Hang the upper edge of the panel over the window ledge, then check that the lock knob and wiring are correctly positioned.
- Press around the panel edges with your hands until every retainer snaps into place.
- Use the correct 7mm or 8mm socket and ratchet to reinstall the original door-panel screws until snug.
- Tighten the small door-trim screws to 2.5 Nm (22 in-lbs).
- Do not use the torque wrench outside its rated range.
Step 12: Reinstall the Switch and Sail Panels
- Reconnect the switch-panel connectors by hand until their locks click.
- Align the switch panel and press it down by hand until fully seated.
- Reconnect the tweeter connector if equipped.
- Align the sail-panel clips and press the panel into place by hand.
- Remove the painter’s masking tape and fender cover.
Step 13: Reconnect the Battery
- Place the negative battery terminal fully onto the battery post.
- Use a 10mm deep socket and torque wrench to tighten the terminal clamp.
- Torque the negative battery terminal clamp to 5 Nm (44 in-lbs).
- Switch the ignition on without starting the engine and watch for warning messages.
Step 14: Initialize and Test the Mirror
- Use the driver-door controls to test mirror adjustment in all four directions.
- Test power folding, memory positions, heating, turn signal, puddle lamp, spotlight, and blind-spot indicator if equipped.
- For memory mirrors, set the seat and mirrors, then hold the desired memory button until the position is stored.
- If the one-touch window function was lost, use the window switch to close the window completely, hold the switch for two seconds, open it completely, and hold it for two seconds.
- If a mirror camera is installed or a camera-related warning appears, use a Ford-compatible diagnostic scan tool to perform the instructed camera alignment. Professional calibration equipment may be required.
✅ After Repair
- ✅ Confirm the mirror is firmly seated and its gasket has no visible gaps.
- 🪞 Adjust the glass for a clear rearward view before driving.
- 💡 Test every feature fitted to the replacement mirror.
- 🚪 Open and close the door while listening for loose clips or wiring contact.
- 🛣️ Drive slowly and check for wind noise or vibration around the mirror base.
- ⚠️ If a camera, blind-spot, door-module, or restraint warning remains illuminated, scan your F-150 before normal driving.
💰 DIY vs Shop Cost
Shop Cost: ₹45,000-₹1,60,000 per mirror, depending on features and imported-parts availability
DIY Cost: ₹25,000-₹1,25,000 per mirror for parts
You Save: ₹10,000-₹35,000 per side by doing it yourself!
Panipat-area labor and imported mirror prices vary. This repair takes a shop approximately 1-2 hours per side, excluding camera calibration or programming.
🎯 Ready to get started?
HowToo makes it easy: same-day/2-day shipping on every part, plus all the tools and specialty tools you need! Check out the parts and tools sections below to add everything to your cart.