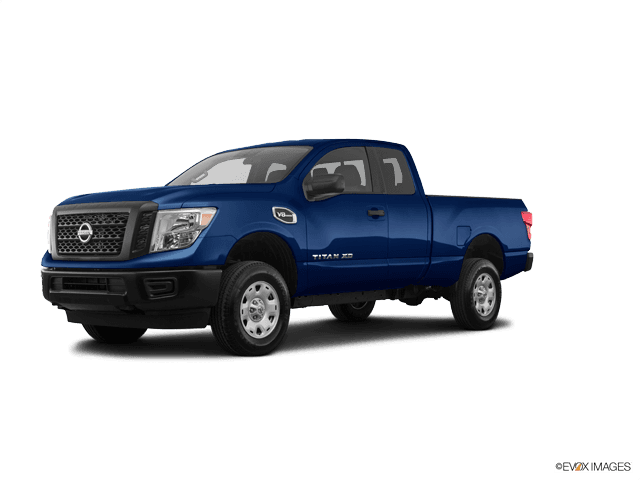








How to Replace Shock Absorbers on a 2017-2024 Nissan TITAN (Trim: PRO-4X)
Step-by-step front and rear shock guide with tools, parts, torque specs, and safety tips for 2017, 2018, 2019, 2020, 2021, 2022, 2023, 2024
How to Replace Shock Absorbers on a 2017-2024 Nissan TITAN (Trim: PRO-4X)
Step-by-step front and rear shock guide with tools, parts, torque specs, and safety tips for 2017, 2018, 2019, 2020, 2021, 2022, 2023, 2024


🔧 TITAN - Shock Absorber Replacement
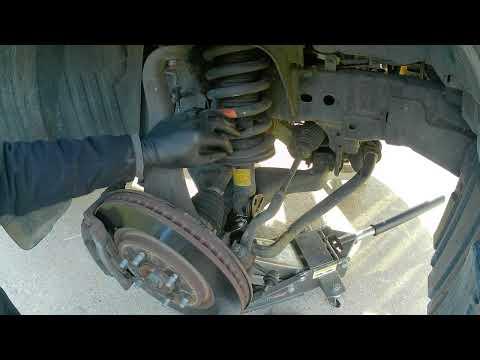
This repair replaces the worn shock absorbers on your TITAN to restore ride control, reduce bouncing, and improve tire contact on rough roads. Your PRO-4X uses front coil-over shock assemblies and separate rear shock absorbers.
Difficulty Level: Intermediate | Estimated Time: 3-5 hours for all four
⚠️ Safety & Precautions
- ⚠️ Never work under your TITAN supported only by a jack. Always use jack stands.
- ⚠️ The front shocks are part of a coil-over assembly. A coil-over means the coil spring surrounds the shock. The spring is under heavy pressure.
- ⚠️ For a beginner, use complete front shock/strut assemblies if available. Do not disassemble the front coil spring unless you have a proper spring compressor and experience.
- ⚠️ Replace shocks in pairs: both front, both rear, or all four.
- ⚠️ Keep hands clear when lowering suspension parts. They can move suddenly.
- ⚠️ Battery disconnect is not required for this repair.
🔧 Required Tools
You'll need the following tools for this repair:
- Floor jack (rated 3-ton minimum)
- Jack stands (rated 3-ton minimum)
- Wheel chocks
- 21mm socket
- 17mm socket
- 19mm socket
- 22mm socket
- Ratchet wrench 1/2-inch drive
- Breaker bar 1/2-inch drive
- Torque wrench 1/2-inch drive
- 17mm combination wrench
- 19mm combination wrench
- 22mm combination wrench
- Flat pry bar
- Rubber mallet
- Penetrating oil
- Paint marker
- Safety glasses
- Mechanic gloves
- Coil spring compressor (specialty)
🔩 Required Parts
HowToo sells all the parts you need for this repair:
- Front shock/strut assemblies - Qty: 2
- Rear shock absorbers - Qty: 2
- Front shock mounting hardware kit - Qty: 1
- Rear shock mounting hardware kit - Qty: 1
📋 Before You Begin
- Park your TITAN on level ground.
- Set the parking brake and place wheel chocks behind the wheels that stay on the ground.
- Loosen the wheel lug nuts slightly before lifting. Do not remove them yet.
- Spray penetrating oil on the upper and lower shock fasteners before starting.
- Use a paint marker to mark the direction of any bolts you remove. This makes reassembly easier.
- If replacing front bare shocks only, the coil spring must be compressed safely with a spring compressor. For first-time DIY, complete front assemblies are strongly recommended.
🔨 Step-by-Step Instructions
Follow these steps in order:
Step 1: Lift and Support the Front
- Use the 21mm socket and breaker bar to loosen the front wheel lug nuts one turn.
- Use the floor jack to lift the front of your TITAN at the front crossmember.
- Place jack stands under the frame rails.
- Lower the truck gently onto the jack stands.
- Use the 21mm socket to remove the front wheels.
- Shake the truck lightly to confirm stability.
Step 2: Support the Lower Control Arm
- Place the floor jack under the lower control arm near the outer end.
- Raise the jack just enough to support the arm. Do not lift the truck off the jack stand.
- The lower control arm is the large suspension arm below the front shock assembly.
Step 3: Remove the Front Lower Shock Bolt
- Use the 19mm socket and 19mm combination wrench to remove the lower shock bolt and nut.
- If the bolt is stuck, use penetrating oil and tap it gently with the rubber mallet.
- Use the flat pry bar only if needed to relieve light pressure on the shock mount.
Step 4: Remove the Front Upper Shock Nuts
- From inside the wheel well, locate the three upper shock mounting nuts.
- Use the 17mm socket to remove the upper mounting nuts.
- Hold the shock assembly with one hand while removing the last nut.
- Lower the shock assembly out through the wheel well.
- Do not loosen the center spring nut.
Step 5: Install the New Front Shock Assembly
- Position the new front shock/strut assembly into the upper mount.
- Start the upper nuts by hand to avoid cross-threading.
- Use the 17mm socket to snug the upper nuts.
- Align the lower shock mount with the lower control arm using the flat pry bar if needed.
- Install the lower bolt and nut by hand.
Step 6: Torque the Front Shock Fasteners
- Use the torque wrench and 17mm socket on the upper nuts.
- Torque front upper shock nuts to 44 Nm (33 ft-lbs).
- Use the torque wrench, 19mm socket, and 19mm combination wrench on the lower bolt and nut.
- Torque front lower shock bolt to 155 Nm (114 ft-lbs).
Step 7: Repeat on the Other Front Side
- Use the same 17mm socket, 19mm socket, and 19mm combination wrench to replace the opposite front shock assembly.
- Make sure both front assemblies are seated evenly in the upper mounts.
Step 8: Reinstall the Front Wheels
- Install the front wheels by hand.
- Use the 21mm socket to snug the lug nuts in a star pattern.
- Use the floor jack to raise the front slightly and remove the jack stands.
- Lower your TITAN to the ground.
- Use the torque wrench and 21mm socket.
- Torque wheel lug nuts to 133 Nm (98 ft-lbs).
Step 9: Lift and Support the Rear
- Use the 21mm socket and breaker bar to loosen the rear wheel lug nuts one turn.
- Use the floor jack under the rear axle center section to lift the rear.
- Place jack stands under the rear frame rails.
- Keep the floor jack lightly supporting the rear axle.
- Use the 21mm socket to remove the rear wheels for easier access.
Step 10: Remove the Rear Shock Absorber
- Use the 22mm socket and 22mm combination wrench to remove the lower rear shock bolt and nut.
- Use the 19mm socket and 19mm combination wrench to remove the upper rear shock bolt and nut.
- Remove the shock absorber from the truck.
- If the shock is stuck, use penetrating oil and the rubber mallet.
Step 11: Install the New Rear Shock Absorber
- Position the new rear shock with the body and dust boot oriented the same way as the original shock.
- Start the upper bolt and nut by hand.
- Use the floor jack to raise or lower the rear axle slightly until the lower mount lines up.
- Install the lower bolt and nut by hand.
- Hand-start bolts before using tools.
Step 12: Torque the Rear Shock Fasteners
- Use the torque wrench, 19mm socket, and 19mm combination wrench on the upper bolt and nut.
- Torque rear upper shock bolt to 155 Nm (114 ft-lbs).
- Use the torque wrench, 22mm socket, and 22mm combination wrench on the lower bolt and nut.
- Torque rear lower shock bolt to 155 Nm (114 ft-lbs).
Step 13: Repeat on the Other Rear Side
- Use the same 19mm socket, 22mm socket, and matching wrenches to replace the opposite rear shock.
- Keep the rear axle supported with the floor jack while lining up the bolts.
Step 14: Reinstall the Rear Wheels
- Install the rear wheels by hand.
- Use the 21mm socket to snug the lug nuts in a star pattern.
- Use the floor jack to raise the rear slightly and remove the jack stands.
- Lower your TITAN to the ground.
- Use the torque wrench and 21mm socket.
- Torque wheel lug nuts to 133 Nm (98 ft-lbs).
✅ After Repair
- ✅ Bounce-test each corner by pushing down on the bumper. The truck should rise and settle quickly.
- ✅ Test drive slowly first. Listen for clunks, rattles, or knocking sounds.
- ✅ Recheck all visible shock fasteners after the first short drive.
- ✅ Recheck wheel lug nut torque after 25-50 miles.
- ✅ A front wheel alignment is recommended after replacing front shock assemblies.
💰 DIY vs Shop Cost
Shop Cost: $900-$1,600 for all four shocks, depending on parts quality and labor rate
DIY Cost: $350-$900 for parts only
You Save: $550-$700 by doing it yourself!
Shop labor rates vary but typically run $100-$150/hour. This repair takes a shop approximately 3-5 hours.
🎯 Ready to get started?
HowToo makes it easy: same-day/2-day shipping on every part, plus all the tools and specialty tools you need! Check out the parts and tools sections below to add everything to your cart.