

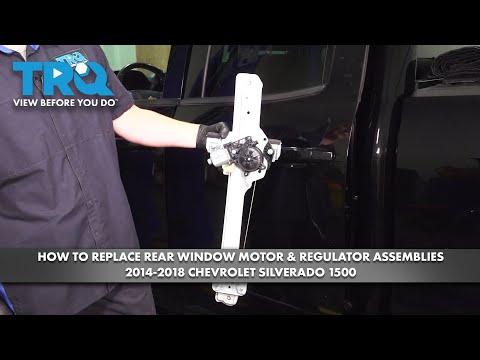






How to Replace Rear Window Regulators on a 2021 Chevy Silverado 1500
Step-by-step rear door regulator and motor replacement with tools, torque specs, safety tips, and testing procedure for 2019, 2020, 2021
How to Replace Rear Window Regulators on a 2021 Chevy Silverado 1500
Step-by-step rear door regulator and motor replacement with tools, torque specs, safety tips, and testing procedure for 2019, 2020, 2021


Silverado 1500 - Rear Window Regulator Replacement 🔧
I’ll cover both rear doors and assume you’re installing a typical regulator + motor assembly (most common). Steps are the same left/right.
Safety First ⚠️
- ⚠️ Disconnect the battery: Loosen the negative (black) terminal and move it aside. This prevents accidental window movement and protects electronics.
- ⚠️ Support the glass: You must hold the window glass safely so it doesn’t drop and crack.
Tools & Supplies Needed 🧰
- 🛠️ Socket set (metric):
- 10 mm socket (regulator/motor and door module bolts)
- 7 mm socket (door panel screws)
- 🛠️ Ratchet and short extension
- 🛠️ T15 Torx driver (for some trim screws, depending on build)
- 🛠️ Trim removal tool (plastic pry tool to pop clips without scratching)
- 🛠️ Small flat screwdriver (to lift trim covers; wrap tip with tape)
- 🛠️ Painter’s tape or masking tape (to hold glass up)
- 🛠️ Pick tool or small awl (help release electrical connectors)
- 🛠️ Torque wrench (in Nm or ft‑lb, for reassembly)
- 🛠️ Shop rags and a magnet (for dropped screws)
Key Torque Specs 🔩
- 🔧 Window regulator bolts: ~10 N·m (7 ft‑lb)
- 🔧 Window motor bolts: ~10 N·m (7 ft‑lb)
- 🔧 Rear door module (inner panel) bolts: ~10 N·m (7 ft‑lb)
- 🔧 Door latch bolts (if loosened): ~25 N·m (18 ft‑lb)
Snug plus a small turn if you don’t have a torque wrench—do not overtighten into sheet metal.
Step 1 – Prepare the Silverado 🧼
- 🧰 Park on level ground, set the parking brake, and open the rear door you’re working on.
- 🧰 Lower that window to about halfway if it still moves. This makes it easier to access the glass bolts later.
- 🧰 Disconnect the negative battery cable under the hood.
Step 2 – Remove Rear Door Trim Panel 🚪
The rear door has hidden screws plus plastic clips around the edge.
- 🛠️ Remove trim covers:
- Use the small flat screwdriver or trim tool to gently pop off:
- The small cover behind the inside door handle.
- The cover in the armrest pull pocket (where your hand grabs to pull the door closed).
- Use the small flat screwdriver or trim tool to gently pop off:
- 🛠️ Remove screws:
- Remove the 7 mm screws behind those covers.
- Check along the bottom edge of the panel for any additional 7 mm screws and remove them.
- 🛠️ Release the panel clips:
- Slide the trim tool between the door panel and metal at the bottom corner.
- Gently pry to pop the first clip, then work your way around the sides and bottom.
- Clips will sound like snaps; that’s normal.
- 🛠️ Lift the panel off:
- Once all clips are loose, lift the panel straight up to unhook it from the top edge near the window.
- Support the panel with one hand; don’t yank it away yet.
- 🛠️ Unplug wiring:
- Disconnect the window switch connector and any other plugs (door light, etc.).
- Release the inside handle cable by flipping the plastic retainer open and unhooking the cable end from the handle.
- Set the door panel aside somewhere safe.
Step 3 – Remove the Inner Door Module Panel 🧩
Behind the trim is a large metal or composite “module” panel that holds the regulator, motor, and latch cables.
- 🛠️ Peel back any foam/vapor barrier carefully if present. Try not to tear it.
- 🛠️ Disconnect connectors on the module:
- Unplug the window motor connector.
- Unplug any speaker or latch connectors attached to the panel.
- 🛠️ Remove door module bolts:
- Use a 10 mm socket to remove the bolts around the perimeter of the inner panel.
- 🛠️ Release latch cable from edge:
- At the rear edge of the door, gently free the latch cable grommet or clips from the panel if needed.
- 🛠️ Support the glass before loosening regulator:
- From inside the door, you’ll see the glass clamped to the regulator with two 10 mm bolts (through access holes).
- Use painter’s tape on the outside: run several strips from the glass up over the top of the door frame and down the outside to hold the glass.
Step 4 – Separate Glass from Regulator 🪟
- 🛠️ With the window at mid-height (if you moved it before disconnecting battery), locate the glass clamp bolts through the access holes.
- 🛠️ Use a 10 mm socket to loosen (do not fully remove) the two clamp bolts until the glass is free from the regulator sliders.
- 🛠️ Carefully slide the glass all the way up by hand and add more tape to secure it firmly to the door frame.
- 🛠️ Double-check the glass is solidly held and won’t drop.
Step 5 – Remove the Regulator & Motor Assembly ⚙️
- 🛠️ Remove regulator bolts:
- Use the 10 mm socket to remove the bolts holding the regulator tracks and the motor to the inner panel.
- 🛠️ Remove the inner module panel (if needed):
- On this generation, the regulator is usually attached to the module panel. Once bolts are out, carefully pull the whole panel away from the door shell.
- Angle it out through the large opening at the bottom/front of the door.
- 🛠️ Separate old regulator from module (if your replacement is regulator-only):
- Transfer the motor and any brackets to the new regulator, matching orientation.
Step 6 – Install the New Regulator & Motor ✅
- 🛠️ Position the new regulator (and motor) on the inner panel or directly in the door, matching the original routing.
- 🛠️ Install all 10 mm bolts finger-tight first so you can adjust alignment.
- 🛠️ Once everything sits correctly, torque the regulator and motor bolts to about 10 N·m (7 ft‑lb).
- 🛠️ Reinstall the inner module panel to the door shell with its 10 mm bolts and torque them to about 10 N·m (7 ft‑lb).
- 🛠️ Reconnect the window motor connector and any other plugs you removed.
Step 7 – Reattach the Glass to the Regulator 🪛
- 🛠️ Reconnect the negative battery cable temporarily.
- 🛠️ Plug the window switch back into the door harness (you can leave the panel hanging or support it).
- 🛠️ Turn ignition to ON (engine off).
- 🛠️ Use the switch to move the regulator sliders to the correct position so the glass clamp openings line up with the glass.
- 🛠️ Turn ignition OFF and disconnect the battery again for safety.
- 🛠️ Carefully remove the tape holding the glass while supporting the glass with one hand.
- 🛠️ Lower the glass gently into the regulator clamps.
- 🛠️ Tighten the two glass clamp bolts (10 mm) to about 10 N·m (7 ft‑lb).
- 🛠️ Reapply a couple of small tape strips if you want extra security while you finish.
Step 8 – Reassemble Door Panel 🧱
- 🛠️ Reconnect any remaining connectors on the inner panel and re-stick the foam/vapor barrier so it seals well.
- 🛠️ Hang the door trim panel on the top edge of the door, making sure it hooks over the window ledge.
- 🛠️ Reconnect:
- The inside handle cable (hook the end in, snap the retainer back).
- The window switch connector and any other wiring.
- 🛠️ Push the panel straight in around the edges to snap all the clips back into the door.
- 🛠️ Reinstall the 7 mm screws in the armrest pocket and behind the handle, plus any along the bottom.
- 🛠️ Snap the small trim covers back over the screws.
Step 9 – Initialize & Test the Window 🧪
- 🛠️ Reconnect the negative battery cable for good.
- 🛠️ Turn ignition ON.
- 🛠️ Test the rear window:
- Run it all the way down and all the way up a few times.
- Listen for rubbing, clicking, or binding.
- 🛠️ If your truck has auto up/down on that window and it doesn’t work correctly:
- Hold the switch to move the window fully up and keep holding for about 2–5 seconds.
- Then move it fully down and hold again for 2–5 seconds.
- This usually re-learns the end positions.
Tips & Tricks 💡
- 💡 Take a few photos of the original setup before removing parts. Great reference if you get stuck.
- 💡 If a clip stays in the door instead of the panel, pull it out with pliers and snap it back onto the panel before reinstalling.
- 💡 Work on one rear door at a time so you can look at the other side as a “template.”
If you tell me whether you’re doing left, right, or both, I can add any side-specific notes and help you pick the correct regulator assemblies and clips you might want to replace at the same time.
HowToo makes it easy: below this answer you’ll see recommended regulators, clips, and tools for your Silverado. You can add them to your cart right from the parts section for fast shipping. 🚚