








How to Replace Rear Window Regulators on a 2017-2022 Honda CR-V
Step-by-step guide for both rear doors with tools, parts, torque specs, and safety tips for 2017, 2018, 2019, 2020, 2021, 2022
How to Replace Rear Window Regulators on a 2017-2022 Honda CR-V
Step-by-step guide for both rear doors with tools, parts, torque specs, and safety tips for 2017, 2018, 2019, 2020, 2021, 2022


🔧 CR-V - Rear Window Regulator Replacement
This procedure replaces the window regulators inside both rear doors. Each regulator moves the glass up and down; replacing the complete regulator-and-motor assembly is usually easiest for a beginner.
Difficulty Level: Intermediate | Estimated Time: 1.5-2.5 hours per door
⚠️ Safety & Precautions
- ⚠️ Wear safety glasses and cut-resistant gloves because the door glass edges can be sharp.
- ⚠️ Secure the glass before removing its regulator bolts. Unsupported glass can fall and shatter.
- ⚠️ Disconnect the negative battery terminal after positioning the glass mounting bolts.
- ⚠️ Wait at least three minutes after disconnecting the battery before working inside the door.
- ⚠️ Never place your fingers inside the regulator tracks while electrical power is connected.
- ⚠️ Replace one rear regulator at a time so the other door remains available as a visual reference.
🔧 Required Tools
You'll need the following tools for this repair:
- 10mm socket
- 1/4-inch drive ratchet
- 1/4-inch drive 6-inch extension
- Phillips #2 screwdriver
- Plastic interior trim-removal tool set
- Plastic hook pick
- Plastic scraper
- Torque wrench rated 2-20 Nm
- Automotive masking tape rated 25mm wide
- Window glass suction cup rated 45kg minimum
- Fine-tip permanent marker
- Microfiber shop towels
- Cut-resistant work gloves
- Safety glasses
🔩 Required Parts
HowToo sells all the parts you need for this repair:
- Left rear window regulator-and-motor assembly - Qty: 1
- Right rear window regulator-and-motor assembly - Qty: 1
- Rear door trim-panel clips - Qty: 12
- Automotive butyl sealing tape - Qty: 1 roll
Important: The left and right regulators are different. Match each replacement assembly to its door before installation.
📋 Before You Begin
- 📍 Park your CR-V on level ground, select Park, and apply the parking brake.
- 🔑 Lower the affected rear window until its two glass mounting bolts align with the door access openings. If the regulator does not operate, secure the glass and access the mounting bolts after removing the panel.
- 🪟 Place a microfiber shop towel over the painted upper door frame before applying masking tape.
- 🔋 Turn the ignition off, remove the key from the vehicle, and open the hood.
- 🧰 A trim-removal tool is a smooth plastic lever that releases interior clips without scratching the panel.
- 🧰 Butyl tape is a flexible, waterproof sealant used to reseal the plastic moisture barrier.
🔨 Step-by-Step Instructions
Follow these steps in order:
Step 1: Position and secure the rear glass
- Use the rear window switch to position the glass mounting bolts behind the access openings.
- Use the window glass suction cup to hold the glass securely.
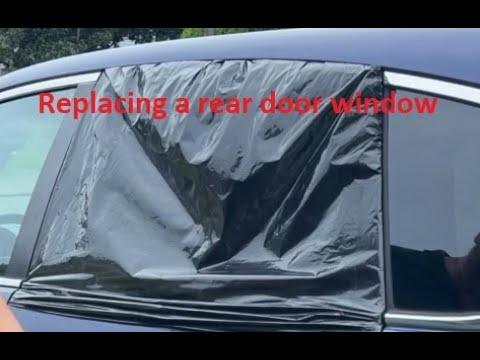
- Use 25mm automotive masking tape to make three wide straps from the outside of the glass, over the padded upper door frame, and onto the inside of the glass.
- Press the tape firmly against clean glass. Do not attach it directly to unprotected paint.
Step 2: Disconnect the battery
- Use a 10mm socket, 6-inch extension, and 1/4-inch drive ratchet to loosen the negative battery-terminal clamp.
- Lift the clamp from the battery post and position it where it cannot spring back into contact.
- Wait at least three minutes before continuing.
Step 3: Remove the inside-handle trim
- Use a plastic hook pick to lift the small cover behind the interior door-release handle.
- Use a Phillips #2 screwdriver to remove the exposed handle-area screw.
- Store the screw where it cannot roll away.
Step 4: Remove the window-switch panel
- Use a plastic interior trim-removal tool to lift the rear edge of the switch panel.
- Work gently around the panel until its retaining clips release.
- Press the electrical connector lock with the plastic hook pick and unplug the switch.
- Use a Phillips #2 screwdriver to remove any exposed armrest screw beneath the panel.
- Plastic clips release easier with steady pressure.
Step 5: Remove the rear door panel
- Insert a plastic interior trim-removal tool between the lower panel edge and the metal door.
- Release the retaining clips along the bottom and both sides, one clip at a time.
- Lift the panel straight upward to unhook it from the window ledge.
- Support the panel while unplugging the remaining connector with the plastic hook pick.
- Detach the interior-handle cable from its bracket by hand, then rotate the cable end from the handle lever.
- Place the panel on a clean microfiber shop towel.
Step 6: Open the moisture barrier
- Use a plastic scraper to separate the plastic moisture barrier from its butyl sealant.
- Peel only enough barrier away to expose the regulator, motor, glass bolts, and electrical connector.
- Keep the barrier clean and avoid stretching or tearing it.
Step 7: Separate the glass from the regulator
- Confirm that the glass remains supported by the suction cup and masking tape.
- Use a fine-tip permanent marker to mark the original positions of the glass clamps.
- Use a 10mm socket, 6-inch extension, and 1/4-inch drive ratchet to remove the two glass mounting bolts.
- Lift the glass fully closed by hand if necessary, then add fresh 25mm automotive masking tape to secure it.
- Do not remove the glass from the door unless it is damaged.
Step 8: Remove the old regulator
- Press the connector lock with the plastic hook pick and unplug the window motor.
- Use a 10mm socket, 6-inch extension, and 1/4-inch drive ratchet to loosen the regulator and motor mounting bolts.
- Hold the assembly through an access opening while removing the final bolts.
- Fold the regulator rails inward carefully and guide the assembly through the largest door opening.
- Do not bend the window guide channels or pull on the wiring harness.
Step 9: Install the replacement regulator
- Compare the new and old assemblies on a microfiber shop towel. Confirm matching mounting points, connector shape, and rail orientation.
- Guide the new assembly through the large access opening without twisting its cables.
- Start every regulator bolt by hand to prevent crossed threads.
- Use a 10mm socket and torque wrench rated 2-20 Nm to tighten the regulator rail and motor mounting bolts to Torque to 9 Nm (80 in-lbs).
- Plug in the motor connector by hand until its lock clicks.
Step 10: Attach and align the glass
- Use the window glass suction cup to support the glass while removing the masking tape.
- Lower the glass carefully into the regulator clamps.
- Align the clamps with the marks made earlier.
- Start both glass mounting bolts by hand.
- Use a 10mm socket and torque wrench rated 2-20 Nm to tighten both bolts evenly to Torque to 6 Nm (53 in-lbs).
- Do not overtighten the bolts because excessive force can damage the glass.
Step 11: Test the regulator before closing the door
- Confirm that all tools and fingers are outside the door cavity.
- Use a 10mm socket and 1/4-inch drive ratchet to reconnect the negative battery terminal temporarily.
- Connect the window-switch panel by hand and turn the ignition to ON.
- Use the switch to move the glass slowly through one complete cycle.
- Confirm that the glass remains centered in both guide channels and does not tilt, bind, click, or scrape.
- If adjustment is needed, turn the ignition off, disconnect the negative battery terminal with the 10mm socket, and reposition the glass clamps.
Step 12: Reseal the moisture barrier
- Disconnect the negative battery terminal again with the 10mm socket before placing your hands near the regulator.
- Use a plastic scraper to remove loose or contaminated sealing material.
- Apply automotive butyl sealing tape around any areas that no longer adhere.
- Press the barrier firmly around its entire edge by hand, especially along the bottom.
- Route every wire through its original opening so the barrier lies flat.
Step 13: Reinstall the rear door panel
- Replace damaged trim-panel clips by hand before installing the panel.
- Reconnect the interior-handle cable by hand and lock its outer sheath into the bracket.
- Reconnect the electrical connectors by hand until each lock clicks.
- Hook the panel over the upper window ledge, then align its clips with the door holes.
- Press directly over each clip by hand until it snaps into place.
- Use a Phillips #2 screwdriver to reinstall the armrest and handle-area screws until snug. Do not overtighten screws into plastic.
- Press the handle cover and switch panel into position by hand.
Step 14: Repeat on the opposite rear door
- Use the same tools and procedure for the other rear door.
- Install the side-specific regulator assembly marked for that door.
- Repeat all glass-support, battery-disconnection, torque, sealing, and testing steps.
✅ After Repair
- ✅ Use a 10mm socket and 1/4-inch drive ratchet to reconnect the negative battery terminal securely.
- ✅ Turn the ignition to ON and fully close each repaired rear window.
- ✅ Hold the corresponding window switch in the UP position for approximately two seconds after the glass reaches the top.
- ✅ Lower each window completely, then raise it completely to confirm smooth travel.
- ✅ Test each rear window from its door switch and from the driver’s master switch.
- ✅ Confirm that the window-lock button operates correctly.
- ✅ Close each rear door gently and inspect the glass alignment against the weatherstrip.
- ✅ Spray water around the exterior glass and inspect the lower door-panel edge for leakage.
- ✅ Reset the clock and other preferences if they were lost during battery disconnection.
💰 DIY vs Shop Cost
Shop Cost: $650-$1,100 for both rear doors (parts + labor)
DIY Cost: $180-$450 for both regulator assemblies and supplies
You Save: $470-$650 by doing it yourself!
Shop labor rates vary but typically run $100-$150/hour. This repair takes a shop approximately 2.5-4 hours for both doors.
🎯 Ready to get started?
HowToo makes it easy: same-day/2-day shipping on every part, plus all the tools and specialty tools you need! Check out the parts and tools sections below to add everything to your cart.