


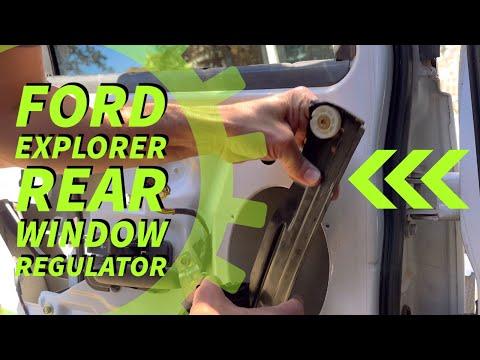





How to Replace Rear Window Regulators on a 2016-2019 Ford Explorer
Step-by-step DIY instructions with required tools, parts, safety tips, and testing for 2016, 2017, 2018, 2019
How to Replace Rear Window Regulators on a 2016-2019 Ford Explorer
Step-by-step DIY instructions with required tools, parts, safety tips, and testing for 2016, 2017, 2018, 2019


🔧 Explorer - Rear Window Regulator Replacement
Replace each failed rear regulator by removing the door panel, supporting the glass, and extracting the regulator through the inner-door opening. This job is manageable for a careful beginner, but the glass must remain securely supported throughout.
Difficulty Level: Intermediate | Estimated Time: 2–3 hours per side
Assumption: These instructions cover the left or right rear door. Use the regulator assembly specifically listed for that side.
⚠️ Safety & Precautions
- ⚠️ Wear gloves and safety glasses. Door glass edges can cause serious cuts.
- ⚠️ Never place your fingers between the glass and the door frame.
- ⚠️ Support the glass with several strips of strong painter’s tape before removing regulator fasteners.
- ⚠️ Keep the ignition off while your hands are inside the door.
- ⚠️ Disconnect the negative battery cable after positioning the window for access.
- ⚠️ Do not operate the motor while it’s disconnected from the glass.
- ⚠️ Replace a torn moisture barrier. Water inside the door can damage the Platinum’s switches, lighting, and trim.
🔧 Required Tools
You'll need the following tools for this repair:
- 1/4-inch drive ratchet
- 1/4-inch drive 6-inch extension
- 7mm socket
- 8mm socket
- 10mm socket
- Torx T20 screwdriver
- Torx T30 bit
- Phillips #2 screwdriver
- Small flat-blade screwdriver
- Plastic trim removal tool set
- Panel clip removal tool
- Needle-nose pliers
- Inch-pound torque wrench
- 2-inch painter’s tape
- LED work light
- Mechanic’s gloves
- Safety glasses
A panel clip tool is a fork-shaped tool that releases trim fasteners without damaging the door panel.
🔩 Required Parts
HowToo sells all the parts you need for this repair:
- Left rear window regulator and motor assembly - Qty: 1 if replacing left side
- Right rear window regulator and motor assembly - Qty: 1 if replacing right side
- Rear door trim panel clips - Qty: 8–12 per door
- Butyl moisture-barrier adhesive - Qty: 1 roll
- Rear door moisture barrier - Qty: 1 if damaged
The parts sidebar now shows separate rear regulator-and-motor assemblies. Match the listing to the affected door before ordering. Don’t order two unless both rear regulators have actually failed.
📋 Before You Begin
- 📋 Park your Explorer on level ground, select Park, and apply the parking brake.
- 📋 Switch off the rear window lock at the driver’s controls.
- 📋 If the regulator still moves, position the glass until its attachment points line up with the access openings.
- 📋 Switch the ignition off and keep the key away from the vehicle.
- 📋 Use a 10mm socket to disconnect the negative battery terminal.
- 📋 Wait at least five minutes before unplugging door electrical connectors.
- 📋 Take a picture of the cable routing and connectors before removing anything.
🔨 Step-by-Step Instructions
Follow these steps in order:
Step 1: Remove the switch panel and hidden covers
- Use a plastic trim removal tool to lift the rear window-switch panel from the armrest.
- Press the connector lock by hand and unplug the switch.
- Use the plastic trim tool to remove the small cover behind the interior door handle.
- Remove the remaining screw covers around the pull handle without forcing them.
- Work from an edge, not the center.
Step 2: Remove the rear door trim panel
- Use the 7mm socket and extension to remove the exposed door-panel screws.
- If your panel uses a Torx fastener, remove it with the Torx T20 screwdriver.
- Use the panel clip removal tool along the bottom and sides to release each clip.
- Lift the panel straight upward to unhook it from the window ledge.
- Support the panel while releasing the interior-handle cable and electrical connectors.
- Set the panel face-up on a clean surface.
- During installation, tighten small trim screws only until seated. Ford service information must be followed for exact fastener torque because the fastener layout can vary.
Step 3: Remove the speaker and moisture barrier
- Use the 7mm or 8mm socket, as fitted, to remove the speaker fasteners.
- Pull the speaker outward, press its connector tab, and disconnect it.
- Use the plastic trim removal tool to separate the moisture barrier from its butyl adhesive.
- Peel back only the portion required for regulator access.
- Keep the adhesive clean so the barrier can reseal properly.
Step 4: Support the window glass
- If accessible, use the rear switch temporarily to position the glass clamps at the service openings before disconnecting the battery.
- Use at least four long strips of 2-inch painter’s tape over the top of the door frame.
- Attach each strip securely to both sides of the glass.
- If the glass has fallen, have a helper hold it while you release the regulator clamps.
- More tape is cheaper than door glass.
Step 5: Separate the glass from the regulator
- Look through the inner-door access openings and locate the two glass attachment points.
- Use the 10mm socket, extension, and ratchet to loosen the glass fasteners.
- Do not remove a fastener completely unless the replacement design requires it.
- Lift the glass fully closed by hand and add fresh painter’s tape.
- Confirm that the glass is free from both regulator carriers.
- Do not guess the glass-fastener torque. Tighten to the specification supplied with the replacement assembly or current Ford service information.
Step 6: Disconnect the window motor
- Use the work light to locate the motor connector.
- Press the locking tab by hand or gently lift it with the small flat-blade screwdriver.
- Pull the connector by its housing, not by its wires.
- Use the needle-nose pliers or panel clip tool to release harness retainers attached to the regulator.
Step 7: Remove the regulator assembly
- Use the 10mm socket and extension to remove the regulator rail and motor mounting fasteners.
- Support the assembly with one hand while removing the final fastener.
- Collapse and rotate the regulator inside the door cavity.
- Guide the regulator and motor through the largest access opening without bending the rails.
- Compare the old and new assemblies on the floor before installation.
Step 8: Transfer the motor if necessary
- Skip this step when the replacement regulator includes a motor.
- Use the Torx T30 bit or 8mm socket, according to the fasteners fitted, to remove the old motor.
- Keep fingers clear because a damaged cable mechanism can move unexpectedly.
- Place the motor on the new regulator in the same orientation.
- Install the motor fasteners evenly without using an impact driver.
Step 9: Install the new regulator
- Feed the new assembly through the large inner-door opening.
- Align the rails and motor with their mounting holes.
- Start every fastener by hand before using the 10mm socket.
- Tighten the regulator fasteners evenly with the inch-pound torque wrench.
- Torque: Use the value supplied with the replacement assembly or current Ford service information. Do not overtighten fasteners installed in thin door metal.
- Reconnect the motor and secure the wiring in its original retainers.
Step 10: Reattach and align the glass
- Carefully lower the glass into the new regulator carriers while a helper supports it.
- Confirm the glass sits evenly in both carriers and remains inside its front and rear guide channels.
- Use the 10mm socket to tighten the glass fasteners evenly.
- Remove the painter’s tape only after confirming the glass is securely attached.
- Reconnect the negative battery cable temporarily with the 10mm socket.
Step 11: Test before closing the door
- Reconnect the rear window switch while keeping the trim panel removed.
- Switch the ignition on and operate the window in short movements.
- Watch for cable rubbing, glass tilting, popping, or binding.
- Run the glass fully up and down only after it moves straight in both channels.
- If it tilts, stop immediately and reseat the glass before continuing.
Step 12: Reinstall the moisture barrier
- Switch the ignition off again.
- Use your fingers and the plastic trim tool to press the barrier into its original adhesive.
- Use new butyl adhesive anywhere the seal no longer sticks.
- Seal around the entire perimeter and all wiring pass-through points.
- Reinstall the speaker with the 7mm or 8mm socket and reconnect it.
Step 13: Reinstall the door panel
- Reconnect the handle cable, lighting connectors, and switch wiring.
- Replace any bent or broken panel clips.
- Hook the top of the panel over the window ledge before aligning the clips.
- Press directly over each clip until it seats.
- Use the 7mm socket or Torx T20 screwdriver to reinstall the trim fasteners.
- Snap the covers and switch panel back into position using hand pressure.
✅ After Repair
- ✅ Cycle the window completely down and completely up several times.
- ✅ If one-touch operation is lost, close the window and hold the switch in the up position for approximately two seconds, then lower it and hold the switch for approximately two seconds.
- ✅ Confirm the glass closes evenly against the weatherstrip.
- ✅ Check the rear door lock, speaker, courtesy lighting, and window switch.
- ✅ Spray water over the outside of the glass and verify no water reaches the cabin.
- ✅ Listen for loose clips or fasteners during a short road test.
💰 DIY vs Shop Cost
Shop Cost: $350–$650 per rear door, depending on local parts and labor
DIY Cost: $115–$180 per rear door for the regulator assembly and supplies
You Save: Approximately $200–$470 per door by doing it yourself!
Labor prices in Sonīpat vary from U.S. estimates. This repair normally takes a shop approximately 1.5–2.5 hours per side.
🎯 Ready to get started?
HowToo makes it easy with vehicle-matched rear regulator assemblies, replacement trim clips, same-day/2-day shipping where available, plus the trim tools and sockets needed for the job. Check the parts and tools sections to add everything to your cart.
The overall procedure and tool selection align with published 2018–2019 Explorer rear-regulator guidance. howtoo.com)
