

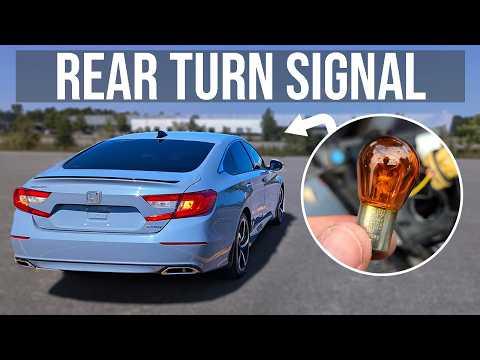







How to Replace Rear Turn Signal Bulbs on a 2018-2022 Honda Accord
Step-by-step DIY guide with trunk liner access, required tools, bulbs, and safety tips for 2018, 2019, 2020, 2021, 2022
How to Replace Rear Turn Signal Bulbs on a 2018-2022 Honda Accord
Step-by-step DIY guide with trunk liner access, required tools, bulbs, and safety tips for 2018, 2019, 2020, 2021, 2022


🔧 Accord - Rear Turn Signal Bulb Replacement
This repair replaces the rear turn signal bulbs in your Accord. A failed bulb can make lane changes unsafe and may cause fast blinking from the turn signal indicator.
Difficulty Level: Beginner | Estimated Time: 15-30 minutes
⚠️ Safety & Precautions
- ⚠️ Turn the ignition completely off before working on the lights.
- ⚠️ Let the bulbs cool before touching them. Bulbs can get hot during use.
- ⚠️ Wear gloves or handle the new bulb by the plastic base. Oil from your fingers can shorten bulb life.
- ⚠️ Do not force the bulb socket. The plastic tabs can break.
- ⚠️ Battery disconnect is not required for this bulb replacement.
🔧 Required Tools
You'll need the following tools for this repair:
- Trim panel removal tool
- Small flathead screwdriver
- Nitrile gloves
- Safety glasses
- Clean microfiber cloth
- Flashlight
🔩 Required Parts
HowToo sells all the parts you need for this repair:
- Rear turn signal bulb - Qty: 1 per side
- Rear turn signal bulbs - Replace in pairs - Qty: 2
📋 Before You Begin
- Park your Accord on level ground and shift to Park.
- Set the parking brake.
- Turn the ignition off and remove the key fob from the vehicle area.
- Open the trunk and make sure you have good lighting.
- A trim panel removal tool is a plastic pry tool used to remove clips without scratching interior panels.
🔨 Step-by-Step Instructions
Follow these steps in order:
Step 1: Open the Trunk
- Open the trunk fully.
- Use a flashlight to look at the inside corner of the trunk behind the tail light area.
- You will access the rear turn signal bulb from inside the trunk, behind the trunk side liner.
Step 2: Remove the Trunk Liner Fasteners
- Use a trim panel removal tool to gently pry out the plastic trunk liner clips near the tail light area.
- If a clip has a center pin, use a small flathead screwdriver to lift the center pin first, then pull the clip out.
- Set the clips aside where they will not roll away.
- Work slowly to avoid broken clips.
Step 3: Pull Back the Trunk Side Liner
- Use your hands to gently pull the trunk side liner away from the body panel.
- Use the flashlight to locate the rear bulb sockets on the back of the tail lamp assembly.
- The turn signal socket is the socket for the amber rear signal bulb.
Step 4: Remove the Turn Signal Bulb Socket
- Wear nitrile gloves before handling the bulb.
- Grip the turn signal bulb socket by the plastic base.
- Turn the socket counterclockwise about a quarter turn by hand.
- Pull the socket straight out of the tail lamp housing.
- No torque spec applies because this is a hand-tight twist-lock socket.
Step 5: Remove the Old Bulb
- Pull the old bulb straight out of the socket by hand.
- If the bulb is stuck, wrap it with a clean microfiber cloth and wiggle it gently while pulling.
- Do not crush the glass.
Step 6: Install the New Bulb
- Push the new rear turn signal bulb straight into the socket by hand until it seats fully.
- If you touched the glass, wipe it clean with a clean microfiber cloth.
- A clean bulb lasts longer.
Step 7: Reinstall the Bulb Socket
- Insert the socket back into the tail lamp housing.
- Turn the socket clockwise by hand until it locks in place.
- Make sure it feels secure and sits flat against the housing.
- No torque spec applies because this socket locks by hand.
Step 8: Test the Turn Signal
- Turn the ignition to accessory mode.
- Move the turn signal stalk to the side you repaired.
- Stand behind your Accord and confirm the rear turn signal flashes normally.
- Turn on the hazard lights to verify both rear signals if replacing both bulbs.
Step 9: Reinstall the Trunk Liner
- Push the trunk side liner back into its original position by hand.
- Reinstall the plastic clips by hand.
- If the clips have center pins, push the clip body in first, then press the center pin flush.
- Use the trim panel removal tool only if you need to guide the panel edge into place.
✅ After Repair
- ✅ Check the left and right rear turn signals.
- ✅ Check the hazard lights.
- ✅ Make sure the trunk liner is secure and no clips are missing.
- ✅ If the turn signal still blinks fast, the bulb may not be seated correctly or there may be another failed turn signal bulb.
💰 DIY vs Shop Cost
Shop Cost: $45-$95 per side parts + labor
DIY Cost: $8-$25 for bulbs
You Save: $35-$70 by doing it yourself!
Shop labor rates vary but typically run $100-$150/hour. This repair takes a shop approximately 0.2-0.4 hours.
🎯 Ready to get started?
HowToo makes it easy: same-day/2-day shipping on every part, plus all the tools and specialty tools you need! Check out the parts and tools sections below to add everything to your cart.