

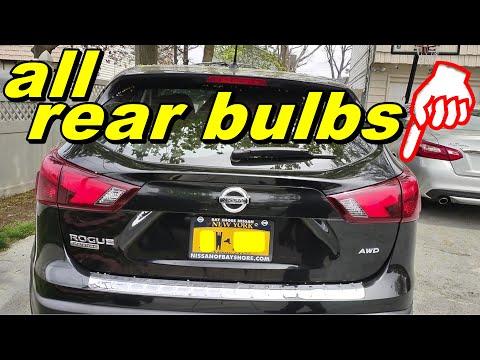







How to Replace Rear Turn Signal Bulbs on a 2014-2020 Nissan Rogue
Step-by-step instructions with bulb size, required tools, safety tips, and torque specs for 2014, 2015, 2016, 2017, 2018, 2019, 2020
How to Replace Rear Turn Signal Bulbs on a 2014-2020 Nissan Rogue
Step-by-step instructions with bulb size, required tools, safety tips, and torque specs for 2014, 2015, 2016, 2017, 2018, 2019, 2020


🔧 Rogue - Rear Turn Signal Bulb Replacement
The rear turn signal bulb is accessed by removing the rear combination lamp assembly from the body. This is a simple repair, but pull the lamp straight backward to avoid breaking its locating pins.
Difficulty Level: Beginner | Estimated Time: 15-25 minutes
⚠️ Safety & Precautions
- Allow the lamp and bulb to cool before touching them.
- Switch off all exterior lights and keep the ignition off.
- Do not operate the turn signal while the bulb socket is removed.
- Battery disconnection is not required for this repair.
- Wear gloves and safety glasses in case the old bulb breaks.
🔧 Required Tools
You'll need the following tools for this repair:
- 10mm socket
- 1/4-inch drive ratchet
- 1/4-inch drive torque wrench rated 2-20 Nm
- Plastic trim-removal tool
- Nitrile work gloves
- Safety glasses
- Clean microfiber cloth
🔩 Required Parts
HowToo sells all the parts you need for this repair:
- Amber 7440A/WY21W rear turn signal bulbs, 21W - Qty: 2 - Replace in pairs
📋 Before You Begin
- Park your Rogue on level ground, select Park, and apply the parking brake.
- Turn the ignition and exterior lights completely off.
- Open the liftgate to expose the fasteners beside the affected rear lamp.
- Place a clean microfiber cloth below the lamp to help protect the paint.
- No infotainment menu, scan tool, coding, or bulb reset is required.
🔨 Step-by-Step Instructions
Follow these steps in order:
Step 1: Remove the Rear Lamp Fasteners
- Put on the nitrile work gloves and safety glasses.
- Use the 10mm socket and 1/4-inch drive ratchet to remove the two bolts along the liftgate-side edge of the rear lamp.
- Keep the bolts in a safe place.
Step 2: Release the Rear Lamp Assembly
- Hold the lamp firmly with both gloved hands and pull it straight toward the rear of your Rogue.
- If it is tight, use the plastic trim-removal tool gently between the lamp edge and body. A trim-removal tool is a nonmetal wedge that helps release fitted panels without scratching them.
- Do not twist the lamp outward. Sideways force can break the locating pins.
- Support the lamp so its wiring is not stretched.
- Wiggle gently while pulling straight backward.
Step 3: Remove the Turn Signal Socket
- Locate the turn signal socket behind the clear or amber turn-signal section of the lamp.
- Using a gloved hand, rotate the socket counterclockwise approximately one-quarter turn.
- Pull the socket straight out of the lamp housing.
Step 4: Replace the Bulb
- Using a gloved hand, pull the old wedge-base bulb straight out of the socket. Do not twist the bulb.
- Push the new amber 7440A/WY21W bulb straight into the socket until fully seated.
- If the bulb was touched with bare fingers, wipe it with the clean microfiber cloth before installation.
- Do not install a clear bulb; your Rogue requires an amber turn-signal bulb in this position.
Step 5: Test the New Bulb
- Keep the lamp supported and ensure the socket cannot touch painted surfaces.
- Switch on the hazard warning lights and confirm the new bulb flashes brightly.
- Switch the hazard warning lights off before continuing.
- If it does not illuminate, remove the bulb with a gloved hand and reseat it firmly in the socket.
Step 6: Reinstall the Bulb Socket
- Inspect the socket seal and make sure it is clean, flat, and undamaged.
- Insert the socket into the lamp housing with a gloved hand.
- Rotate the socket clockwise approximately one-quarter turn until it locks securely.
Step 7: Reinstall the Rear Lamp Assembly
- Align the lamp’s locating pins with their body-mounted retainers.
- Press the lamp straight forward with both gloved hands until it sits flush against the body.
- Start both bolts by hand to prevent cross-threading.
- Use the 10mm socket and 1/4-inch drive torque wrench to tighten both lamp bolts evenly: Torque to 5.5 Nm (49 in-lbs).
- Do not overtighten the bolts; excessive force can crack the lamp housing.
✅ After Repair
- Operate the left and right turn signals and confirm both sides flash at the same normal speed.
- Switch on the hazard warning lights and inspect the repaired lamp again.
- Confirm the lamp sits evenly against the body and does not move when pressed gently.
- Check for warning messages or rapid flashing. Rapid flashing usually means a bulb is incorrect, loose, or not working.
- No scan-tool reset or programming is required.
💰 DIY vs Shop Cost
Shop Cost: ₹800-₹1,800 (parts + labor in the Panipat area)
DIY Cost: ₹250-₹700 (parts only)
You Save: ₹550-₹1,100 by doing it yourself!
Local labor rates vary. This repair takes a shop approximately 0.2-0.4 hours.
🎯 Ready to get started?
HowToo makes it easy: same-day/2-day shipping on every part, plus all the tools and specialty tools you need! Check out the parts and tools sections below to add everything to your cart.