

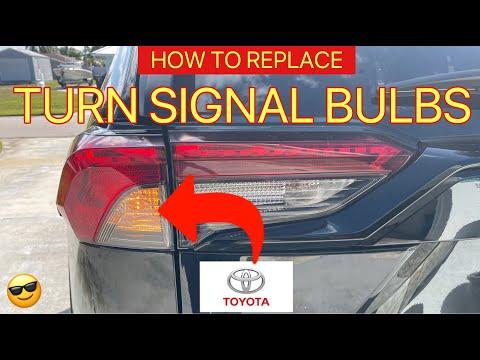







How to Replace Rear Turn Signal Bulbs on a 2012-2014 Toyota RAV4 (Trim: Hybrid LE)
Step-by-step tail lamp bulb guide with tools, parts, torque specs, and safety tips for 2012, 2013, 2014
How to Replace Rear Turn Signal Bulbs on a 2012-2014 Toyota RAV4 (Trim: Hybrid LE)
Step-by-step tail lamp bulb guide with tools, parts, torque specs, and safety tips for 2012, 2013, 2014


🔧 RAV4 - Rear Turn Signal Bulb Replacement
This repair replaces the rear turn signal bulb in the tail lamp assembly on your RAV4. A failed rear turn signal bulb can flash rapidly, trigger a warning, or reduce visibility to drivers behind you.
Difficulty Level: Beginner | Estimated Time: 15-30 minutes
⚠️ Safety & Precautions
- ⚠️ Turn the vehicle fully OFF before working on the rear lamps.
- ⚠️ Do not press the brake pedal or use the turn signals while the bulb is removed.
- ⚠️ The hybrid high-voltage system does not need to be serviced for this job.
- ⚠️ Battery disconnect is not normally required for rear turn signal bulb replacement.
- ⚠️ Let the bulb cool if the lights were recently used.
🔧 Required Tools
You'll need the following tools for this repair:
- 10mm socket
- 1/4-inch ratchet
- Plastic trim removal tool
- Clean nitrile gloves
- Safety glasses
🔩 Required Parts
HowToo sells all the parts you need for this repair:
- Rear turn signal bulb - Qty: 1 per side
- Rear turn signal bulbs - Replace in pairs - Qty: 2
📋 Before You Begin
- Park your RAV4 on level ground.
- Shift to Park and set the parking brake.
- Turn the power switch OFF and keep the key fob away from the vehicle.
- Open the liftgate fully.
- Wear clean gloves. Oil from your fingers can shorten bulb life.
- A plastic trim removal tool is a non-metal pry tool used to remove small covers without scratching paint or trim.
🔨 Step-by-Step Instructions
Follow these steps in order:
Step 1: Open the Liftgate and Locate the Tail Lamp Fasteners
- Open the rear liftgate all the way.
- Look at the inner edge of the tail lamp assembly on the side you are replacing.
- Use the plastic trim removal tool to gently pop off the small plastic access covers if equipped.
- You will see the tail lamp retaining bolts.
- Work slowly to avoid scratches.
Step 2: Remove the Tail Lamp Bolts
- Use the 10mm socket and 1/4-inch ratchet to remove the tail lamp bolts.
- Place the bolts somewhere safe so they do not fall into the cargo area.
- There is no torque needed during removal.
Step 3: Pull the Tail Lamp Assembly Straight Rearward
- Hold the tail lamp assembly with both hands.
- Pull it straight back away from the body of the RAV4.
- Do not twist it side to side. The lamp has guide pins that pull straight out.
- If it feels stuck, use the plastic trim removal tool carefully at the outer edge to help release it.
- Straight back prevents broken pins.
Step 4: Remove the Rear Turn Signal Bulb Socket
- Find the turn signal bulb socket on the back of the tail lamp assembly.
- The rear turn signal bulb is the amber flashing bulb location.
- Use your gloved hand to rotate the socket counterclockwise about a quarter turn.
- Pull the socket straight out of the lamp housing.
Step 5: Replace the Bulb
- Use clean nitrile gloves to pull the old bulb straight out of the socket.
- Push the new rear turn signal bulb straight into the socket until fully seated.
- Do not force it. The bulb should fit snugly.
- If the bulb has a wedge base, it pulls and pushes straight in.
- A wedge base bulb has a flat plastic/glass end that slides directly into the socket.
Step 6: Reinstall the Bulb Socket
- Insert the bulb socket back into the tail lamp housing.
- Use your gloved hand to rotate the socket clockwise until it locks.
- Make sure it sits flat and tight so water cannot enter the lamp.
Step 7: Test the Turn Signal Before Bolting the Lamp Back In
- Keep the tail lamp supported so it does not hang by the wiring.
- Turn the vehicle to accessory/ON mode without starting the hybrid system.
- Use the turn signal stalk to test the side you replaced.
- Confirm the rear bulb flashes normally.
- Turn the power switch OFF after the test.
- If it does not flash, remove the bulb with clean nitrile gloves and reseat it in the socket.
Step 8: Reinstall the Tail Lamp Assembly
- Line up the guide pins with the body openings.
- Push the tail lamp straight forward until it seats evenly against the body.
- Use the 10mm socket and 1/4-inch ratchet to reinstall the bolts.
- Torque to 5.0 Nm (44 in-lbs).
- If using hand feel only, snug the bolts gently. Do not overtighten.
Step 9: Reinstall Covers and Final Check
- Use your hand to snap any plastic access covers back into place.
- Close the liftgate.
- Turn the hazard lights on and confirm both rear turn signals flash normally.
✅ After Repair
- ✅ Check that the turn signal flashes at a normal speed.
- ✅ Confirm the tail lamp sits flush with the body.
- ✅ Make sure no warning message remains on the dash.
- ✅ If the bulb burns out again quickly, inspect the socket for corrosion or looseness.
💰 DIY vs Shop Cost
Shop Cost: $60-$130 (parts + labor)
DIY Cost: $5-$20 (parts only)
You Save: $55-$110 by doing it yourself!
Shop labor rates vary but typically run $100-$150/hour. This repair takes a shop approximately 0.3-0.5 hours.
🎯 Ready to get started?
HowToo makes it easy: same-day/2-day shipping on every part, plus all the tools and specialty tools you need! Check out the parts and tools sections below to add everything to your cart.