

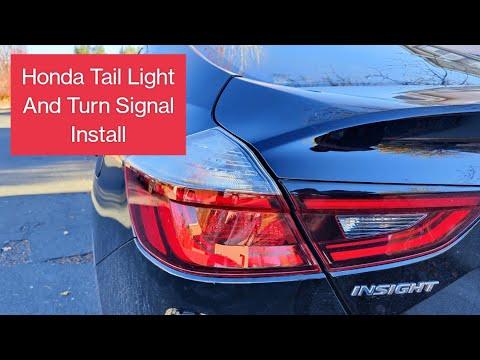







How to Replace Rear Turn Signal Bulbs on a 2010-2022 Honda Insight
Step-by-step instructions, tools, safety tips, and 7440A amber bulb specifications for 2010, 2011, 2012, 2013, 2014, 2019, 2020, 2022
How to Replace Rear Turn Signal Bulbs on a 2010-2022 Honda Insight
Step-by-step instructions, tools, safety tips, and 7440A amber bulb specifications for 2010, 2011, 2012, 2013, 2014, 2019, 2020, 2022


🔧 Insight - Rear Turn Signal Bulb Replacement
This is an easy 20-minute job. Remove the rear lamp assembly, twist out the turn-signal socket, and install a new 21-watt amber 7440A-style bulb. Honda specifies a 21-watt amber bulb for this position. techinfo.honda.com
Difficulty Level: Beginner | Estimated Time: 15-30 minutes
⚠️ Safety & Precautions
- ⚠️ Turn the Insight completely off and keep the key away from the car.
- 🧤 Let the lamps cool before touching the bulb or socket.
- 🔋 Battery disconnection isn't required for this repair.
- 💡 Don't switch the car to READY mode while the lamp is disconnected.
- 🛡️ Pull the lamp straight rearward. Twisting it sideways can break its locating pins.
🔧 Required Tools
You'll need the following tools for this repair:
- Phillips-head screwdriver
- Plastic trim-removal tool
- Microfiber cloth
- Nitrile gloves
- Safety glasses
🔩 Required Parts
HowToo sells all the parts you need for this repair:
- Rear turn signal bulb, 21-watt amber 7440A style - Qty: 2
I’d replace both sides with the in-stock SYLVANIA Long Life Amber Mini Bulb 2 Pack. Matching age and brightness saves you from doing the other side next weekend. Nobody enjoys an encore performance from a five-dollar bulb.
📋 Before You Begin
- 🚗 Park your Insight on level ground and select Park.
- 🔌 Turn off the exterior lights and open the trunk.
- 🧺 Remove anything that could interfere with your access to the rear lamp area.
- 🔎 Identify the failed side by briefly operating the hazards, then switch everything off.
🔨 Step-by-Step Instructions
Follow these steps in order:
Step 1: Open the trunk and locate the lamp fasteners
- Open the trunk and look along the inner edge of the affected rear lamp assembly.
- If a small trim cover blocks access, wrap the plastic trim-removal tool with the microfiber cloth and release the cover gently.
- Keep removed fasteners together in the trunk.
Step 2: Remove the lamp fasteners
- Use the Phillips-head screwdriver to remove the exposed lamp mounting fasteners.
- Support the lamp with your free hand so it doesn't shift against the paint.
- Honda's owner procedure permits a Phillips-head screwdriver or socket for these fasteners. techinfo.honda.com
Step 3: Release the rear lamp assembly
- Wear nitrile gloves and grasp the lamp firmly with both hands.
- Pull the assembly straight rearward from the rear pillar. Don't pry between the lens and painted body.
- The lamp is also held by alignment pins seated in rubber grommets, so steady pressure works better than jerking it.
- Wiggle gently, but don't rotate the lens.
Step 4: Remove the turn-signal socket
- Find the rear turn-signal socket on the back of the lamp assembly.
- Turn the socket counterclockwise by hand, approximately one-quarter turn, and pull it straight out.
- Don't pull on the wiring harness.
Step 5: Replace the bulb
- Pull the old bulb straight out of the socket by hand. This is a wedge-base bulb, meaning it pushes directly into the socket without threads.
- Check the socket for melted plastic, green corrosion, or burned terminals before installing the replacement.
- Push the new 21-watt amber bulb straight into the socket until fully seated.
- Don't substitute a clear bulb because the lamp requires an amber light source.
Step 6: Test the new bulb
- Keep the lamp supported safely away from painted surfaces.
- Switch on the hazard lights and confirm that the new bulb flashes normally.
- If it doesn't work, turn everything off, remove the bulb, rotate it 180 degrees, and reseat it firmly.
- Switch the hazards off before continuing.
Step 7: Reinstall the socket
- Insert the socket into its keyed opening in the lamp.
- Turn it clockwise by hand until it locks.
- Make sure the socket seal sits flat to help keep moisture outside the lamp.
Step 8: Reinstall the lamp assembly
- Align the lamp's guide and locating pins with the body grommets.
- Push the assembly straight forward until every pin is fully seated. Honda specifically calls for aligning the pins before pressing the lamp into place. techinfo.honda.com
- Confirm that the lamp sits evenly against the body without a raised edge.
Step 9: Install the fasteners
- Start every fastener by hand to prevent cross-threading.
- Use the Phillips-head screwdriver to tighten each fastener evenly.
- Torque: Honda's owner procedure doesn't publish a numerical torque for these lamp fasteners. Tighten them snugly by hand without crushing the plastic housing.
- Reinstall any trim cover using the plastic trim-removal tool if needed.
✅ After Repair
- ✅ Test the left signal, right signal, and hazard lights.
- 👀 Compare the repaired side with the opposite side for similar brightness and flash speed.
- ⚡ Rapid flashing usually means a bulb isn't seated correctly or another signal bulb has failed.
- 💧 Check the lamp after the next rain or car wash for unexpected condensation.
💰 DIY vs Shop Cost
Shop Cost: $40-$100 per side
DIY Cost: $5-$15 for a pair of bulbs
You Save: Approximately $35-$85 by doing it yourself!
Shop labor rates vary but typically run $100-$150/hour. This repair takes a shop approximately 0.2-0.5 hour.
🎯 Ready to get started?
HowToo makes it easy: same-day/2-day shipping on every part, plus all the tools and specialty tools you need! The matching rear turn-signal bulb aisle is open in the parts section.