

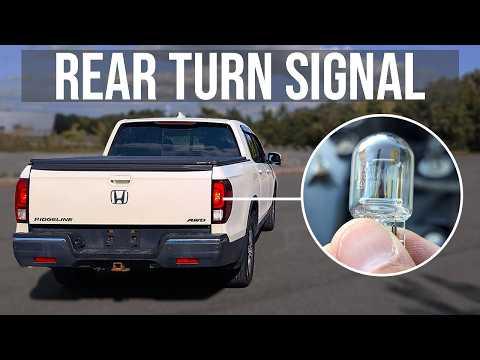







How to Replace Rear Turn Signal Bulbs on a 2006-2018 Honda Ridgeline
Step-by-step taillight removal guide with tools, 7440A bulbs, testing, and safety tips for 2006, 2007, 2008, 2009, 2010, 2011, 2012, 2013, 2014, 2017, 2018
How to Replace Rear Turn Signal Bulbs on a 2006-2018 Honda Ridgeline
Step-by-step taillight removal guide with tools, 7440A bulbs, testing, and safety tips for 2006, 2007, 2008, 2009, 2010, 2011, 2012, 2013, 2014, 2017, 2018


🔧 Ridgeline - Rear Turn Signal Bulb Replacement
The rear turn signal bulbs are inside the left and right taillight assemblies. Open the tailgate, remove each assembly, and replace the amber bulb without disturbing the wiring.
Difficulty Level: Beginner | Estimated Time: 20–30 minutes
⚠️ Safety & Precautions
- ⚠️ Switch off all exterior lights and remove the key before starting.
- 🧤 Allow the bulbs to cool before touching their sockets.
- 🔋 Battery disconnection is not required for this repair.
- 💡 Do not force the taillight sideways; this can break its locating pins.
🔧 Required Tools
You'll need the following tools for this repair:
- 8mm socket
- 1/4-inch drive ratchet
- Plastic trim removal tool (specialty)
- Nitrile gloves
- Safety glasses
🔩 Required Parts
HowToo sells all the parts you need for this repair:
- 7440A amber rear turn signal bulbs - Qty: 2 - Replace in pairs
📋 Before You Begin
- 🅿️ Park your Ridgeline on level ground, shift into Park, and apply the parking brake.
- 🔑 Turn the ignition and exterior lights completely off.
- 🚪 Open the tailgate fully to expose the two fasteners along the inner edge of each taillight.
- 📦 Place a folded towel on the bed rail so the removed assembly cannot scratch the paint.
🔨 Step-by-Step Instructions
Follow these steps in order:
Step 1: Remove the Taillight Fasteners
- Wear the safety glasses and nitrile gloves.
- Use the 8mm socket and 1/4-inch drive ratchet to remove the two bolts exposed beside the taillight.
- Keep both bolts in a safe place.
Step 2: Release the Taillight Assembly
- Grip the outer edges of the taillight and pull it straight rearward.
- If it is tight, use the plastic trim removal tool between the lamp and body to apply gentle, even pressure.
- A trim tool is a nonmetallic lever that helps avoid paint damage.
- Do not twist the assembly or pull it sideways.
- Rock gently while pulling straight backward.
Step 3: Remove the Turn Signal Socket
- Support the taillight so its wiring is not stretched.
- Locate the turn signal socket behind the amber section of the assembly.
- Turn the socket counterclockwise by hand approximately one-quarter turn, then pull it straight out.
Step 4: Replace the Bulb
- Pull the old bulb straight out of the socket by hand; it does not unscrew.
- Inspect the socket for melted plastic, darkened terminals, or green corrosion. Replace the damaged socket before installing a bulb if any of these conditions are present.
- Using nitrile gloves, push the new 7440A amber bulb straight into the socket until fully seated.
- Match the new bulb to the old bulb.
Step 5: Test the New Bulb
- Keep the taillight supported and clear of moving parts.
- Switch on the hazard warning lights and verify that the new bulb flashes brightly.
- Switch the hazard lights off before continuing.
- If it does not illuminate, switch everything off, remove the bulb by hand, rotate it 180 degrees, reinstall it, and test again.
Step 6: Reinstall the Bulb Socket
- Insert the socket into the taillight opening by hand.
- Turn it clockwise approximately one-quarter turn until it locks securely.
- Confirm the socket seal sits evenly and no wiring is pinched.
Step 7: Reinstall the Taillight Assembly
- Align the taillight locating pins with their body grommets.
- Press the assembly straight forward by hand until it sits flush with the body.
- Start both bolts by hand to prevent cross-threading.
- Use the 8mm socket and 1/4-inch drive ratchet to tighten the bolts evenly until snug. Do not overtighten these small fasteners.
Step 8: Replace the Opposite Bulb
- Repeat Steps 1–7 on the opposite side using the same listed tools.
- Replacing both bulbs together helps maintain equal brightness and reliability.
✅ After Repair
- ✅ Operate the left and right turn signals separately and confirm both flash normally.
- 🚨 Turn on the hazard lights and walk around your Ridgeline to verify both rear bulbs work.
- 💡 A rapid flash usually indicates a loose bulb, incorrect bulb, damaged socket, or another failed turn signal bulb.
- 🚪 Close the tailgate and confirm it does not contact either taillight.
💰 DIY vs Shop Cost
Shop Cost: $45–$90 (parts + labor)
DIY Cost: $8–$20 (parts only)
You Save: $25–$82 by doing it yourself!
Shop labor rates vary but typically run $100–$150/hour. This repair takes a shop approximately 0.2–0.4 hours.
🎯 Ready to get started?
HowToo makes it easy: same-day/2-day shipping on every part, plus all the tools and specialty tools you need! Check out the parts and tools sections below to add everything to your cart.