

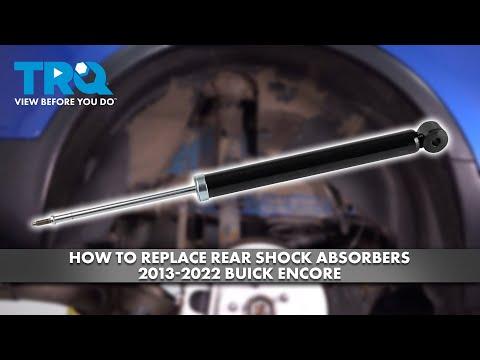






How to Replace Rear Shock Absorbers on a 2015-2022 Chevrolet Trax
Step-by-step DIY guide with required tools, parts, torque specs, and safety tips for 2015, 2016, 2017, 2018, 2019, 2020, 2021, 2022
How to Replace Rear Shock Absorbers on a 2015-2022 Chevrolet Trax
Step-by-step DIY guide with required tools, parts, torque specs, and safety tips for 2015, 2016, 2017, 2018, 2019, 2020, 2021, 2022


🔧 Trax - Rear Shock Absorber Replacement
This procedure covers replacing both rear shock absorbers on your Trax. The front suspension uses complete strut assemblies, so it requires a different procedure.
Assumption: “Shock absorbers” refers to the separate rear shocks.
Difficulty Level: Beginner | Estimated Time: 1-2 hours
⚠️ Safety & Precautions
- ⚠️ Replace both rear shock absorbers together so damping remains balanced.
- ⚠️ Support your Trax with jack stands. Never work beneath a vehicle supported only by a floor jack.
- ⚠️ Support the rear suspension before removing either shock. Do not allow the rear axle assembly to hang from brake hoses or wiring.
- ⚠️ Remove and install one shock at a time to keep the suspension controlled.
- ⚠️ Do not open, heat, crush, or drill a gas-pressurized shock absorber.
- ⚠️ Battery disconnection is not required.
🔧 Required Tools
You'll need the following tools for this repair:
- Hydraulic floor jack rated 2-ton minimum
- Jack stands rated 2-ton minimum
- Wheel chocks
- 19mm impact-rated wheel socket
- 18mm six-point socket
- 18mm combination wrench
- 1/2-inch-drive ratchet
- 1/2-inch-drive breaker bar
- 1/2-inch-drive torque wrench rated 20-200 Nm
- 150mm socket extension
- Nylon cleaning brush
- Mechanic’s gloves
- Safety glasses
🔩 Required Parts
HowToo sells all the parts you need for this repair:
- Rear shock absorbers - Replace in pairs - Qty: 2
- Rear shock absorber upper bolts - Qty: 2
- Rear shock absorber lower bolts and nuts - Qty: 2
📋 Before You Begin
- 📋 Park your Trax on firm, level ground. Shift into Park and apply the parking brake.
- 📋 Place wheel chocks securely in front of both front tires.
- 📋 Keep the new shocks beside the vehicle and compare their length, mounting sleeves, and bushings with the original parts.
- 📋 A torque wrench clicks when the selected tightening force is reached. Stop pulling immediately after it clicks.
- 📋 No infotainment setting, scan-tool command, alignment procedure, or battery disconnect is needed.
🔨 Step-by-Step Instructions
Follow these steps in order:
Step 1: Loosen the Rear Wheel Nuts
- Put on the mechanic’s gloves and safety glasses.
- Use the 19mm impact-rated wheel socket and 1/2-inch-drive breaker bar to loosen each rear wheel nut approximately one-quarter turn.
- Do not remove the wheel nuts while your Trax is still on the ground.
Step 2: Raise and Support the Rear
- Use the hydraulic floor jack under the reinforced rear-center lifting area to raise the vehicle.
- Position the two jack stands beneath the reinforced rear side support points.
- Lower the vehicle slowly onto the jack stands with the hydraulic floor jack.
- Gently push the body to confirm that it is stable before continuing.
Step 3: Remove the Rear Wheels
- Use the 19mm impact-rated wheel socket and 1/2-inch-drive ratchet to remove the rear wheel nuts.
- Remove both rear wheels and place them flat away from the work area.
Step 4: Support the Rear Suspension
- Place the hydraulic floor jack beneath the rear suspension arm near the shock being replaced.
- Raise the jack only until it lightly supports the suspension. Do not lift your Trax off the jack stands.
- This removes tension from the shock bolts and prevents the suspension from dropping unexpectedly.
Step 5: Remove the Lower Shock Fastener
- Use the nylon cleaning brush to remove dirt from the lower shock bolt and nut.
- Hold the nut with the 18mm combination wrench.
- Use the 18mm six-point socket, 150mm socket extension, and 1/2-inch-drive breaker bar to loosen the lower bolt.
- Remove the nut and bolt with the 18mm combination wrench and 18mm six-point socket.
- Adjust the hydraulic floor jack slightly if the bolt binds. Never hammer the bolt while the suspension is under tension.
Step 6: Remove the Upper Shock Bolt
- Hold the shock with one hand so it cannot fall.
- Use the 18mm six-point socket, 150mm socket extension, and 1/2-inch-drive ratchet to remove the upper mounting bolt.
- Lower and remove the old shock absorber.
- Inspect the mounting areas for cracks, corrosion, damaged threads, or distorted brackets.
- Match each new shock before installation.
Step 7: Install the New Shock Absorber
- Position the new shock with the same upper-to-lower orientation as the original.
- Align the upper mounting sleeve with the body bracket.
- Install the new upper bolt by hand for several turns. Do not cross-thread it.
- Use the 18mm six-point socket and 1/2-inch-drive ratchet to make the bolt snug, but do not apply final torque yet.
- Move the shock’s lower eye into its bracket. Adjust the hydraulic floor jack until the holes align naturally.
- Install the new lower bolt and nut by hand.
Step 8: Tighten the Shock Fasteners
- Use the hydraulic floor jack to hold the suspension near its normal loaded position.
- Use the 18mm six-point socket and 1/2-inch-drive torque wrench to tighten the upper shock bolt to 85 Nm (63 ft-lbs).
- Hold the lower nut with the 18mm combination wrench.
- Use the 18mm six-point socket and 1/2-inch-drive torque wrench to tighten the lower shock bolt to 85 Nm (63 ft-lbs).
- Remove the hydraulic floor jack from beneath the suspension.
Step 9: Replace the Opposite Shock
- Repeat Steps 4 through 8 on the opposite side using the same listed tools.
- Do not remove both shocks simultaneously.
- Confirm that both shocks have the same orientation and that no brake hose or wheel-speed sensor wire is trapped.
Step 10: Reinstall the Rear Wheels
- Place each wheel onto its hub.
- Install all wheel nuts by hand to prevent cross-threading.
- Use the 19mm impact-rated wheel socket and 1/2-inch-drive ratchet to snug the nuts in a crisscross pattern.
- Use the hydraulic floor jack to raise your Trax slightly, then remove both jack stands.
- Lower the vehicle until the tires contact the ground fully.
- Use the 19mm impact-rated wheel socket and 1/2-inch-drive torque wrench to tighten the wheel nuts in a crisscross pattern to 140 Nm (103 ft-lbs).
✅ After Repair
- ✅ Check that the upper and lower fasteners are seated correctly on both shocks.
- ✅ Push down firmly on each rear corner. The body should rise and settle without repeated bouncing.
- ✅ Drive slowly over a small bump and listen for clunks, rattles, or rubbing.
- ✅ Stop immediately if your Trax feels unstable or if a new knocking noise appears.
- ✅ Recheck wheel-nut torque to 140 Nm (103 ft-lbs) after approximately 80-160 km.
- ✅ Rear shock replacement alone does not normally require a wheel alignment.
💰 DIY vs Shop Cost
Shop Cost: $350-$650 USD (parts + labor)
DIY Cost: $120-$300 USD (parts only)
You Save: $230-$350 USD by doing it yourself!
Local pricing in Sonīpat can vary because the Trax is a U.S.-market vehicle and compatible parts may require importation. Shop labor for this repair is approximately 1-1.5 hours.
🎯 Ready to get started?
HowToo makes it easy: same-day/2-day shipping on every part, plus all the tools and specialty tools you need! Check out the parts and tools sections below to add everything to your cart.