


How to Replace Rear Shock Absorbers on a 2014 Toyota Camry (DIY Repair Guide)
Step-by-step instructions with required tools, parts list, and torque specs for a safe rear shock replacement
How to Replace Rear Shock Absorbers on a 2014 Toyota Camry (DIY Repair Guide)
Step-by-step instructions with required tools, parts list, and torque specs for a safe rear shock replacement
🔧 Camry - Rear Shock Absorber Replacement
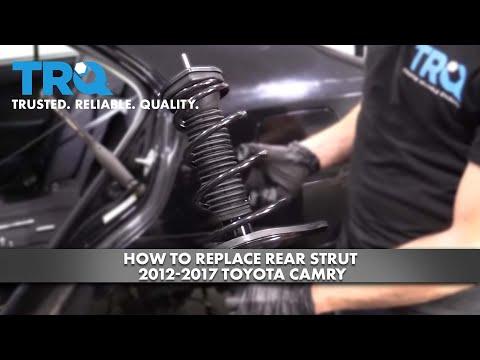
On your Camry, the rear suspension uses separate shock absorbers (the front uses struts, which is a different job). Replacing worn rear shocks restores ride control, reduces bouncing, and helps keep the rear tires planted over bumps.
Difficulty Level: Intermediate | Estimated Time: 1.5-3.0 hours
Assumption: Rear shocks only (not front struts); OEM-style replacement.
⚠️ Safety & Precautions
- ⚠️ Support the car with jack stands on solid points; never rely on a floor jack alone.
- ⚠️ Hybrid safety: keep tools away from any orange high-voltage cables; do not unplug or touch HV connectors.
- ⚠️ Keep the car fully OFF (not in READY) and keep the key fob away from the car while working.
- ⚠️ Wear eye protection when working under the wheel well and when removing trim clips.
🔧 Required Tools
You'll need the following tools for this repair:
- Floor jack (rated 2-ton minimum)
- Jack stands (rated 2-ton minimum, pair)
- Wheel chocks
- 21mm lug nut socket
- 3/8" drive ratchet
- 1/2" drive breaker bar
- Socket set (10mm, 12mm, 14mm, 17mm, 19mm)
- Combination wrench set (14mm, 17mm, 19mm)
- Torque wrench (20-200 Nm range)
- Trim clip removal tool
- Flathead screwdriver
- Penetrating oil
- Paint marker
- Mechanic gloves
- Safety glasses
🔩 Required Parts
HowToo sells all the parts you need for this repair:
- Rear shock absorbers - Replace in pairs - Qty: 2
- Rear shock upper mounting nuts - Qty: 4
- Rear shock lower mounting bolts/nuts - Qty: 2
📋 Before You Begin
- Park on level ground, shift to P, and set the parking brake.
- Place wheel chocks at the front wheels.
- Open the trunk; you’ll be removing small trunk side trim panels to reach the upper shock nuts.
- “Trim clips” are plastic fasteners—pry gently.
🔨 Step-by-Step Instructions
Follow these steps in order:
Step 1: Loosen rear wheel lug nuts
- Use a 21mm lug nut socket and a breaker bar to loosen (do not remove) the rear lug nuts about 1/2 turn.
Step 2: Lift and support the rear of the car
- Use a floor jack to lift the rear.
- Set the car onto jack stands at solid rear lift/support points.
- Remove both rear wheels using the 21mm lug nut socket.
Step 3: Access the upper shock mounts in the trunk
- Use a trim clip removal tool and flathead screwdriver to carefully remove the trunk side trim/liner pieces near the rear wheel well area.
- Locate the shock’s upper mounting nuts (one shock per side).
- Put clips in a cup so they don’t vanish.
Step 4: Support the rear suspension arm
- Place the floor jack under the rear suspension arm (near the shock area) with light upward pressure.
- This keeps the suspension from dropping when the shock bolt comes out.
Step 5: Remove the lower shock bolt
- Spray the lower shock fastener with penetrating oil and wait a minute.
- Use a 17mm or 19mm socket with a ratchet (and a matching combination wrench to hold the other side if needed) to remove the lower shock bolt/nut.
- If it’s tight, use the breaker bar carefully.
Step 6: Remove the upper shock nuts
- From inside the trunk, use a 14mm socket and ratchet to remove the upper shock mounting nuts.
- Keep one hand on the shock so it doesn’t drop suddenly once the last nut is off.
Step 7: Remove the shock absorber
- Lower the floor jack slightly (only as needed) and wiggle the shock out through the wheel well.
- Compare the old and new shocks side-by-side (length, mounts) before installing.
Step 8: Install the new shock absorber
- Position the new shock in place from the wheel well.
- Start the upper nuts by hand in the trunk using the 14mm socket (do not fully tighten yet).
- Line up the lower mount and insert the lower bolt by hand; use the floor jack to raise/lower the suspension arm slightly until the bolt slides through smoothly.
- If it won’t line up, adjust the jack height.
Step 9: Torque the shock fasteners
- Torque the lower shock bolt using a torque wrench: Torque to 103 Nm (76 ft-lbs).
- Torque the upper shock nuts using a torque wrench: Torque to 39 Nm (29 ft-lbs).
- Repeat Steps 4–9 for the other side.
Step 10: Reinstall trunk trim and wheels
- Reinstall the trunk liners/clips using the trim clip removal tool (reverse of removal).
- Reinstall wheels and hand-thread lug nuts using the 21mm lug nut socket.
- Lower the car off the jack stands using the floor jack.
- Torque lug nuts in a star pattern with a torque wrench: Torque to 103 Nm (76 ft-lbs).
✅ After Repair
- Do a short test drive over a few bumps at low speed. Listen for clunks (a common sign a fastener isn’t fully seated/torqued).
- Re-check lug nut torque after the test drive: 103 Nm (76 ft-lbs).
- Rear shocks alone usually do not require alignment, but if the car still feels unstable, have the suspension inspected.
💰 DIY vs Shop Cost
Shop Cost: $350-$750 (parts + labor)
DIY Cost: $120-$350 (parts only)
You Save: $230-$400 by doing it yourself!
Shop labor rates vary but typically run $100-$150/hour. This repair takes a shop approximately 1.5-2.5 hours.
🎯 Ready to get started?
HowToo makes it easy: same-day/2-day shipping on every part, plus all the tools and specialty tools you need! Check out the parts and tools sections below to add everything to your cart.
