

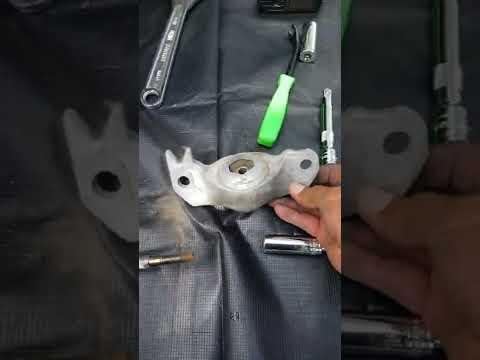






How to Replace Rear Shock Absorbers on a 2014-2020 Chevrolet Impala
Step-by-step DIY instructions with required tools, parts, torque specs, and safety tips for 2014, 2015, 2016, 2017, 2018, 2019, 2020
How to Replace Rear Shock Absorbers on a 2014-2020 Chevrolet Impala
Step-by-step DIY instructions with required tools, parts, torque specs, and safety tips for 2014, 2015, 2016, 2017, 2018, 2019, 2020


Assumption: “Shock absorbers” means the separate rear shocks; your Impala uses complete strut assemblies at the front.
🔧 Impala - Rear Shock Absorber Replacement
The rear shock absorbers control bouncing and keep the tires firmly planted on the road. Replace both rear shocks together so damping remains balanced from side to side.
Difficulty Level: Beginner | Estimated Time: 1–2 hours
⚠️ Safety & Precautions
- ⚠️ Work on level, solid pavement and support your Impala with jack stands.
- ⚠️ Never work beneath a vehicle supported only by a floor jack.
- ⚠️ The rear coil spring is separate from the shock, but support the rear suspension before removing the shock.
- ⚠️ Replace both rear shocks, even if only one is leaking or damaged.
- ⚠️ Do not use an impact wrench to tighten the shock fasteners or wheel nuts.
- ⚠️ Battery disconnection and suspension calibration are not required.
🔧 Required Tools
You'll need the following tools for this repair:
- 3-ton floor jack
- 3-ton jack stands
- Wheel chocks
- 22mm wheel socket
- 15mm six-point socket
- 18mm six-point socket
- 18mm combination wrench
- 3/8-inch-drive ratchet
- 1/2-inch-drive breaker bar
- 1/2-inch-drive torque wrench rated to 150 Nm
- 3/8-inch-drive torque wrench rated to 60 Nm
- 150mm socket extension
- Small nylon trim-removal tool
- Wire brush
- Safety glasses
- Mechanic gloves
🔩 Required Parts
HowToo sells all the parts you need for this repair:
- Rear shock absorbers - Qty: 2 — Replace in pairs
- Rear shock upper mounts - Qty: 2 if worn or not supplied
- Rear shock dust boots and bump stops - Qty: 2 if damaged or not supplied
- Rear shock mounting hardware - Qty: 1 kit if specified with the replacement shocks
📋 Before You Begin
- 🚗 Park your Impala on level pavement, shift to Park, and apply the parking brake.
- 🧱 Place wheel chocks firmly in front of both front tires.
- 📦 Compare the new shocks with the originals before disassembly. Mounting points and extended length should match.
- 🔩 Verify the replacement shock instructions for any supplied single-use nuts or model-specific torque changes.
- 📱 No infotainment service mode, scan tool, battery disconnect, or alignment calibration is required.
🔨 Step-by-Step Instructions
Follow these steps in order:
Step 1: Loosen the Rear Wheel Nuts
- Use a 22mm wheel socket and 1/2-inch-drive breaker bar to loosen each rear wheel nut about one-quarter turn.
- Do not remove the wheel nuts while your Impala is still on the ground.
Step 2: Raise and Support the Rear
- Use the 3-ton floor jack at the designated rear lifting point to raise your Impala.
- Place the 3-ton jack stands beneath the reinforced rear side support points. A jack stand is a fixed support that safely holds the raised vehicle.
- Lower the vehicle onto the stands, then gently push the body to verify that it is stable.
- Keep the floor jack nearby, but do not rely on it as the only support.
Step 3: Remove Both Rear Wheels
- Use the 22mm wheel socket and 1/2-inch-drive breaker bar to remove the wheel nuts.
- Remove both rear wheels and slide them beneath the body as an additional precaution.
Step 4: Support the Rear Suspension
- Position the 3-ton floor jack beneath the outer end of the lower rear suspension arm on the first side.
- Raise the jack only enough to support the arm. Do not lift your Impala off the jack stand.
- The lower suspension arm is the metal link supporting the wheel hub and coil spring.
Step 5: Remove the Lower Shock Bolt
- Clean exposed threads with the wire brush.
- Use an 18mm six-point socket, 1/2-inch-drive breaker bar, and 18mm combination wrench to loosen and remove the lower shock fastener.
- Adjust the floor jack slightly if the bolt binds. The bolt should slide out without force from the suspension.
- Small jack movements release bolt tension.
Step 6: Remove the Upper Shock Fasteners
- If necessary, use the small nylon trim-removal tool to release the edge of the wheelhouse liner for access.
- Support the shock with one hand.
- Use a 15mm six-point socket, 150mm socket extension, and 3/8-inch-drive ratchet to remove the two upper mounting bolts.
- Lower the shock from the wheel opening.
- Do not remove the rear coil spring or loosen suspension-arm bolts.
Step 7: Inspect the Mount and New Shock
- Inspect the upper mount, dust boot, and bump stop for cracks, separation, or crumbling rubber.
- Move the new shock through one full stroke by hand while holding it upright. Smooth, firm resistance is normal.
- Use the 15mm six-point socket and 3/8-inch-drive ratchet to transfer the original upper mount only if the new shock requires it.
- Install all supplied washers, bushings, and spacers in the exact order shown by the shock manufacturer.
Step 8: Install the New Shock
- Place the new shock in position and start both upper bolts by hand to prevent crossed threads.
- Use the 15mm six-point socket, 150mm socket extension, and 3/8-inch-drive torque wrench to tighten the upper bolts evenly: Torque to 58 Nm (43 ft-lbs).
- Use the 3-ton floor jack to align the lower shock eye with its mounting hole.
- Insert the lower bolt by hand in its original direction.
- Use the 18mm six-point socket, 18mm combination wrench, and 1/2-inch-drive torque wrench to tighten the lower fastener: Torque to 150 Nm (111 ft-lbs).
- If replacement-shock instructions specify a different torque for supplied hardware, follow that hardware specification.
Step 9: Replace the Opposite Shock
- Move the 3-ton floor jack beneath the opposite rear suspension arm.
- Repeat Steps 4 through 8 using the same listed tools.
- Confirm that both dust boots face downward and neither shock contacts a hose, wire, or wheelhouse liner.
Step 10: Reinstall the Wheels
- Install each wheel and start all wheel nuts by hand.
- Use the 22mm wheel socket and 1/2-inch-drive ratchet to snug the nuts in a crisscross pattern.
- Raise your Impala slightly with the 3-ton floor jack, remove the 3-ton jack stands, and lower it until the tires touch the ground.
- Use the 22mm wheel socket and 1/2-inch-drive torque wrench to tighten the wheel nuts in a crisscross pattern: Torque to 140 Nm (100 ft-lbs).
✅ After Repair
- ✅ Push down firmly on each rear corner. The body should rise and settle without repeated bouncing.
- ✅ Check that both upper and lower shock mounts are seated correctly.
- ✅ Drive slowly over a smooth route, listening for clunks or rattles.
- ✅ Recheck the wheel-nut torque after approximately 80–160 km (50–100 miles).
- ✅ A wheel alignment is not normally required after replacing only the rear shocks.
- ✅ If your Impala still sags, bounces, or sits unevenly, inspect the rear springs, mounts, and suspension links.
💰 DIY vs Shop Cost
Shop Cost: $350–$650 USD (parts + labor)
DIY Cost: $100–$300 USD (parts only)
You Save: $250–$350 USD by doing it yourself!
Local Sonīpat pricing varies. A shop typically needs 1–1.5 hours for this repair.
🎯 Ready to get started?
HowToo makes it easy: same-day/2-day shipping on every part, plus all the tools and specialty tools you need! Check out the parts and tools sections below to add everything to your cart.