


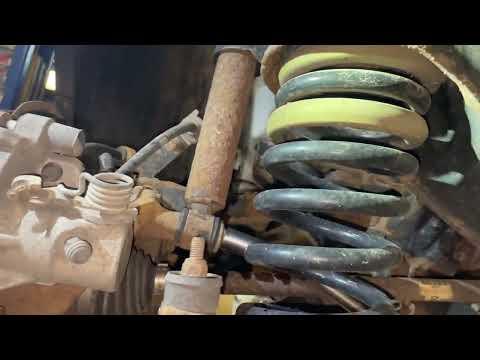




How to Replace Rear Shock Absorbers on a 2013-2019 Ford Escape
Step-by-step DIY instructions with required tools, parts, torque specs, and safety tips for 2013, 2014, 2015, 2016, 2017, 2018, 2019
How to Replace Rear Shock Absorbers on a 2013-2019 Ford Escape
Step-by-step DIY instructions with required tools, parts, torque specs, and safety tips for 2013, 2014, 2015, 2016, 2017, 2018, 2019


🔧 Escape - Rear Shock Absorber Replacement
Replace both rear shock absorbers together. Your Escape uses conventional shocks at the rear, while the front uses complete strut assemblies. This procedure covers the rear shocks and doesn't require removing or compressing the coil springs.
Assumption: “Shock absorbers” means the separate rear shocks, not the front struts.
Difficulty Level: Beginner | Estimated Time: 1.5-2.5 hours
⚠️ Safety & Precautions
- ⚠️ Work on solid, level ground and support your Escape with jack stands.
- ⚠️ Never work beneath a vehicle supported only by a floor jack.
- ⚠️ Support the rear suspension arm before removing a shock. This prevents the suspension from dropping suddenly.
- ⚠️ Replace the shocks in pairs so both sides control suspension movement equally.
- ⚠️ Do not remove any rear coil-spring retainers or suspension-arm pivot bolts.
- ⚠️ Battery disconnection isn't required.
🔧 Required Tools
You'll need the following tools for this repair:
- 19mm deep socket
- 15mm deep socket
- 18mm deep socket
- 15mm combination wrench
- 18mm combination wrench
- 1/2-inch drive ratchet
- 1/2-inch drive breaker bar
- 1/2-inch drive torque wrench rated to 150 ft-lbs
- 6-inch socket extension
- Hydraulic floor jack rated 2-ton minimum
- Jack stands rated 2-ton minimum
- Wheel chocks
- Wire brush
- Penetrating oil
- Mechanic gloves
- Safety glasses
🔩 Required Parts
HowToo sells all the parts you need for this repair:
- Rear shock absorbers - Qty: 2, replace as a pair
- Rear shock upper fasteners - Qty: 4
- Rear shock lower bolts and nuts - Qty: 2 sets
Ford service information treats suspension fasteners as critical hardware. New fasteners are the smart move here. Rusty suspension bolts have never become friendlier with age.
📋 Before You Begin
- 🚗 Park your Escape on level ground, shift into Park, and apply the parking brake.
- 🚗 Place wheel chocks securely in front of both front tires.
- 🚗 Open both new shocks and compare their length, mounts, bushings, and sleeves with the old units.
- 🚗 Keep the left and right parts separated if their packaging identifies a specific side.
- 🚗 Spray the upper and lower shock fasteners with penetrating oil and allow several minutes to soak.
- 🚗 No infotainment service mode, scan tool, electronic parking-brake mode, or alignment programming is required.
🔨 Step-by-Step Instructions
Follow these steps in order:
Step 1: Loosen the Rear Wheel Nuts
- Use the 19mm deep socket and breaker bar to loosen each rear wheel nut approximately one-quarter turn.
- Do not completely remove the nuts while your Escape is on the ground.
Step 2: Raise and Support the Rear
- Use the 2-ton floor jack at an approved rear lifting point to raise your Escape.
- Place the 2-ton jack stands beneath the approved body support points on both sides.
- Lower the vehicle carefully onto the stands, then gently push the body to confirm it is stable.
- Keep the floor jack available because it will support each rear suspension arm.
Step 3: Remove the Rear Wheels
- Use the 19mm deep socket and ratchet to remove the wheel nuts.
- Remove both rear wheels and slide them beneath the body as an additional precaution.
Step 4: Support the First Suspension Arm
- Position the floor jack beneath the lower suspension arm near the shock mount.
- Raise the jack only until it supports the arm. Do not lift your Escape off the jack stand.
- This keeps the suspension controlled after the shock is disconnected.
Step 5: Remove the Lower Shock Fastener
- Clean the exposed threads using the wire brush and apply more penetrating oil if necessary.
- Use the 18mm deep socket, breaker bar, and 18mm combination wrench to loosen the lower shock bolt and nut.
- Remove the nut, then pull the bolt out while supporting the shock by hand.
- Raise or lower the suspension arm slightly with the floor jack if the bolt is under tension.
Step 6: Remove the Upper Shock Fasteners
- Support the shock with one hand so it cannot fall.
- Use the 15mm deep socket, 6-inch extension, and ratchet to remove the two upper mounting fasteners.
- Lower and remove the shock absorber through the wheel opening.
- Inspect the surrounding mount for cracking, elongated holes, or heavy corrosion.
Step 7: Prepare the New Shock
- Compare the new shock directly with the removed shock.
- Confirm that the mounting eyes, sleeves, bushings, and extended length match.
- Slowly compress and extend the new shock vertically three to five times before installation.
- Slow strokes help settle the internal oil.
- Keep the shock upright after cycling it.
Step 8: Install the Upper Shock Mount
- Position the new shock with the same orientation as the original unit.
- Start both upper fasteners by hand for several full turns. This prevents crossed threads.
- Use the 15mm deep socket, 6-inch extension, and torque wrench to tighten the upper fasteners evenly.
- Torque the rear shock upper fasteners to 90 Nm (66 ft-lbs). Ford Performance instructions for this Escape platform specify 90 Nm for the rear shock upper and lower fasteners. trackey.ford.com)
Step 9: Connect the Lower Shock Mount
- Use the floor jack to align the lower shock eye with the suspension-arm mounting hole.
- Insert the new lower bolt without hammering it through the bushing.
- Install the new nut and tighten it lightly using the 18mm deep socket and 18mm combination wrench.
- Raise the suspension arm with the floor jack until it sits near normal ride height.
- Use the 18mm deep socket, 18mm combination wrench, and torque wrench to finish tightening.
- Torque the rear shock lower fastener to 90 Nm (66 ft-lbs). trackey.ford.com
Step 10: Replace the Opposite Shock
- Move the floor jack beneath the opposite rear suspension arm.
- Repeat Steps 4 through 9 using the same tools and torque specifications.
- Do not leave one old shock and one new shock installed.
Step 11: Reinstall the Rear Wheels
- Clean the wheel and hub mating surfaces using the wire brush.
- Install each wheel and start every wheel nut by hand.
- Use the 19mm deep socket and ratchet to snug the nuts in a crossing pattern.
- Raise your Escape using the floor jack, remove the jack stands, and lower it completely.
- Use the 19mm deep socket and torque wrench to tighten the wheel nuts in a crossing pattern.
- Torque the wheel nuts to 135 Nm (100 ft-lbs).
✅ After Repair
- ✅ Check that every shock fastener is fully seated and that no brake hose or wiring is trapped.
- ✅ Push down firmly at each rear corner. The body should rise and settle without repeated bouncing.
- ✅ Drive slowly over a smooth route, then over several small bumps while listening for clunks.
- ✅ Stop immediately if the rear feels unstable or a new knocking sound appears.
- ✅ Recheck the wheel-nut torque after approximately 50 miles.
- ✅ A wheel alignment normally isn't required after rear shock replacement because no alignment-adjusting link is disconnected.
- ✅ Ford issued service information covering rear shock-related rattles or clunks on certain 2015 Escape production ranges, so persistent noise may require checking the build-specific shock design and mounting hardware. ford.oemdtc.com)
💰 DIY vs Shop Cost
Shop Cost: $300-$600 (parts + labor)
DIY Cost: $90-$260 (parts only)
You Save: $210-$340 by doing it yourself!
Local labor rates in Sonīpat vary. This repair takes a shop approximately 1-1.5 hours.
🎯 Ready to get started?
HowToo makes it easy: same-day/2-day shipping on every part, plus all the tools and specialty tools you need! Check out the parts and tools sections below to add everything to your cart.
