
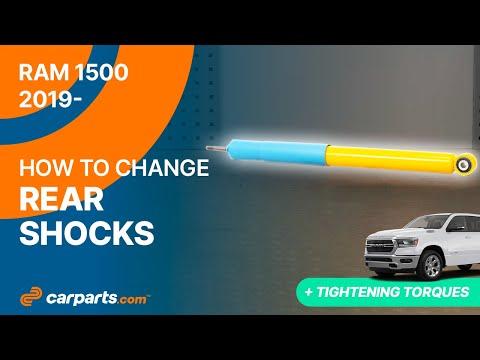







How to Replace Rear Shock Absorbers on a 2011-2019 Ram 1500
Step-by-step DIY guide with tools, parts, torque specs, safety tips, and cost savings for 2011, 2012, 2013, 2014, 2015, 2016, 2017, 2018, 2019
How to Replace Rear Shock Absorbers on a 2011-2019 Ram 1500
Step-by-step DIY guide with tools, parts, torque specs, safety tips, and cost savings for 2011, 2012, 2013, 2014, 2015, 2016, 2017, 2018, 2019


🔧 1500 - Rear Shock Absorber Replacement
This guide covers replacing the rear shock absorbers on your 1500. Rear shocks control bounce and keep the rear tires planted, especially over bumps or when towing.
Difficulty Level: Beginner | Estimated Time: 1-2 hours
⚠️ Safety & Precautions
- ⚠️ Work on level, solid ground only. Never rely on a jack by itself.
- ⚠️ Use jack stands under the frame before working underneath your 1500.
- ⚠️ Keep hands clear when lowering or raising the axle. The axle can move suddenly.
- ⚠️ Your 1500 has an eTorque mild-hybrid system. Do not touch orange high-voltage cables or components.
- ⚠️ Battery disconnect is not normally required for rear shock replacement.
- ⚠️ Replace rear shocks in pairs so left and right suspension damping stays balanced.
🔧 Required Tools
You'll need the following tools for this repair:
- Floor jack rated 3-ton minimum
- Jack stands rated 3-ton minimum
- Wheel chocks
- 21mm socket
- 21mm wrench
- 18mm socket
- 18mm wrench
- 1/2-inch drive ratchet
- 1/2-inch drive breaker bar
- Torque wrench rated to 150 ft-lbs
- Penetrating oil
- Rubber mallet
- Safety glasses
- Mechanic gloves
🔩 Required Parts
HowToo sells all the parts you need for this repair:
- Rear shock absorbers - Qty: 2
- Rear shock mounting hardware kit - Qty: 1
📋 Before You Begin
- Park your 1500 on level ground and shift into Park.
- Set the parking brake.
- Place wheel chocks in front of the front tires.
- Spray the upper and lower rear shock bolts with penetrating oil and let it soak for 5-10 minutes.
- A jack stand is a fixed support stand that safely holds the truck after lifting.
- A torque wrench tightens bolts to the correct force so they are not too loose or too tight.
🔨 Step-by-Step Instructions
Follow these steps in order:
Step 1: Lift and Support the Rear of the Truck
- Use the floor jack rated 3-ton minimum under the rear axle center section to lift the rear of your 1500.
- Place jack stands rated 3-ton minimum under the rear frame rails.
- Slowly lower the truck onto the jack stands using the floor jack rated 3-ton minimum.
- Keep the floor jack lightly touching the rear axle. This supports the axle while the shocks are removed.
- Shake gently to confirm stability.
Step 2: Support the Rear Axle
- Use the floor jack rated 3-ton minimum to slightly raise the rear axle until the shocks are not stretched.
- Do not lift the truck off the jack stands.
- This removes tension from the shock bolts and makes them easier to remove.
Step 3: Remove the Lower Shock Bolt
- Put on safety glasses and mechanic gloves.
- Use a 21mm socket with a 1/2-inch drive breaker bar to loosen the lower shock bolt.
- Hold the nut with a 21mm wrench if it spins.
- Remove the lower bolt and nut using the 21mm socket, 21mm wrench, and 1/2-inch drive ratchet.
- If the bolt sticks, tap it out gently with a rubber mallet.
Step 4: Remove the Upper Shock Bolt
- Use an 18mm socket with a 1/2-inch drive breaker bar to loosen the upper shock bolt.
- Hold the nut with an 18mm wrench if needed.
- Remove the upper bolt using the 18mm socket, 18mm wrench, and 1/2-inch drive ratchet.
- Pull the shock absorber out by hand.
- Note the mounting direction before removal.
Step 5: Install the New Rear Shock
- Position the new rear shock absorber the same way the old one came out.
- Start the upper bolt by hand first. This prevents cross-threading, which means damaging the threads by starting the bolt crooked.
- Install the lower bolt by hand.
- If the lower holes do not line up, use the floor jack rated 3-ton minimum to gently raise or lower the axle until the bolt slides through.
Step 6: Tighten the Shock Bolts
- Use the 18mm socket, 18mm wrench, and torque wrench rated to 150 ft-lbs on the upper shock bolt.
- Torque upper rear shock bolt to 100 Nm (74 ft-lbs).
- Use the 21mm socket, 21mm wrench, and torque wrench rated to 150 ft-lbs on the lower shock bolt.
- Torque lower rear shock bolt to 135 Nm (100 ft-lbs).
Step 7: Repeat on the Other Side
- Move to the opposite rear shock absorber.
- Use the same 21mm socket, 21mm wrench, 18mm socket, 18mm wrench, 1/2-inch drive ratchet, and torque wrench rated to 150 ft-lbs.
- Replace the second shock the same way.
- Torque upper rear shock bolt to 100 Nm (74 ft-lbs).
- Torque lower rear shock bolt to 135 Nm (100 ft-lbs).
Step 8: Lower the Truck
- Use the floor jack rated 3-ton minimum to slightly raise the rear of your 1500 off the jack stands.
- Remove the jack stands rated 3-ton minimum.
- Lower the truck slowly with the floor jack rated 3-ton minimum.
- Remove the wheel chocks.
✅ After Repair
- ✅ Bounce the rear bumper by hand. The truck should settle quickly without repeated bouncing.
- ✅ Test drive slowly over a few bumps and listen for clunks.
- ✅ Recheck the upper and lower shock bolts after the test drive using the torque wrench rated to 150 ft-lbs.
- ✅ If the rear still bounces, sags, or clunks, inspect rear springs, sway bar links, control arms, and shock mounts.
- ✅ No scan tool, programming, or infotainment reset is required for rear shock replacement.
💰 DIY vs Shop Cost
Shop Cost: $300-$650 (parts + labor)
DIY Cost: $90-$250 (parts only)
You Save: $210-$400 by doing it yourself!
Shop labor rates vary but typically run $100-$150/hour. This repair takes a shop approximately 1-2 hours.
🎯 Ready to get started?
HowToo makes it easy: same-day/2-day shipping on every part, plus all the tools and specialty tools you need! Check out the parts and tools sections below to add everything to your cart.