
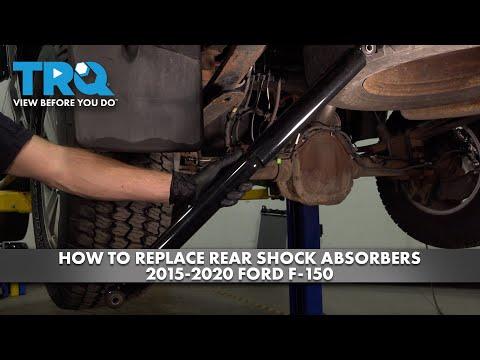







How to Replace Rear Shock Absorbers on a 2009-2025 Ford F-150 (Trim: Lariat)
Step-by-step DIY guide with tools, parts, torque specs, safety tips, and cost savings for 2009, 2010, 2011, 2012, 2013, 2014
How to Replace Rear Shock Absorbers on a 2009-2025 Ford F-150 (Trim: Lariat)
Step-by-step DIY guide with tools, parts, torque specs, safety tips, and cost savings for 2009, 2010, 2011, 2012, 2013, 2014


🔧 F-150 - Rear Shock Absorber Replacement
Assumption: This guide covers the rear shock absorbers on your F-150. The front uses strut-style coilover assemblies, which are a different repair.
Rear shocks control bounce and help keep the tires planted on the road. Replace them in pairs so the truck handles evenly side-to-side.
Difficulty Level: Beginner | Estimated Time: 1-2 hours
⚠️ Safety & Precautions
- ⚠️ Work on a flat, solid surface only.
- ⚠️ Use jack stands before getting under the truck. Never rely on a floor jack alone.
- ⚠️ The shock is not the main spring support on the rear of your F-150, but it can still be under slight tension.
- ⚠️ Replace both rear shocks together to keep braking, handling, and ride feel balanced.
- ⚠️ Battery disconnect is not required for this repair.
🔧 Required Tools
You'll need the following tools for this repair:
- Floor jack rated 3-ton minimum
- Jack stands rated 3-ton minimum
- Wheel chocks
- Safety glasses
- Mechanic gloves
- 21mm socket
- 18mm socket
- 18mm combination wrench
- 1/2-inch drive ratchet
- 1/2-inch drive breaker bar
- 1/2-inch drive torque wrench rated to 150 ft-lbs
- Penetrating oil
- Wire brush
- Rubber mallet
🔩 Required Parts
HowToo sells all the parts you need for this repair:
- Rear shock absorbers - Replace in pairs - Qty: 2
- Rear shock mounting hardware kit - Qty: 1
📋 Before You Begin
- Park your F-150 on level ground.
- Shift to Park and set the parking brake.
- Place wheel chocks in front of and behind the front tires.
- Spray the upper and lower rear shock bolts with penetrating oil and let it soak for 10-15 minutes.
- A torque wrench tightens bolts to the correct force so they are not too loose or over-tightened.
🔨 Step-by-Step Instructions
Follow these steps in order:
Step 1: Lift and support the rear of the truck
- Use the floor jack rated 3-ton minimum under the rear axle housing or approved rear lift point.
- Raise the rear high enough to work safely around the shocks.
- Place jack stands rated 3-ton minimum under the frame rails.
- Lower the truck gently onto the jack stands.
- Keep the floor jack lightly supporting the rear axle so it does not drop when the shock is removed.
- Shake the truck gently to confirm stability.
Step 2: Clean the shock mounting bolts
- Use the wire brush to clean dirt and rust from the upper and lower shock bolts.
- Spray more penetrating oil on the bolt threads if they look rusty.
- Let it soak for a few minutes before loosening the bolts.
Step 3: Support the rear axle
- Use the floor jack rated 3-ton minimum to support the rear axle close to the shock you are replacing.
- Do not lift the truck off the jack stands.
- The goal is only to hold the axle in position and take tension off the shock bolts.
Step 4: Remove the lower shock bolt
- Use the 18mm socket and 1/2-inch drive breaker bar to loosen the lower shock bolt.
- Use the 18mm combination wrench on the nut if the nut spins.
- Remove the lower bolt and nut by hand once loose.
- If the bolt sticks, tap it gently with the rubber mallet.
Step 5: Remove the upper shock bolt
- Use the 18mm socket and 1/2-inch drive breaker bar to loosen the upper shock bolt.
- Use the 18mm combination wrench to hold the nut if needed.
- Remove the upper bolt and nut.
- Pull the old shock absorber out of the mounting brackets.
- Note the direction before removing it.
Step 6: Compare the old and new shock
- Place the old and new rear shock absorbers side by side.
- Check that the length, mounting eyes, bushings, and sleeves match.
- Move the new shock by hand if needed so the mounting holes line up.
- A bushing is the rubber cushion inside the shock mount that reduces noise and vibration.
Step 7: Install the new upper shock mount
- Position the new shock in the upper mount by hand.
- Install the upper bolt and nut from the rear shock mounting hardware kit.
- Use the 18mm socket and 18mm combination wrench to snug the upper bolt.
- Do not fully torque it yet.
Step 8: Install the new lower shock mount
- Use the floor jack rated 3-ton minimum to raise or lower the axle slightly until the lower shock hole lines up.
- Slide the lower bolt through the shock and bracket by hand.
- Install the lower nut.
- Use the 18mm socket and 18mm combination wrench to snug the lower bolt.
- Never force the bolt through crooked.
Step 9: Torque the shock bolts
- Use the 1/2-inch drive torque wrench rated to 150 ft-lbs with the 18mm socket.
- Tighten the upper rear shock bolt to Torque to 90 Nm (66 ft-lbs).
- Tighten the lower rear shock bolt to Torque to 90 Nm (66 ft-lbs).
- If using new aftermarket hardware, follow the hardware manufacturer torque if it differs.
Step 10: Repeat on the opposite side
- Move the floor jack rated 3-ton minimum to support the axle near the other shock.
- Repeat the same removal and installation steps on the other rear shock.
- Use the 1/2-inch drive torque wrench rated to 150 ft-lbs to torque both mounting bolts to 90 Nm (66 ft-lbs).
Step 11: Lower the truck
- Use the floor jack rated 3-ton minimum to slightly lift the rear of the truck off the jack stands.
- Remove the jack stands rated 3-ton minimum.
- Lower the truck slowly to the ground.
- Remove the wheel chocks.
✅ After Repair
- Push down firmly on the rear bumper and release. The truck should rise and settle quickly, not keep bouncing.
- Test drive slowly first. Listen for clunks, rattles, or knocking from the rear.
- After the test drive, visually check both rear shocks to make sure the bushings are seated correctly.
- Recheck the upper and lower shock bolt torque with the 1/2-inch drive torque wrench rated to 150 ft-lbs after 25-50 miles.
- No alignment is normally required after rear shock replacement on your F-150.
💰 DIY vs Shop Cost
Shop Cost: $300-$650 (parts + labor)
DIY Cost: $90-$280 (parts only)
You Save: $210-$370 by doing it yourself!
Shop labor rates vary but typically run $100-$150/hour. This repair takes a shop approximately 1-1.5 hours.
🎯 Ready to get started?
HowToo makes it easy: same-day/2-day shipping on every part, plus all the tools and specialty tools you need! Check out the parts and tools sections below to add everything to your cart.