

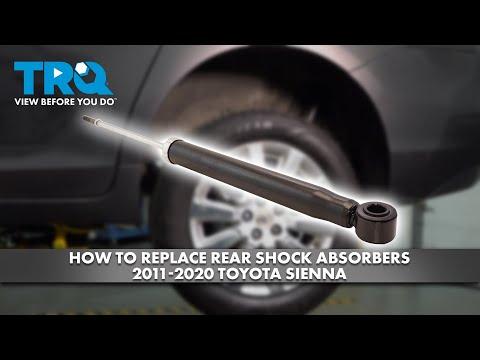






How to Replace Rear Shock Absorbers on a 2007-2020 Toyota Sienna (Trim: Limited | Engine: V6 3.5L)
Step-by-step DIY instructions with required tools, parts, torque specs, and safety tips for 2007, 2008, 2009, 2010
How to Replace Rear Shock Absorbers on a 2007-2020 Toyota Sienna (Trim: Limited | Engine: V6 3.5L)
Step-by-step DIY instructions with required tools, parts, torque specs, and safety tips for 2007, 2008, 2009, 2010


🔧 Sienna - Rear Shock Absorber Replacement
This procedure replaces the two rear shock absorbers on your Sienna. The front suspension uses complete strut assemblies, so the steps below apply only to the separate rear shocks.
Assumption: “Shock absorbers” means the rear shocks, replaced as a pair.
Difficulty Level: Intermediate | Estimated Time: 1.5-2.5 hours
⚠️ Safety & Precautions
- ⚠️ Work on level, solid ground and support your Sienna with jack stands. Never work beneath a vehicle supported only by a floor jack.
- ⚠️ Chock both front wheels and keep the transmission in Park.
- ⚠️ Support the rear suspension before removing a shock. The shock helps limit downward suspension travel.
- ⚠️ Do not place the floor jack beneath the spare tire, exhaust, or thin sheet metal.
- ⚠️ Do not grip or scratch the polished shock piston rod.
- ⚠️ Do not use an impact wrench on the shock’s upper retaining nut.
- Battery disconnection is not required.
🔧 Required Tools
You'll need the following tools for this repair:
- 3-ton floor jack
- 3-ton jack stands
- Wheel chocks
- 21mm deep socket
- 19mm deep socket
- 19mm combination wrench
- 17mm deep socket
- 6mm hex-bit socket
- 3/8-inch-drive ratchet
- 1/2-inch-drive breaker bar
- 1/2-inch-drive torque wrench rated 20-150 ft-lbs
- Plastic interior trim-removal tool set
- Small flat-blade screwdriver
- Penetrating oil
- Mechanic’s gloves
- Safety glasses
🔩 Required Parts
HowToo sells all the parts you need for this repair:
- Rear shock absorbers - Qty: 2 - Replace in pairs
- Rear shock upper cushions and retainers - Qty: 2 sets
- Rear shock self-locking upper nuts - Qty: 2
- Rear shock lower mounting nuts - Qty: 2
📋 Before You Begin
- Park your Sienna on level pavement. Select Park, switch off the engine, and chock both front wheels.
- Empty the rear cargo area and move the third-row seats as needed to reach the small upper-shock access covers in the rear side trim.
- A torque wrench tightens a fastener to an exact measured force. Use it for all listed final-tightening specifications.
- Apply penetrating oil to the lower shock fasteners before lifting the vehicle if corrosion is present.
- No infotainment service mode, scan tool, electronic parking-brake procedure, alignment, or battery registration is required.
🔨 Step-by-Step Instructions
Follow these steps in order:
Step 1: Loosen the Rear Wheel Nuts
- Use the 21mm deep socket and 1/2-inch-drive breaker bar to loosen each rear wheel nut about one-quarter turn.
- Do not remove the nuts while the tires are still on the ground.
Step 2: Raise and Support the Rear
- Position the 3-ton floor jack beneath the center rear suspension support point and raise your Sienna.
- Place the 3-ton jack stands beneath the reinforced left and right rear body support points.
- Lower the body securely onto the stands. Leave the 3-ton floor jack lightly supporting the rear axle beam.
- Gently push the body to confirm it is stable before working underneath.
Step 3: Remove Both Rear Wheels
- Use the 21mm deep socket and 3/8-inch-drive ratchet to remove the wheel nuts.
- Remove both rear wheels and place them flat away from your work area.
Step 4: Open the Upper-Shock Access Covers
- Inside the rear cargo area, use the plastic interior trim-removal tool set to release the small shock-access cover on each rear side trim panel.
- Use the small flat-blade screwdriver only where necessary to lift a clip. Protect the surrounding plastic.
- Expose the upper shock retaining nut, washer, and rubber cushion.
- Photograph the cushion and washer order first.
Step 5: Support the Suspension
- Position the 3-ton floor jack beneath the rear axle beam near the shock being replaced.
- Raise the jack only until it supports the beam. Do not lift the body off the jack stands.
Step 6: Disconnect the Shock’s Lower Mount
- Use the 19mm combination wrench to hold the lower fastener while loosening the opposite side with the 19mm deep socket and 1/2-inch-drive breaker bar.
- Remove the lower nut and bolt. Adjust the 3-ton floor jack slightly if the bolt is under tension.
- Do not force the bolt out with your fingers between the shock and bracket.
Step 7: Remove the Upper Nut and Old Shock
- Insert the 6mm hex-bit socket into the piston-rod end to prevent it from turning.
- Use the 17mm deep socket and 3/8-inch-drive ratchet to remove the upper retaining nut while holding the rod stationary.
- Remove the upper washer and rubber cushion, then guide the old shock downward and out.
- Note the exact direction of every washer, retainer, sleeve, and cushion.
Step 8: Prepare the New Shock
- Use gloved hands to slowly compress and extend the new shock three to five times while keeping it upright.
- Compare its mounting ends, length, bushings, and supplied hardware with the removed shock.
- Install the lower cushion and retainer in the same orientation as the original components.
- Do not use any tool on the polished piston rod.
Step 9: Install the Shock’s Upper Mount
- Guide the new shock upward through the body mounting hole.
- From inside, install the upper cushion, retainer, washer, and new self-locking nut in their original order.
- Use the 6mm hex-bit socket to hold the piston rod and the 17mm deep socket with the 1/2-inch-drive torque wrench to tighten the upper nut to 25 Nm (18 ft-lbs).
- Stop tightening when the torque specification is reached. Do not crush the rubber cushions flat.
Step 10: Attach the Lower Mount
- Use the 3-ton floor jack to align the shock’s lower bushing with its mounting bracket.
- Insert the lower bolt in its original direction and install the new nut by hand.
- Use the jack to place the rear suspension close to normal ride height before final tightening. This prevents the rubber bushing from being twisted at rest.
- Hold one side with the 19mm combination wrench. Use the 19mm deep socket and 1/2-inch-drive torque wrench to tighten the lower fastener to 140 Nm (103 ft-lbs).
Step 11: Replace the Opposite Shock
- Repeat Steps 5 through 10 on the other side using the same listed tools.
- Keep the 3-ton floor jack beneath the side being serviced so the rear suspension remains controlled.
Step 12: Reinstall the Access Covers and Wheels
- Use the plastic interior trim-removal tool set to seat the rear trim and access covers without pinching their clips.
- Install both wheels and start all wheel nuts by hand.
- Use the 21mm deep socket and 3/8-inch-drive ratchet to snug the nuts in a crisscross pattern.
Step 13: Lower the Vehicle and Torque the Wheels
- Use the 3-ton floor jack to raise the body slightly, remove the 3-ton jack stands, and lower your Sienna fully.
- Use the 21mm deep socket and 1/2-inch-drive torque wrench to tighten the wheel nuts in a crisscross pattern to 103 Nm (76 ft-lbs).
✅ After Repair
- ✅ Check that both upper mounts are assembled identically and all access covers are secure.
- Push down firmly on each rear corner. The body should rise and settle without repeated bouncing or clunking.
- Drive slowly over a smooth road, then a small bump. Listen for knocking and confirm that the rear feels controlled.
- Recheck the lower mounts for looseness or shifted bushings after the road test.
- Recheck wheel-nut torque to 103 Nm (76 ft-lbs) after approximately 80-160 km.
- A wheel alignment is normally unnecessary because replacing the rear shocks does not change alignment adjustments.
💰 DIY vs Shop Cost
Shop Cost: ₹18,000-₹35,000 (parts + labor)
DIY Cost: ₹9,000-₹22,000 (parts only)
You Save: ₹9,000-₹13,000 by doing it yourself!
Local labor rates vary by parts brand and workshop. This repair takes a shop approximately 1-2 hours.
🎯 Ready to get started?
HowToo makes it easy: same-day/2-day shipping on every part, plus all the tools and specialty tools you need! Check out the parts and tools sections below to add everything to your cart.