








How to Replace Rear Quarter Window Latch on a 2016-2023 Toyota Tacoma
Step-by-step guide with tools, parts, torque specs, alignment, and leak checks for 2016, 2017, 2018, 2019, 2020, 2021, 2022, 2023
How to Replace Rear Quarter Window Latch on a 2016-2023 Toyota Tacoma
Step-by-step guide with tools, parts, torque specs, alignment, and leak checks for 2016, 2017, 2018, 2019, 2020, 2021, 2022, 2023


🔧 Tacoma - Rear Window Regulator Replacement
Your Tacoma is an Access Cab, so the rear side windows do not use the same power window regulator setup as the front doors. The rear quarter windows use a pop-out latch-style assembly; if the glass will not open, close, or stay latched, the repair is usually replacing the rear quarter window latch assembly, hinge hardware, or the complete quarter window glass assembly.
Difficulty Level: Beginner-Intermediate | Estimated Time: 1-2 hours per side
⚠️ Safety & Precautions
- ⚠️ Wear safety glasses and cut-resistant gloves when working around glass.
- ⚠️ Support the rear quarter glass by hand before removing latch or hinge hardware.
- ⚠️ Do not pry directly against the glass edge. Tempered glass can shatter suddenly.
- ⚠️ Protect painted surfaces with painter’s tape before using trim tools.
- ⚠️ Battery disconnect is not normally required for this latch-style rear quarter window repair.
🔧 Required Tools
You'll need the following tools for this repair:
- 10mm socket
- Ratchet handle
- Phillips #2 screwdriver
- Trim removal tool set
- Small flathead screwdriver
- Plastic pick tool
- Needle-nose pliers
- Painter’s tape
- Suction cup glass holder
- Torque wrench inch-pound range
- Work light
- Cut-resistant gloves
- Safety glasses
🔩 Required Parts
HowToo sells all the parts you need for this repair:
- Rear quarter window latch assembly - Driver side: Qty: 1
- Rear quarter window latch assembly - Passenger side: Qty: 1
- Rear quarter window hinge hardware - Qty: As needed
- Rear quarter window glass assembly - Qty: As needed
- Interior trim panel clips - Qty: As needed
- Foam sealing tape - Qty: 1
📋 Before You Begin
- 🚗 Park your Tacoma on level ground and set the parking brake.
- 🧼 Clean the inside glass and surrounding trim so tape and suction cups stick well.
- 🧰 A trim removal tool is a plastic pry tool that removes panels without scratching them.
- 🧰 A suction cup glass holder gives you a safe handle on the glass.
- 📸 Take photos of the latch, hinge, and trim before removing anything.
- 🪟 Work on one side at a time so you can compare the other side if needed.
🔨 Step-by-Step Instructions
Follow these steps in order:
Step 1: Open the Rear Access Door
- Open the front door fully by hand.
- Open the rear access door fully by hand.
- Use painter’s tape along nearby painted edges if you will be using trim tools close to the body.
Step 2: Remove Small Interior Trim Covers
- Use a plastic pick tool to lift any small screw covers near the rear quarter trim panel.
- Use a small flathead screwdriver only if needed, with painter’s tape wrapped around the tip.
- Set the covers aside in order.
- Tip: Take photos before pulling clips.
Step 3: Remove Rear Quarter Trim Fasteners
- Use a Phillips #2 screwdriver to remove visible trim screws.
- Use a 10mm socket and ratchet handle to remove any 10mm trim bolts if equipped.
- Keep each fastener grouped by location so reassembly is easier.
Step 4: Release the Rear Quarter Trim Panel
- Use a trim removal tool at the lower edge of the rear quarter trim panel.
- Pry outward gently until the first clip releases.
- Continue around the panel with the trim removal tool until the clips are free.
- Pull the panel away only far enough to access the latch and hinge area.
- Do not bend the panel sharply; it can crease or crack.
Step 5: Support the Quarter Glass
- Attach the suction cup glass holder to the rear quarter glass.
- Use painter’s tape to secure the glass to the body opening from the outside.
- Keep one hand on the glass when latch hardware is being removed.
- The tape is backup support, not the only support.
Step 6: Inspect the Latch and Hinges
- Use a work light to inspect the latch assembly and hinge points.
- Look for cracked plastic, loose pivots, bent brackets, missing screws, or torn seals.
- If only the latch is broken, replace the latch assembly.
- If the hinge side is damaged or bonded hardware has separated from the glass, replace the complete rear quarter window glass assembly.
Step 7: Remove the Latch Assembly
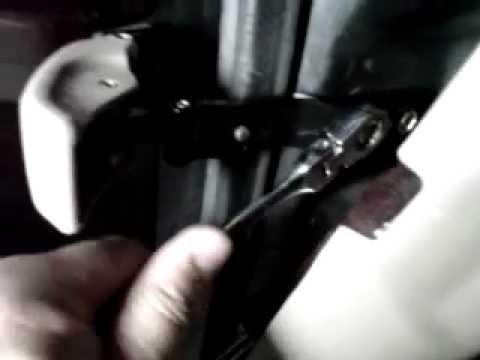
- Use a Phillips #2 screwdriver or 10mm socket, depending on the installed fastener style, to remove the latch mounting fasteners.
- Support the latch by hand as the last fastener comes out.
- Use needle-nose pliers only if a small retaining clip must be removed from the latch pivot.
- Remove the latch assembly from the glass and body bracket.
Step 8: Install the New Latch Assembly
- Position the new rear quarter window latch assembly by hand.
- Start all screws or bolts by hand before tightening.
- Use a Phillips #2 screwdriver or 10mm socket to snug the latch fasteners evenly.
- Use a torque wrench with the correct bit or 10mm socket if bolts are used.
- Torque small latch bolts to 5 Nm (44 in-lbs)
- Do not overtighten screws into plastic trim or latch parts.
Step 9: Replace Hinge Hardware if Needed
- Keep the glass supported with the suction cup glass holder and painter’s tape.
- Use a Phillips #2 screwdriver or 10mm socket to remove hinge fasteners one hinge at a time.
- Install the replacement hinge hardware by hand.
- Use a Phillips #2 screwdriver or 10mm socket to tighten the hinge fasteners evenly.
- Torque small hinge bolts to 5 Nm (44 in-lbs)
- If the hinge is bonded to the glass and has detached, install a complete rear quarter window glass assembly instead.
Step 10: Check Glass Alignment
- Close the quarter window by hand using the latch.
- Watch the seal around the glass as it closes.
- The glass should sit evenly against the rubber seal.
- If it sits high, low, or loose, use a Phillips #2 screwdriver or 10mm socket to loosen the latch slightly and adjust it.
- Retighten after adjustment.
Step 11: Check for Water Seal Contact
- Use a work light to inspect the rubber seal around the glass.
- Check that the seal is not folded, pinched, or torn.
- Install foam sealing tape only where the original seal or trim foam was damaged or missing.
- Do not add thick foam where it prevents the glass from latching fully.
Step 12: Reinstall the Rear Quarter Trim Panel
- Line up the rear quarter trim panel clips by hand.
- Press the trim panel straight into place with your palm until the clips snap in.
- Use a Phillips #2 screwdriver to reinstall trim screws.
- Use a 10mm socket and ratchet handle to reinstall any 10mm trim bolts.
- Snap small trim covers back in by hand.
Step 13: Final Latch Test
- Open and close the rear quarter window by hand several times.
- The latch should lock firmly without forcing it.
- The glass should not rattle when you tap the trim lightly by hand.
- Repeat the same procedure on the other side if replacing both rear quarter window latch assemblies.
✅ After Repair
- ✅ Drive slowly over a rough surface and listen for rattles from the rear quarter window area.
- ✅ Spray water over the outside of the rear quarter window and check inside for leaks.
- ✅ Confirm the latch opens smoothly, closes firmly, and does not pop open.
- ✅ Recheck latch fasteners after a few days if you hear new noise.
💰 DIY vs Shop Cost
Shop Cost: $250-$700 per side (parts + labor)
DIY Cost: $40-$350 per side (parts only)
You Save: $210-$350 per side by doing it yourself!
Shop labor rates vary but typically run $100-$150/hour. This repair takes a shop approximately 1-2 hours per side.
🎯 Ready to get started?
HowToo makes it easy: same-day/2-day shipping on every part, plus all the tools and specialty tools you need! Check out the parts and tools sections below to add everything to your cart.