

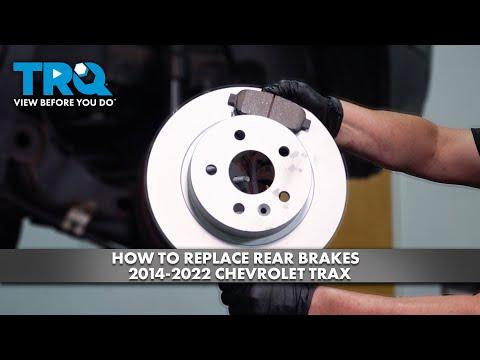







How to Replace Rear Brake Shoes on a 2015-2020 Chevrolet Trax
Step-by-step drum brake guide with tools, parts, adjustment, torque specs, and safety tips for 2015, 2016, 2017, 2018, 2019, 2020
How to Replace Rear Brake Shoes on a 2015-2020 Chevrolet Trax
Step-by-step drum brake guide with tools, parts, adjustment, torque specs, and safety tips for 2015, 2016, 2017, 2018, 2019, 2020


🔧 Trax - Rear Brake Shoe Replacement
Your Trax uses rear drum brakes, so the friction parts are called brake shoes, not pads. Replace the shoes on both rear wheels together and install new retaining springs and hardware.
Difficulty Level: Intermediate | Estimated Time: 2.5-4 hours
⚠️ Safety & Precautions
- ⚠️ Work on level, solid ground and support your Trax with jack stands. Never rely on a floor jack alone.
- ⚠️ Release the parking brake before removing the drums. Chock both front wheels so the vehicle cannot move.
- ⚠️ Brake dust is harmful. Do not use compressed air or sweep it dry; wet it with brake cleaner.
- ⚠️ Service one side at a time. The assembled side provides a reference for spring and shoe placement.
- ⚠️ Do not press the brake pedal while either drum is removed.
- ⚠️ Brake springs store energy. Wear safety glasses and keep your face away from the spring path.
- 🔋 Battery disconnection is not required.
🔧 Required Tools
You'll need the following tools for this repair:
- Hydraulic floor jack rated 2-ton minimum
- Jack stands rated 2-ton minimum
- Wheel chocks
- 19mm impact-rated socket
- 1/2-inch breaker bar
- 1/2-inch drive torque wrench rated to 140 Nm
- Torx T30 socket
- 3/8-inch ratchet
- Flat-blade screwdriver set
- Needle-nose locking pliers
- Drum-brake spring pliers (specialty)
- Drum-brake hold-down spring tool (specialty)
- Brake adjusting spoon (specialty)
- Brake drum inside-diameter gauge (specialty)
- Digital caliper accurate to 0.1mm
- Small brass wire brush
- Drain pan
- Nitrile mechanic gloves
- Safety glasses
- Disposable shop towels
🔩 Required Parts
HowToo sells all the parts you need for this repair:
- Rear drum-brake shoe set - Qty: 1 set for both rear wheels
- Rear drum-brake hardware kit - Qty: 1 set for both rear wheels
- Rear brake drums - Qty: 2 if worn, cracked, heat-damaged, or oversized; replace in pairs
- High-temperature ceramic brake lubricant - Qty: 1
- Non-chlorinated brake cleaner - Qty: 2 cans
📋 Before You Begin
- 📍 Park your Trax on level pavement. Shift into Park, switch off the ignition, and chock both sides of both front wheels.
- 🅿️ Fully release the parking brake. The drums may not come off if it remains applied.
- 📱 No infotainment service mode or scan-tool command is required because the rear parking brake is mechanically operated.
- 🔎 Open the replacement shoe and hardware packages before lifting the vehicle. Compare the new components with the originals during disassembly.
- 🧰 A brake adjusting spoon is a thin tool used to turn the drum-brake adjuster through its access opening.
🔨 Step-by-Step Instructions
Follow these steps in order:
Step 1: Loosen the Rear Wheel Nuts
- Place the wheel chocks firmly against the front tires.
- With the rear wheels still on the ground, use the 19mm socket and 1/2-inch breaker bar to loosen each rear wheel nut about one-half turn.
- Do not remove the nuts yet.
Step 2: Raise and Support the Rear
- Use the hydraulic floor jack at an approved rear lifting point shown in the owner’s manual.
- Place the jack stands beneath the reinforced rear support points. Lower your Trax carefully onto both stands.
- Give the body a gentle push to confirm it is stable before working.
Step 3: Remove the Rear Wheels
- Use the 19mm socket and 1/2-inch breaker bar to remove the wheel nuts.
- Remove both rear wheels and place them flat away from the work area.
Step 4: Remove the First Brake Drum
- Confirm that the parking brake is fully released.
- If a drum retaining screw is fitted, remove it with the Torx T30 socket and 3/8-inch ratchet.
- Pull the drum straight off by hand.
- If the drum catches on the shoes, remove the rear access plug with a flat-blade screwdriver. Use the brake adjusting spoon to retract the adjuster while moving its locking lever aside with a flat-blade screwdriver.
- Do not force the drum against the shoes or parking-brake cable.
- Photograph the springs before disassembly.
Step 5: Inspect the Drum and Check for Leaks
- Place the drum over the drain pan and clean its interior with non-chlorinated brake cleaner and disposable shop towels.
- Use the brake drum inside-diameter gauge to measure the drum. Replace both drums if either exceeds the maximum diameter cast or stamped into the drum.
- Replace both drums if either friction surface is cracked, deeply scored, heavily rusted, or blue from overheating.
- Inspect the wheel-cylinder rubber boots at the top of the backing plate. Any brake-fluid wetness means the wheel cylinder must be repaired before continuing.
- Use the digital caliper to compare shoe lining thickness. Replace the set if a lining is near 1.0mm, cracked, contaminated, or separating from its metal shoe.
Step 6: Remove the Return Springs
- Use the drum-brake spring pliers to unhook the upper and lower return springs carefully.
- Lay each removed spring on a clean shop towel in its original orientation.
- Use safety glasses throughout this step because the springs can release suddenly.
Step 7: Remove the Hold-Down Hardware and Shoes
- Use the drum-brake hold-down spring tool to press and rotate each retaining cup until it releases from its pin.
- Remove the cups, springs, and pins while supporting the shoes by hand.
- Spread the shoes slightly and remove the adjuster assembly and any connecting spring.
- Use needle-nose locking pliers to release the parking-brake cable spring, then disconnect the cable end from the parking-brake lever.
- Remove both shoes and keep track of the parking-brake lever and adjuster orientation.
- Do not operate or pull the exposed wheel-cylinder pistons.
Step 8: Clean and Lubricate the Backing Plate
- Place the drain pan below the brake and spray the backing plate with non-chlorinated brake cleaner.
- Wipe away residue with disposable shop towels. Do not inhale the mist.
- Use the small brass wire brush to clean the raised shoe-contact pads on the backing plate.
- Apply a very thin film of high-temperature ceramic brake lubricant to those contact pads using a clean shop towel.
- Keep lubricant away from the shoe linings, drum surface, wheel-cylinder boots, and adjuster teeth.
Step 9: Prepare the Adjuster
- Use disposable shop towels and the small brass wire brush to clean the adjuster threads.
- Apply a tiny amount of high-temperature ceramic brake lubricant to the adjuster threads, then turn it by hand to verify free movement.
- Return the adjuster to its fully shortened position.
- Match its orientation to the photograph and the untouched opposite brake. Left-side and right-side adjusters must not be interchanged.
Step 10: Install the New Shoes
- Transfer the parking-brake lever only if it is not supplied with the new shoes. Use needle-nose locking pliers to reconnect its retaining hardware exactly as removed.
- Use needle-nose locking pliers to connect the parking-brake cable end to the lever.
- Position the new shoes against the wheel-cylinder ends and lower anchor.
- Install the hold-down pins, new springs, and cups with the drum-brake hold-down spring tool.
- Install the cleaned adjuster in the same direction as the original.
- Use the drum-brake spring pliers to install the new lower and upper return springs.
- Confirm every shoe end is seated correctly against the wheel cylinder, anchor, and adjuster.
- Compare everything with the untouched side.
Step 11: Set the Initial Shoe Adjustment
- Fit the cleaned drum over the shoes by hand.
- If the drum will not fit, remove it and shorten the adjuster using the brake adjusting spoon.
- If the drum spins with no contact, remove it and lengthen the adjuster a few clicks using the brake adjusting spoon.
- Repeat until the drum slides on normally and produces a light, even rubbing sound when turned by hand.
- If fitted, install the drum retaining screw using the Torx T30 socket and 3/8-inch ratchet. Tighten it only snugly; it positions the drum and is not a structural fastener.
- Reinstall the rubber adjuster-access plug with a flat-blade screwdriver.
Step 12: Replace the Shoes on the Opposite Side
- Repeat Steps 4 through 11 on the opposite rear brake using the same listed tools.
- Use the completed first side only as a reference. Make sure the opposite-side adjuster remains in its original mirrored orientation.
- Replace shoes and drums in axle pairs, never on only one rear wheel.
Step 13: Reinstall the Wheels
- Install each wheel and start every wheel nut by hand to prevent crossed threads.
- Use the 19mm socket and 1/2-inch breaker bar to tighten the nuts lightly in a crisscross pattern.
- Use the hydraulic floor jack to raise your Trax slightly, remove the jack stands, and lower the tires to the ground.
- Use the 19mm socket and 1/2-inch torque wrench to tighten the wheel nuts in a crisscross pattern: Torque to 140 Nm (103 ft-lbs).
Step 14: Seat and Adjust the Shoes
- Before moving the vehicle, press and release the brake pedal 15-20 times until it feels firm.
- Apply and release the parking brake 10-15 times to help the automatic adjusters set the shoe clearance.
- If the pedal remains soft or travels unusually far, do not drive. Recheck the shoe, spring, and adjuster installation.
✅ After Repair
- ✅ Check that the brake pedal is firm before selecting a gear.
- 🔎 Confirm the parking brake holds your Trax on a gentle slope and releases without either rear wheel dragging.
- 🚗 Perform a low-speed test in a safe area. Brake gently several times and listen for scraping, knocking, or spring movement.
- 🌡️ After the test, carefully check near each rear wheel for excessive heat. Do not touch the drum directly.
- 🛑 Avoid hard stops for the first 200 miles unless required for safety. This lets the new shoes wear evenly against the drums.
- 🔧 Recheck wheel-nut torque after approximately 50 miles: Torque to 140 Nm (103 ft-lbs).
💰 DIY vs Shop Cost
Shop Cost: ₹18,000-₹35,000 (parts + labor)
DIY Cost: ₹5,000-₹14,000 (parts only)
You Save: ₹13,000-₹21,000 by doing it yourself!
Local labor rates and imported Trax parts availability vary. This repair takes a shop approximately 2-3 hours.
🎯 Ready to get started?
HowToo makes it easy: same-day/2-day shipping on every part, plus all the tools and specialty tools you need! Check out the parts and tools sections below to add everything to your cart.