

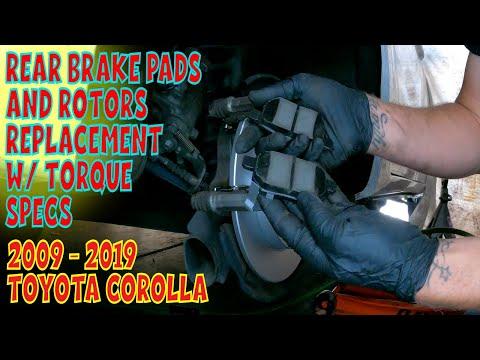







How to Replace Rear Brake Shoes and Drums on a 2009-2019 Toyota Corolla (Body: Sedan)
Step-by-step rear drum brake guide with tools, parts, adjustment tips, and torque specs for 2009, 2010, 2011, 2012, 2013, 2014, 2015, 2016, 2017, 2018, 2019
How to Replace Rear Brake Shoes and Drums on a 2009-2019 Toyota Corolla (Body: Sedan)
Step-by-step rear drum brake guide with tools, parts, adjustment tips, and torque specs for 2009, 2010, 2011, 2012, 2013, 2014, 2015, 2016, 2017, 2018, 2019


🔧 Corolla - Rear Brake Shoe & Drum Replacement
Your Corolla LE uses rear drum brakes, not rear brake rotors. That means the rear friction parts are brake shoes and the round outer braking surface is the brake drum.
This repair replaces the rear brake shoes and drums, then adjusts the parking brake so the pedal feel and stopping performance are correct.
Difficulty Level: Intermediate | Estimated Time: 2-3 hours
⚠️ Safety & Precautions
- ⚠️ Work on a flat, solid surface only. Never rely on a jack alone.
- ⚠️ Use jack stands; they are safety supports that hold the vehicle after lifting.
- ⚠️ Brake dust can be harmful. Do not blow it with compressed air.
- ⚠️ Wear safety glasses and nitrile gloves.
- ⚠️ Do one side at a time so the other side can be used as a reference.
- ⚠️ Do not press the brake pedal while the drums are removed.
- ⚠️ Battery disconnect is not required for this repair.
🔧 Required Tools
You'll need the following tools for this repair:
- 21mm lug nut socket
- 1/2-inch drive breaker bar
- 1/2-inch drive torque wrench
- Floor jack (rated 2-ton minimum)
- Jack stands (rated 2-ton minimum)
- Wheel chocks
- Flat-blade screwdriver
- Needle-nose pliers
- Brake spring pliers (specialty)
- Brake hold-down spring tool (specialty)
- Brake adjustment spoon (specialty)
- Rubber mallet
- Brake cleaner spray
- Shop towels
- Anti-seize brush
- Nitrile gloves
- Safety glasses
- Dust mask
🔩 Required Parts
HowToo sells all the parts you need for this repair:
- Rear brake shoe set - Qty: 1
- Rear brake drums - Replace in pairs - Qty: 2
- Rear drum brake hardware kit - Qty: 1
- High-temperature brake grease - Qty: 1
- Anti-seize compound - Qty: 1
📋 Before You Begin
- Park your Corolla on level ground.
- Put the transmission in Park.
- Release the parking brake fully. The rear drums will not come off easily if the parking brake is applied.
- Place wheel chocks in front of the front wheels.
- Loosen the rear lug nuts slightly before lifting the vehicle.
- Keep the left and right brake parts separated. They can look similar but may not install the same way.
🔨 Step-by-Step Instructions
Follow these steps in order:
Step 1: Loosen the Rear Wheel Lug Nuts
- Use the 21mm lug nut socket and 1/2-inch drive breaker bar to loosen each rear lug nut about half a turn.
- Do not remove the lug nuts yet.
- Tip: Loosen before lifting.
Step 2: Lift and Support the Rear of the Vehicle
- Use the floor jack to lift the rear of your Corolla at the rear center jacking point.
- Place jack stands under the rear side pinch weld lift points.
- Lower the vehicle gently onto the jack stands.
- Use the floor jack only as backup support. Do not work under a vehicle held only by a jack.
Step 3: Remove the Rear Wheels
- Use the 21mm lug nut socket to remove the loosened lug nuts.
- Remove both rear wheels and set them flat on the ground.
Step 4: Remove the Brake Drum
- Make sure the parking brake is fully released.
- Pull the drum straight off by hand.
- If the drum is stuck, tap around the face of the drum with a rubber mallet.
- If the drum still will not come off, use a flat-blade screwdriver through the backing plate access slot to turn the adjuster inward.
- The adjuster is the small star-shaped wheel that moves the shoes closer to or farther from the drum.
- Tip: Do not pry against the backing plate.
Step 5: Inspect Before Taking Parts Apart
- Use your phone to take a clear picture of the brake spring layout.
- Use brake cleaner spray and shop towels to gently clean loose dust.
- Do not use compressed air.
- Work on one side only. Leave the other side assembled as a guide.
Step 6: Remove the Return Springs
- Use brake spring pliers to remove the upper and lower return springs.
- Return springs are the strong springs that pull the brake shoes back after braking.
- Set old springs aside. They should be replaced with the new hardware kit.
Step 7: Remove the Shoe Hold-Down Springs
- Use the brake hold-down spring tool to press and twist each hold-down spring retainer.
- A hold-down spring keeps each brake shoe flat against the backing plate.
- Remove the hold-down springs, pins, and retainers.
- Use needle-nose pliers if needed to guide small pieces out.
Step 8: Remove the Brake Shoes and Adjuster
- Use needle-nose pliers to disconnect the parking brake lever from the rear shoe.
- Remove both brake shoes, the adjuster, and the small connecting parts as an assembly if possible.
- Lay the parts on the ground in the same orientation they came off.
Step 9: Clean and Lubricate the Backing Plate
- Use brake cleaner spray and shop towels to clean the backing plate.
- Use high-temperature brake grease on the small raised pads where the brake shoes touch the backing plate.
- Do not get grease on the brake shoe friction material or inside the drum.
- Tip: Grease only metal contact points.
Step 10: Transfer the Parking Brake Lever
- Use needle-nose pliers to remove the parking brake lever retaining clip from the old shoe if required.
- Install the lever onto the matching new rear shoe.
- Make sure it moves freely after installation.
Step 11: Install the New Brake Shoes
- Position the new brake shoes against the backing plate.
- Use the brake hold-down spring tool to install the new hold-down pins, springs, and retainers.
- Make sure each shoe sits flat and does not lean outward.
Step 12: Install the Adjuster and Springs
- Clean the adjuster with brake cleaner spray.
- Apply a tiny amount of high-temperature brake grease to the adjuster threads.
- Use needle-nose pliers to install the adjuster between the shoes.
- Use brake spring pliers to install the new return springs from the hardware kit.
- Compare the spring layout to the picture you took earlier.
Step 13: Prepare the New Brake Drum
- Use brake cleaner spray and shop towels to clean the inside braking surface of the new drum.
- Clean both sides of the drum because new drums often have protective oil on them.
- Apply a thin film of anti-seize compound to the wheel hub face with an anti-seize brush.
- Do not put anti-seize on the wheel studs.
Step 14: Install and Adjust the Brake Drum
- Slide the new drum over the brake shoes by hand.
- If the drum will not fit, use the brake adjustment spoon to turn the adjuster inward.
- Adjust until the drum slides on and turns with a light, even drag.
- Light drag means the shoes barely touch the drum as it spins.
- Tip: Too tight causes overheating.
Step 15: Repeat on the Other Side
- Use the same tools and method on the other rear brake assembly.
- Use the completed side or your photo as a reference.
- Make both sides feel similar when spinning the drums by hand.
Step 16: Reinstall the Rear Wheels
- Install the rear wheels by hand.
- Thread the lug nuts by hand first to avoid cross-threading.
- Use the 21mm lug nut socket to snug the lug nuts in a star pattern.
Step 17: Lower the Vehicle and Torque the Lug Nuts
- Use the floor jack to lift the rear slightly off the jack stands.
- Remove the jack stands.
- Lower the vehicle fully to the ground.
- Use the 1/2-inch drive torque wrench and 21mm lug nut socket to tighten the lug nuts in a star pattern.
- Torque to 103 Nm (76 ft-lbs)
Step 18: Seat the Rear Brake Shoes
- Press the brake pedal several times with your foot until it feels firm.
- Apply and release the parking brake several times.
- This helps center the shoes and set the adjusters.
✅ After Repair
- ✅ Start your Corolla and press the brake pedal. It should feel firm, not soft or sinking.
- ✅ Test the parking brake on a safe, flat surface before driving normally.
- ✅ Drive slowly in a safe area and make several gentle stops.
- ✅ Avoid hard braking for the first 100-200 miles unless needed for safety.
- ✅ After the first drive, carefully check for burning smell, excessive heat, scraping, or pulling.
- ✅ Recheck rear wheel lug nut torque after 25-50 miles: Torque to 103 Nm (76 ft-lbs).
💰 DIY vs Shop Cost
Shop Cost: $350-$650 (parts + labor)
DIY Cost: $90-$220 (parts only)
You Save: $260-$430 by doing it yourself!
Shop labor rates vary but typically run $100-$150/hour. This repair takes a shop approximately 1.5-2.5 hours.
🎯 Ready to get started?
HowToo makes it easy: same-day/2-day shipping on every part, plus all the tools and specialty tools you need! Check out the parts and tools sections below to add everything to your cart.