

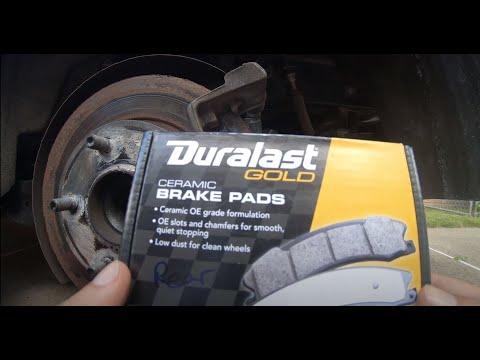





How to Replace Rear Brake Pads & Rotors on a 2018 Mazda 3 (EPB vs Manual)
Step-by-step instructions, required tools/parts, safety tips, and parking brake service-mode guidance for 2017, 2018
How to Replace Rear Brake Pads & Rotors on a 2018 Mazda 3 (EPB vs Manual)
Step-by-step instructions, required tools/parts, safety tips, and parking brake service-mode guidance for 2017, 2018


🔧 Mazda3 - Rear Brake Pads & Rotor Replacement
Rear pads and rotors are replaced together when pads are worn, rotors are thin/grooved, or you feel pulsation/noise. On your Mazda3, the rear calipers may use either an electronic parking brake (EPB) motor or a mechanical parking-brake mechanism—this changes the correct procedure.
Difficulty Level: Intermediate | Estimated Time: 2-4 hours
⚠️ Safety & Precautions
- ⚠️ Support the car with jack stands; never rely on a jack.
- ⚠️ Brakes may contain dust—avoid blowing with air; use brake cleaner.
- ⚠️ If your Mazda3 has Electronic Parking Brake (EPB), do not force the piston in—EPB must be put in service/maintenance mode first.
- ⚠️ Keep brake fluid off paint; it damages paint quickly.
🔧 Required Tools
You'll need the following tools for this repair:
- Floor jack (rated 3-ton minimum)
- Jack stands (rated 3-ton minimum) - Qty: 2
- Wheel chocks - Qty: 2
- Breaker bar 1/2"
- Torque wrench 3/8"
- Torque wrench 1/2"
- Socket set metric 8mm-21mm
- Wrench set metric 8mm-21mm
- Flat trim tool
- Brake caliper hanger hook (specialty)
- Brake piston compressor tool (specialty)
- Brake piston wind-back tool kit (specialty)
- Wire brush
- Micrometer or digital caliper (specialty)
- Brake cleaner spray
- Nitrile gloves
- Safety glasses
🔩 Required Parts
HowToo sells all the parts you need for this repair:
- Rear brake pad set - Qty: 1
- Rear brake rotors - Replace in pairs - Qty: 2
- Rear pad hardware/clip kit - Qty: 1
- Brake caliper slide pin grease (silicone) - Qty: 1
- Brake cleaner - Qty: 1
- Brake fluid (DOT 3) - Qty: 1 quart
📋 Before You Begin
- Park on level ground, put the shifter in P, and chock the front wheels with wheel chocks.
- Loosen rear wheel lug nuts 1/2 turn using a breaker bar and correct socket before lifting.
- Open the hood and remove the brake fluid reservoir cap (leave it sitting on top). This helps fluid return when pistons are pushed back.
- Quick check: Look between the seats/near the console—do you have a parking brake lever or an EPB button/switch?
🔨 Step-by-Step Instructions
Follow these steps in order:
Step 1: Confirm your parking brake type (required)
- If you have an EPB switch/button, you must put the EPB into service/maintenance mode before compressing the rear pistons.
- If you have a manual parking brake lever, the rear piston typically must be rotated while pushing (this is why a wind-back tool exists).
- Reply with: EPB button or manual lever, and I’ll give you the exact Mazda3 procedure with the correct torque specs.
Step 2: Lift the rear and remove wheels
- Use a floor jack (rated 3-ton minimum) to lift the rear at the approved rear jack point, then set the car onto jack stands (rated 3-ton minimum).
- Remove the lug nuts with a socket and take off both rear wheels.
Step 3: Stop here before compressing pistons
- Do not remove calipers or compress pistons yet until we confirm EPB vs manual, because the wrong method can damage the caliper/EPB motor.
- Tell me “EPB button” or “manual lever”.
✅ After Repair
- After installation, pump the brake pedal until it feels firm before moving the car.
- Check brake fluid level and top off with DOT 3 if needed.
- Verify the parking brake applies and releases normally.
- Do a cautious road test and confirm no grinding, pulling, or warning lights.
💰 DIY vs Shop Cost
Shop Cost: $450-$900 (parts + labor)
DIY Cost: $160-$450 (parts only)
You Save: $290-$450 by doing it yourself!
Shop labor rates vary but typically run $100-$150/hour. This repair takes a shop approximately 2-3 hours.
🎯 Ready to get started?
HowToo makes it easy: same-day/2-day shipping on every part, plus all the tools and specialty tools you need! Check out the parts and tools sections below to add everything to your cart.