

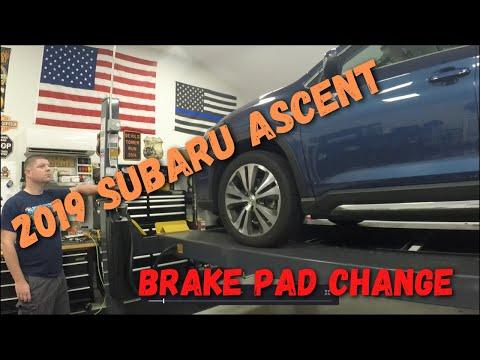






How to Replace Rear Brake Pads on a 2019-2025 Subaru Ascent (Engine: Flat 4 2.4L)
Step-by-step EPB maintenance mode instructions with tools, torque specs, and safety tips for 2019, 2020, 2021, 2022, 2023, 2024, 2025
How to Replace Rear Brake Pads on a 2019-2025 Subaru Ascent (Engine: Flat 4 2.4L)
Step-by-step EPB maintenance mode instructions with tools, torque specs, and safety tips for 2019, 2020, 2021, 2022, 2023, 2024, 2025


🔧 Ascent - Rear Brake Pad Replacement
This is an intermediate brake job because your Ascent uses a caliper-mounted electronic parking brake. Put the parking brake system into brake maintenance mode with a compatible scan tool before compressing either piston. Never force the piston.
Difficulty Level: Intermediate | Estimated Time: 1.5-2.5 hours
⚠️ Safety & Precautions
- ⚠️ Support your Ascent with jack stands. Never work beneath a vehicle supported only by a jack.
- ⚠️ Replace rear pads on both sides as one axle set.
- ⚠️ Release the electronic parking brake before lifting the vehicle.
- ⚠️ Use EPB brake maintenance mode before pushing the caliper pistons inward.
- ⚠️ Don’t press the brake pedal while a caliper is removed.
- ⚠️ Don’t let a caliper hang from its rubber brake hose.
- ⚠️ Brake dust can be harmful. Don’t blow it away with compressed air.
- ⚠️ Battery disconnection isn’t required when a scan tool controls the EPB.
🔧 Required Tools
You'll need the following tools for this repair:
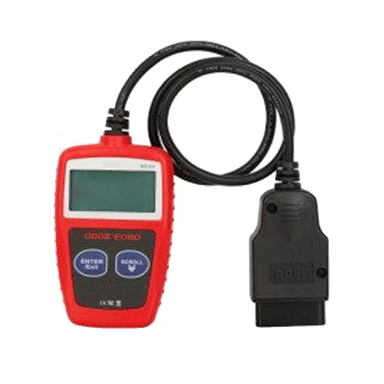
- EPB-capable diagnostic scan tool (specialty)
- Floor jack (rated 3-ton minimum)
- Jack stands (rated 3-ton minimum)
- Wheel chocks
- 19mm deep socket
- 14mm socket
- 3/8-inch drive ratchet
- 1/2-inch drive breaker bar
- 3/8-inch drive torque wrench (10-80 ft-lbs range)
- 1/2-inch drive torque wrench (20-150 ft-lbs range)
- Rear brake piston compression tool (specialty)
- Small flat-blade screwdriver
- Nylon brake cleaning brush
- Caliper hanger hook
- Plastic drain syringe
- Nitrile gloves
- Safety glasses
🔩 Required Parts
HowToo sells all the parts you need for this repair:
- Rear ceramic brake pad set - Qty: 1
- Rear brake pad hardware kit - Qty: 1 if not included with pads
- High-temperature silicone brake lubricant - Qty: 1
- Aerosol brake cleaner - Qty: 1
- DOT 3 brake fluid - Qty: 1 small sealed container if adjustment is needed
Parts note: Replace the rear rotors in pairs if either rotor is below the 15mm service limit, deeply scored, cracked, heavily rusted, or causing pedal pulsation. The matching brake aisles are open in the parts list.
📋 Before You Begin
- 📋 Park on level pavement, place the transmission in Park, release the parking brake, and switch the ignition off.
- 📋 Chock both front wheels securely.
- 📋 Verify that your scan tool specifically supports Subaru electronic parking brake maintenance or pad replacement mode.
- 📋 Check the brake-fluid reservoir. Remove a little fluid with a plastic drain syringe if it is already at the maximum line.
- 📋 Allow the brakes to cool fully before touching them.
🔨 Step-by-Step Instructions
Follow these steps in order:
Step 1: Retract the Electronic Parking Brake
- Connect the EPB-capable diagnostic scan tool to the diagnostic connector beneath the driver’s side dashboard.
- Switch the ignition on without starting the engine.
- Select the scan tool’s Subaru > Parking Brake > Brake Maintenance Mode or equivalent brake-pad replacement command.
- Follow the prompts until the tool confirms that both rear parking-brake actuators are retracted.
- Switch the ignition off, but leave the parking brake released.
- If maintenance mode fails, stop. Don’t force or twist the piston.
Step 2: Loosen the Rear Wheel Nuts
- Use the 19mm deep socket and 1/2-inch drive breaker bar to loosen each rear wheel nut about half a turn.
- Keep the wheels on the ground during this step.
Step 3: Raise and Support the Rear
- Raise the rear of your Ascent using the floor jack at an approved lifting point.
- Position both jack stands beneath the rear support points and lower the vehicle carefully onto them.
- Give the vehicle a gentle stability check before removing either wheel.
Step 4: Remove Both Rear Wheels
- Use the 19mm deep socket and 3/8-inch drive ratchet to remove the wheel nuts.
- Remove both rear wheels and place them flat away from the work area.
Step 5: Remove the First Rear Caliper
- Inspect the brake hose and electronic parking-brake wiring before moving the caliper.
- Use the 14mm socket and 3/8-inch drive ratchet to remove the upper and lower caliper slide-pin bolts.
- Hold the slide pin with an appropriate wrench if it turns with the bolt.
- Lift the caliper straight off the pads and support it using the caliper hanger hook.
- Don’t disconnect the brake hose or parking-brake connector.
Step 6: Remove and Inspect the Old Pads
- Slide the inner and outer pads out of the caliper bracket by hand.
- Use the small flat-blade screwdriver only if needed to lift the old stainless hardware clips from the bracket.
- Compare pad wear from side to side. One pad being much thinner can indicate a seized slide pin or sticking caliper.
- Inspect the rotor for cracks, blue heat spots, deep grooves, and a pronounced outer lip.
Step 7: Clean and Lubricate the Hardware
- Use the nylon brake cleaning brush and brake cleaner to clean the bracket surfaces beneath the hardware clips.
- Install the new hardware clips by hand, making sure each clip sits completely flat.
- Remove each slide pin carefully by hand. Clean it and inspect its rubber boot.
- Apply a thin coat of high-temperature silicone brake lubricant to each slide pin before reinstalling it.
- Apply a tiny film of lubricant where the pad ears contact the hardware.
- Keep lubricant off the pad friction material and rotor. Grease on friction surfaces ruins a good brake job.
Step 8: Compress the Caliper Piston
- Check that the scan tool successfully retracted the electronic parking brake.
- Place an old brake pad across the piston face.
- Use the rear brake piston compression tool to press the piston straight inward slowly and evenly.
- Watch the brake-fluid reservoir while compressing the piston. Remove excess fluid with the plastic drain syringe if it approaches the top.
- Stop if the piston binds, tilts, or requires excessive force.
Step 9: Install the New Pads
- Transfer any required wear-indicator arrangement from the old pad layout to the matching new pad position.
- Slide the new inner and outer pads into the cleaned hardware clips by hand.
- Make sure both pads move freely without excessive looseness.
- Don’t sand, file, or grind new pads to make them fit. Correctly installed hardware should allow smooth movement.
Step 10: Reinstall the Caliper
- Lower the caliper over the new pads without twisting the brake hose or EPB wiring.
- Start both slide-pin bolts by hand to prevent crossed threads.
- Use the 14mm socket and 3/8-inch drive torque wrench to tighten both bolts to 27 Nm (20 ft-lbs). howtoo.com)
- Confirm that both slide-pin boots are seated and aren’t twisted.
Step 11: Repeat on the Other Side
- Repeat Steps 5 through 10 on the opposite rear brake.
- Compare both sides for matching pad placement, hose routing, and hardware installation.
Step 12: Reinstall the Wheels
- Install each wheel and start every wheel nut by hand.
- Snug the nuts in a star pattern using the 19mm deep socket and 3/8-inch drive ratchet.
- Raise the vehicle slightly with the floor jack, remove the jack stands, and lower the vehicle completely.
- Use the 19mm deep socket and 1/2-inch drive torque wrench to tighten the wheel nuts in a star pattern to 120 Nm (88.5 ft-lbs).
Step 13: Exit Brake Maintenance Mode
- Switch the ignition on without starting the engine.
- Use the EPB-capable diagnostic scan tool to select Subaru > Parking Brake > Exit Maintenance Mode or the equivalent command.
- Wait for confirmation that the parking brake is initialized and operational.
- Apply and release the parking brake once using its normal switch.
✅ After Repair
- ✅ Before starting the engine, press the brake pedal slowly several times until it becomes firm.
- ✅ Check the brake-fluid level and adjust only with fresh DOT 3 brake fluid. Don’t overfill it.
- ✅ Start the engine and confirm that the brake and electronic parking-brake warnings go out.
- ✅ Test the parking brake while stationary before driving.
- ✅ Make a slow test stop in a traffic-free area. Stop immediately if the pedal feels soft or the vehicle pulls.
- ✅ Bed the pads using several moderate stops from approximately 30 mph to 5 mph, allowing cooling time between stops.
- ✅ Avoid panic stops and holding the hot brakes firmly at a standstill for the first 200 miles unless safety requires it.
- ✅ Recheck for unusual heat, smells, fluid leaks, or warning lights after the test drive.
💰 DIY vs Shop Cost
Shop Cost: $300-$550 (parts + labor)
DIY Cost: $40-$120 (pads, hardware, and supplies)
You Save: $180-$450 by doing it yourself!
Shop labor rates vary but typically run $100-$150/hour. This repair takes a shop approximately 1.0-1.5 hours.
🎯 Ready to get started?
HowToo makes it easy: same-day/2-day shipping on every part, plus all the tools and specialty tools you need! Check out the parts and tools sections below to add everything to your cart.