

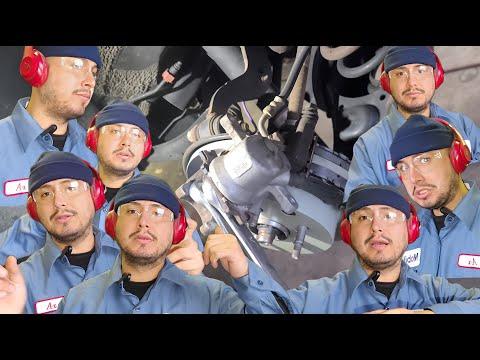






How to Replace Rear Brake Pads on a 2018 Toyota RAV4
Step-by-step instructions with tools, parts, torque specs, and parking brake service mode tips for 2006, 2007, 2008, 2009, 2010, 2011, 2012, 2013, 2014, 2015, 2016, 2017, 2018
How to Replace Rear Brake Pads on a 2018 Toyota RAV4
Step-by-step instructions with tools, parts, torque specs, and parking brake service mode tips for 2006, 2007, 2008, 2009, 2010, 2011, 2012, 2013, 2014, 2015, 2016, 2017, 2018


🔧 Rear Brake Pads - Pad Replacement
On your RAV4 Hybrid, the rear brake pads are replaced at the rear calipers, and the parking brake system must be put into service mode before the calipers are serviced. This helps prevent damage to the electronic parking brake and makes the caliper easier to retract.
Difficulty Level: Intermediate | Estimated Time: 1.5-2.5 hours
⚠️ Safety & Precautions
- Work on a cool vehicle and keep hands clear of the brake rotor and caliper edges.
- Put the electronic parking brake into service mode before opening the rear caliper. Do not force the rear caliper piston back manually unless service mode is active.
- Do not press the brake pedal with a caliper removed.
- Use jack stands on both rear sides. Never rely on a floor jack alone.
- If the hybrid system is on, shut the vehicle fully OFF before starting.
- After service, verify the parking brake releases and applies correctly before road use.
🔧 Required Tools
You'll need the following tools for this repair:
- Floor jack (rated 3-ton minimum)
- Jack stands (rated 3-ton minimum)
- Wheel chocks
- 21mm lug wrench or socket
- 14mm socket
- 17mm wrench
- Ratchet
- Torque wrench
- Brake caliper piston compressor tool (specialty)
- Bungee cord or caliper hanger
- Brake cleaner
- Wire brush
- Flat blade screwdriver
- Gloves
- Safety glasses
🔩 Required Parts
HowToo sells all the parts you need for this repair:
- Rear brake pad set - Qty: 1
- Brake grease - Qty: 1
- Pad hardware clips - Qty: 1 set
📋 Before You Begin
- Park on level ground and engage the parking brake only after you are ready to begin removal.
- Shift to P and shut the vehicle completely OFF.
- Use the vehicle display or switch sequence to place the electronic parking brake in service mode if equipped with that function.
- Loosen the rear wheel lug nuts slightly before raising the vehicle.
🔨 Step-by-Step Instructions
Follow these steps in order:
Step 1: Prepare and raise the rear of the vehicle
- Place wheel chocks at the front wheels.
- Use the 21mm lug wrench or socket to loosen both rear wheel lug nuts slightly while the tires are still on the ground.
- Raise the rear with a floor jack and support it with jack stands.
- Remove the rear wheels.
Step 2: Put the rear brake system into service mode
- Use the vehicle’s parking brake service procedure before touching the caliper. This is the electronic parking brake service mode.
- Do not skip this step.
- Confirm the parking brake is not clamped on the rear calipers before moving on.
Step 3: Remove the rear caliper
- Use the 14mm socket and 17mm wrench to remove the caliper slide pin bolts.
- Lift the caliper off the bracket and support it with a bungee cord or caliper hanger.
- Do not let the caliper hang by the brake hose.
Step 4: Remove the old brake pads and hardware
- Remove the old inner and outer pads from the caliper bracket.
- Remove the pad clips from the bracket.
- Use a wire brush to clean rust and dirt from the pad contact surfaces.
- Spray the area with brake cleaner and let it dry.
Step 5: Retract the caliper piston
- Use a brake caliper piston compressor tool to slowly retract the piston.
- Apply steady pressure only. Do not force it.
- If the piston will not move, stop and recheck that service mode is active.
Step 6: Install the new hardware and pads
- Install the new pad hardware clips into the bracket.
- Apply a thin layer of brake grease to the pad contact points only.
- Install the new inner and outer pads in the same positions as the old ones.
- Keep grease off the rotor and friction material.
Step 7: Reinstall the caliper
- Place the caliper back over the new pads.
- Install the slide pin bolts by hand first.
- Use the 14mm socket and 17mm wrench to tighten the bolts.
- Torque to 34 Nm (25 ft-lbs).
Step 8: Reinstall wheels and lower the vehicle
- Reinstall the rear wheels.
- Snug the lug nuts in a star pattern with the 21mm lug wrench or socket.
- Lower the vehicle to the ground.
- Torque to 103 Nm (76 ft-lbs) for the lug nuts.
✅ After Repair
- Pump the brake pedal several times until it feels firm.
- Take the parking brake out of service mode and confirm normal operation.
- Check for any warning lights on the dash.
- Test the brakes at very low speed in a safe area first.
- If the pedal feels soft, stop and recheck the installation.
💰 DIY vs Shop Cost
Shop Cost: $180-$350 (parts + labor)
DIY Cost: $45-$110 (parts only)
You Save: $135-$240 by doing it yourself!
Shop labor rates vary but typically run $100-$150/hour. This repair takes a shop approximately 1.5-2.5 hours.
🎯 Ready to get started?
HowToo makes it easy: same-day/2-day shipping on every part, plus all the tools and specialty tools you need! Check out the parts and tools sections below to add everything to your cart.