
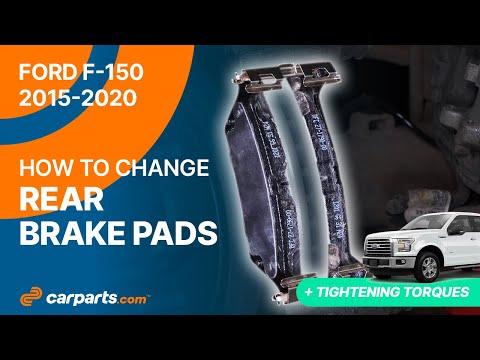







How to Replace Rear Brake Pads on a 2012-2020 Ford F-150 (Trim: Limited)
Step-by-step guide with EPB maintenance mode, required tools, torque specs, and safety tips for 2012, 2013, 2014
How to Replace Rear Brake Pads on a 2012-2020 Ford F-150 (Trim: Limited)
Step-by-step guide with EPB maintenance mode, required tools, torque specs, and safety tips for 2012, 2013, 2014


This is an intermediate two-hour job, and parking-brake maintenance mode is mandatory before compressing either rear piston. The rear brake aisle is open for your F-150. Match the new pad shape against the removed pads before installation because the catalog shows more than one rear-pad configuration.
Assumption: This procedure covers the factory rear calipers with the electric parking-brake motors attached.
🔧 F-150 - Rear Brake Pad Replacement
You’ll remove both rear wheels, place the electric parking brake in maintenance mode, compress each caliper piston, and replace the pads on both sides. Inspect the rotors and caliper slides while everything is apart.
Difficulty Level: Intermediate | Estimated Time: 1.5-2.5 hours
⚠️ Safety & Precautions
- ⚠️ Use maintenance mode before removing the calipers or compressing the pistons.
- ⚠️ Never work under your F-150 while it’s supported only by a floor jack.
- ⚠️ Chock both front wheels because the parking brake must remain released.
- ⚠️ Don’t press the brake pedal while a caliper is removed.
- ⚠️ Don’t hang a caliper from its rubber brake hose.
- ⚠️ Compress the piston through the old inner pad. Don’t press against the plastic parking-brake motor housing.
- ⚠️ Brake dust can be harmful. Don’t blow it away with compressed air.
- ⚠️ Battery disconnection isn’t required, but keep the battery charged throughout the maintenance-mode procedure.
🔧 Required Tools
You'll need the following tools for this repair:
- 1/2-inch drive breaker bar
- 21mm deep socket
- 13mm socket
- 15mm combination wrench
- 1/2-inch drive torque wrench rated to 150 ft-lbs
- 3/8-inch drive torque wrench rated to 30 ft-lbs
- 3/8-inch drive ratchet
- Brake caliper piston compression tool (specialty)
- Flat-blade screwdriver
- Nylon detailing brush
- Floor jack rated 3-ton minimum
- Jack stands rated 3-ton minimum
- Wheel chocks
- Mechanic’s wire
- Nitrile gloves
- Safety glasses
🔩 Required Parts
HowToo sells all the parts you need for this repair:
- Rear disc brake pad set matched to the removed pad shape - Qty: 1 set
- Rear brake pad abutment hardware - Qty: 1 kit
- Silicone ceramic brake lubricant - Qty: 1 tube
- Non-chlorinated brake cleaner - Qty: 1 can
Replace all four rear pads together. If either rotor is deeply grooved, heat-spotted, cracked, or below its stamped minimum thickness, replace both rear rotors.
📋 Before You Begin
- Park on firm, level ground. Put the transmission in Park and switch the engine off.
- Chock the front wheels securely.
- Release the electric parking brake completely.
- Open the hood and check the brake-fluid reservoir. Remove a little fluid if it’s already at the brim.
- Don’t remove the calipers until the instrument cluster confirms maintenance mode.
🔨 Step-by-Step Instructions
Follow these steps in order:
Step 1: Enter parking-brake maintenance mode
- Sit in the driver’s seat with the doors closed and the transmission in Park.
- Switch the ignition on without starting the engine.
- Confirm that the electric parking brake is released.
- Press the accelerator pedal fully and hold it down.
- While holding the accelerator, push and hold the parking-brake switch downward in the release direction.
- Switch the ignition off, then back on within five seconds. Keep holding both controls.
- Wait for the message center to display Park Brake Maintenance Mode and illuminate the yellow parking-brake warning.
- Switch the ignition off, then release the accelerator and parking-brake switch. Ford specifies maintenance mode before servicing the rear brakes, and the pistons compress straight inward without rotation. studylib.net
Step 2: Loosen the rear wheel nuts
- Use the 21mm deep socket and 1/2-inch drive breaker bar to loosen each rear lug nut about one-quarter turn.
- Don’t fully remove the lug nuts while the tires are supporting the truck.
Step 3: Raise and support the rear
- Use the 3-ton floor jack at an approved rear lifting point.
- Position both 3-ton jack stands beneath the rear axle tubes, clear of brake lines and brackets.
- Lower the axle carefully onto the stands and give your F-150 a firm stability check.
- A jack lifts. Jack stands hold.
Step 4: Remove both rear wheels
- Use the 21mm deep socket and 1/2-inch drive breaker bar to remove the lug nuts.
- Remove both wheels and slide one beneath each frame rail as secondary protection.
Step 5: Inspect the brakes before disassembly
- Use the safety glasses and inspect the pads, rotors, hoses, calipers, and parking-brake motor wiring.
- Check whether the inner and outer pads have worn evenly.
- Uneven wear usually means a sticking slide pin or piston. Correct that problem before installing new pads.
- Check the rotor for deep grooves, blue heat marks, cracks, or a pronounced outer lip.
Step 6: Remove the first rear caliper
- Use the 13mm socket and 3/8-inch drive ratchet to loosen the upper and lower caliper guide-pin bolts.
- If a guide pin spins, hold its flats with the 15mm combination wrench.
- Remove both bolts and carefully lift the caliper away from the rotor.
- Support the caliper with mechanic’s wire. Don’t pull on the brake hose or motor wiring.
Step 7: Remove the old pads and hardware
- Use the flat-blade screwdriver to lift the old inner and outer pads from the bracket.
- Note the position of any wear indicator and pad springs before removal.
- Use the flat-blade screwdriver to remove the stainless abutment clips from the bracket.
- Keep the old inner pad nearby for compressing the piston.
Step 8: Clean and inspect the bracket
- Use the non-chlorinated brake cleaner and nylon detailing brush to clean the pad-contact surfaces.
- Don’t grind away bracket metal. Remove only rust and packed brake dust.
- Check both guide-pin boots for tears and make sure each pin moves smoothly.
- Apply a thin film of silicone ceramic brake lubricant to the guide pins if they’re dry.
- Keep lubricant off the rotor and pad friction material.
Step 9: Compress the caliper piston
- Place the old inner pad squarely against the piston face.
- Position the brake caliper piston compression tool so it pushes through the old pad and against the metal caliper body.
- Slowly press the piston straight into its bore. Don’t rotate the piston.
- Watch the brake-fluid reservoir while compressing it and stop if fluid approaches the top.
- Don’t brace the tool against the plastic electric parking-brake motor. That’s an expensive shortcut in the wrong direction.
Step 10: Install the new hardware and pads
- Press the new abutment clips fully into the cleaned bracket by hand.
- Apply a very thin film of silicone ceramic brake lubricant where the pad ears contact the clips.
- Install the new inner and outer pads in the same orientation as the originals.
- Slide each pad by hand. It should move freely without rattling excessively.
- Clean accidental grease from the friction surfaces with non-chlorinated brake cleaner.
Step 11: Reinstall the caliper
- Place the caliper over the new pads without twisting its hose or motor wiring.
- Start both guide-pin bolts several turns by hand to prevent cross-threading.
- Hold the guide-pin flats with the 15mm combination wrench if necessary.
- Use the 13mm socket and 3/8-inch drive torque wrench to tighten the guide-pin bolts to 27 Nm (20 ft-lbs).
Step 12: Repeat on the opposite side
- Repeat Steps 5 through 11 on the other rear wheel.
- Compare both sides for pad orientation, hose routing, wiring position, and installed hardware.
Step 13: Reinstall the wheels
- Install both wheels and start every lug nut by hand.
- Use the 21mm deep socket and snug the nuts in a star pattern.
- Use the 3-ton floor jack to raise the axle slightly, remove the stands, and lower your F-150 to the ground.
- Use the 21mm deep socket and 1/2-inch drive torque wrench to tighten the lug nuts in a star pattern to 204 Nm (150 ft-lbs).
Step 14: Seat the pads with the brake pedal
- Before leaving Park, press and release the brake pedal slowly several times.
- Continue until the pedal becomes firm and maintains a consistent height.
- Check the brake-fluid reservoir and adjust the level only with the specified brake fluid.
Step 15: Exit parking-brake maintenance mode
- Switch the ignition on without starting the engine.
- Press the accelerator pedal fully and hold it down.
- Pull and hold the parking-brake switch upward in the apply direction.
- Switch the ignition off, then back on within five seconds while holding both controls.
- Release the controls after the parking brake fully applies and releases.
- Confirm that Park Brake Maintenance Mode disappears and the brake warnings switch off. studylib.net
✅ After Repair
- Apply and release the electric parking brake once more. Confirm normal operation and no warning messages.
- With the engine running, hold firm pressure on the brake pedal for 30 seconds. The pedal shouldn’t sink steadily.
- Check around both calipers for fluid leaks, trapped wiring, twisted hoses, or loose fasteners.
- Test the brakes at walking speed before entering traffic.
- Make several gentle stops from approximately 30 mph, allowing cooling time between stops.
- Avoid panic stops, trailer towing, and holding the hot brakes at a complete stop for the first 200 miles unless the pad manufacturer specifies another bedding procedure.
- Recheck the wheel-lug torque after 50 miles.
💰 DIY vs Shop Cost
Shop Cost: $300-$550 USD (parts + labor)
DIY Cost: $25-$130 USD (pads and consumables)
You Save: Approximately $170-$425 USD by doing it yourself!
Labor prices vary by region. A shop typically bills 1.0-1.8 hours for rear pad replacement and inspection.
🎯 Ready to get started?
HowToo has opened the rear brake pads, hardware, rotors, and related brake parts for your F-150. Same-day and two-day shipping options vary by destination, and the parts aisle includes the tools and specialty equipment needed for the job.