

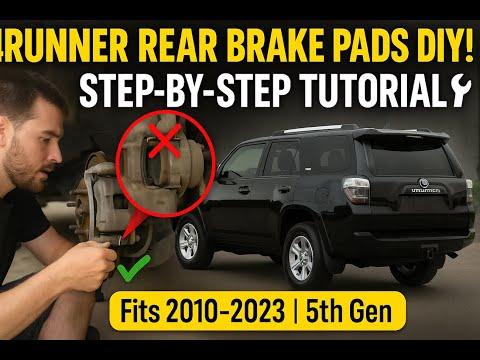






How to Replace Rear Brake Pads on a 2003-2024 Toyota 4Runner (Trim: TRD Off-Road)
Step-by-step DIY guide with required tools, parts, torque specs, and safety tips for 2003, 2004, 2005, 2006, 2007, 2008, 2009, 2010, 2011, 2012, 2013, 2014, 2015, 2016, 2017, 2018, 2019, 2020, 2021, 2022, 2023, 2024
How to Replace Rear Brake Pads on a 2003-2024 Toyota 4Runner (Trim: TRD Off-Road)
Step-by-step DIY guide with required tools, parts, torque specs, and safety tips for 2003, 2004, 2005, 2006, 2007, 2008, 2009, 2010, 2011, 2012, 2013, 2014, 2015, 2016, 2017, 2018, 2019, 2020, 2021, 2022, 2023, 2024


🔧 4Runner - Rear Brake Pad Replacement
This repair replaces the rear brake pads on both sides of your 4Runner. The brake caliper—the clamp that presses the pads against the rotor—stays connected to its brake hose while you install the new pads.
Difficulty Level: Beginner | Estimated Time: 1.5-2.5 hours
⚠️ Safety & Precautions
- ⚠️ Work on level, solid ground and support your 4Runner with jack stands. Never rely on the floor jack alone.
- 🛑 Chock both front wheels before lifting the rear.
- 🌡️ Let the brakes cool completely before touching them.
- 🧤 Brake dust can be harmful. Do not use compressed air; use brake cleaner.
- 🔗 Never allow a caliper to hang from its rubber brake hose.
- 🛢️ Watch the brake-fluid reservoir while compressing the pistons. Remove excess fluid if it approaches the top.
- 🔋 Battery disconnection is not required.
- 🅿️ Your 4Runner uses a mechanical parking brake inside the rear rotors, not an electronic parking brake. Release it before lifting.
🔧 Required Tools
You'll need the following tools for this repair:
- 21mm impact-rated socket
- 17mm six-point socket
- 17mm combination wrench
- 1/2-inch drive breaker bar
- 3/8-inch drive ratchet
- 3/8-inch drive torque wrench rated 10-80 ft-lbs
- 1/2-inch drive torque wrench rated 30-150 ft-lbs
- Disc-brake piston compression tool (specialty)
- Small flat-blade screwdriver
- Nylon brake-cleaning brush
- 12-inch caliper hanger
- Floor jack rated 3-ton minimum
- Jack stands rated 3-ton minimum
- Rubber wheel chocks
- Brake-fluid syringe rated 100mL
- Drain pan rated 2-quart minimum
- Nitrile mechanic gloves
- ANSI Z87.1 safety glasses
🔩 Required Parts
HowToo sells all the parts you need for this repair:
- Rear brake pad set - Replace both sides - Qty: 1
- Rear brake pad fitting hardware kit - Qty: 1
- Ceramic brake lubricant - Qty: 1 packet
- Brake cleaner - Qty: 1 can
- DOT 3 brake fluid - Qty: 1 small bottle, only if correction is needed
📋 Before You Begin
- 📍 Park your 4Runner on level concrete, shift into Park, switch off the engine, and release the parking brake.
- 🧱 Place rubber wheel chocks securely in front of and behind both front tires.
- 🧰 Open the hood and locate the brake-fluid reservoir near the driver-side firewall. Clean around its cap before opening it.
- 📱 No infotainment setting, scan-tool command, or electronic parking-brake service mode is required.
- 🔍 Inspect the rear rotors for deep grooves, cracks, heavy rust, or a thickness below the specification stamped on the rotor. Damaged or undersized rotors must be replaced or professionally measured.
🔨 Step-by-Step Instructions
Follow these steps in order:
Step 1: Loosen the Rear Wheel Nuts
- Use the 21mm socket and 1/2-inch breaker bar to loosen each rear lug nut about one-half turn while the tires remain on the ground.
- Do not remove the lug nuts yet.
Step 2: Lift and Support the Rear
- Put on the safety glasses and nitrile mechanic gloves.
- Use the 3-ton floor jack beneath the center of the rear axle housing. Do not place the jack under the thin differential cover.
- Raise the rear, then place the 3-ton jack stands beneath the solid rear axle tubes near the spring seats.
- Lower the axle carefully onto both stands. Leave the floor jack lightly touching the axle as backup support.
- Push gently on the body to verify that your 4Runner is stable.
Step 3: Remove the Rear Wheels
- Use the 21mm socket and 1/2-inch breaker bar to remove the loosened lug nuts.
- Lift off both rear wheels and place them flat away from the work area.
- Keep each wheel’s lug nuts together in the drain pan.
Step 4: Check the Brake-Fluid Level
- Remove the brake-fluid reservoir cap by hand and place it on a clean surface.
- If the reservoir is near the maximum line, use the 100mL brake-fluid syringe to remove a small amount. Store it in the drain pan for proper disposal.
- Rest the cap loosely over the reservoir to prevent contamination while allowing the fluid level to rise.
Step 5: Remove the First Caliper
- Place the drain pan under the brake assembly. Use the brake cleaner and nylon brake-cleaning brush to remove loose dirt from the caliper area.
- Use the 17mm six-point socket and 3/8-inch ratchet to remove the upper and lower caliper slide-pin bolts.
- If a slide pin turns with its bolt, hold the pin with the 17mm combination wrench while loosening the bolt with the 17mm socket.
- Lift the caliper straight off the pads. Support it from the suspension with the 12-inch caliper hanger.
- Do not disconnect the brake hose or press the brake pedal.
Step 6: Remove the Old Pads and Hardware
- Use the small flat-blade screwdriver to slide the inner and outer pads out of the caliper bracket.
- Note the position of the pad wear indicator so the new pads can be installed in the same orientation.
- Use the small flat-blade screwdriver to remove the stainless pad-support clips from the bracket.
- Use brake cleaner and the nylon brake-cleaning brush to clean the clip seats and exposed bracket surfaces.
- Complete one side before opening the other.
Step 7: Inspect the Caliper and Rotor
- Inspect the rotor by sight while wearing safety glasses. Stop if it is cracked, heavily grooved, blue from overheating, or severely rusted.
- Pull each slide pin outward by hand and confirm that it moves smoothly. Stop if a pin is seized, badly corroded, or its rubber boot is torn.
- Inspect the caliper piston boot for splits or brake-fluid leakage. A leaking caliper must be replaced before driving.
Step 8: Compress the Caliper Pistons
- Place one old brake pad across the caliper pistons.
- Use the disc-brake piston compression tool to press both pistons slowly and evenly into the caliper.
- Watch the brake-fluid reservoir as the pistons retract. Use the 100mL syringe if the fluid approaches the reservoir opening.
- Stop if either piston binds, tilts, or requires excessive force.
Step 9: Install the New Hardware and Pads
- Press the new pad-support clips into the caliper bracket by hand. Use the small flat-blade screwdriver only to seat a stubborn edge gently.
- Apply a very thin film of ceramic brake lubricant to the pad ears where they contact the stainless clips.
- Do not put lubricant on the rotor or pad friction surfaces.
- Slide the new inner and outer pads into the bracket by hand. Match the old wear-indicator position.
- Confirm that both pads slide freely in the clips without excessive looseness.
Step 10: Reinstall the Caliper
- Remove the caliper from the 12-inch hanger and lower it over the new pads without twisting the brake hose.
- Start both slide-pin bolts by hand to avoid cross-threading.
- Use the 17mm socket and 3/8-inch torque wrench to tighten both slide-pin bolts to 27 Nm (20 ft-lbs).
- If a slide pin rotates, hold it with the 17mm combination wrench while tightening with the torque wrench.
Step 11: Repeat on the Opposite Side
- Use the same listed tools and repeat Steps 5 through 10 on the other rear brake assembly.
- Replace all rear pads as one axle set, even if one side has more material remaining.
Step 12: Reinstall the Wheels
- Install both wheels and thread every lug nut by hand.
- Use the 21mm socket and 1/2-inch breaker bar to snug the lug nuts in a star pattern.
- Use the 3-ton floor jack to raise the axle slightly, remove both jack stands, and lower your 4Runner completely.
- Use the 21mm socket and 1/2-inch torque wrench to tighten the lug nuts in a star pattern to 112 Nm (83 ft-lbs).
Step 13: Restore Brake-Pedal Pressure
- With the engine off, press and release the brake pedal slowly several times by foot until it becomes firm.
- Never move your 4Runner until the pedal feels firm and remains at a consistent height.
- Check the reservoir level visually. Add DOT 3 brake fluid from the new bottle only if the level is below the minimum mark.
- Install the reservoir cap securely by hand.
✅ After Repair
- 🔍 Start the engine and hold firm pressure on the brake pedal for 30 seconds. The pedal should not continue sinking.
- 🧪 Check around both rear calipers for brake-fluid leakage and verify that both hoses are untwisted.
- 🚙 Test the brakes at walking speed in a safe, traffic-free area before normal driving.
- 🛑 Bed in the pads with approximately 8-10 moderate stops from 50 km/h to 10 km/h. Allow about 30 seconds between stops and avoid coming to a complete stop with very hot brakes.
- 🌡️ Drive gently for the first 300-500 km. Avoid hard braking unless required for safety.
- 🔩 Recheck wheel-lug torque to 112 Nm (83 ft-lbs) after approximately 80-160 km.
- ⚠️ Stop driving if the pedal is soft, the vehicle pulls strongly, a grinding noise continues, or brake fluid leaks.
💰 DIY vs Shop Cost
Shop Cost: ₹10,000-₹18,000 (parts + labor)
DIY Cost: ₹4,500-₹9,000 (parts only)
You Save: ₹5,500-₹9,000 by doing it yourself!
Sonīpat-area labor rates and imported 4Runner parts availability vary. This repair takes a shop approximately 1-1.5 hours.
🎯 Ready to get started?
HowToo makes it easy: same-day/2-day shipping on every part, plus all the tools and specialty tools you need! Check out the parts and tools sections below to add everything to your cart.