






How to Replace Rear Brake Pads and Rotors on a 2019 Chevrolet Silverado 1500 (Trim: High Country | Engine: V8 5.3L)
Step-by-step guide with tools, parts, torque specs, safety tips, and electronic parking brake service mode for 2019
How to Replace Rear Brake Pads and Rotors on a 2019 Chevrolet Silverado 1500 (Trim: High Country | Engine: V8 5.3L)
Step-by-step guide with tools, parts, torque specs, safety tips, and electronic parking brake service mode for 2019


🔧 Silverado 1500 - Rear Brake Pad and Rotor Replacement
This is a manageable job, but the electronic parking brake must be placed in service mode before compressing either rear caliper. Replace the pads and rotors on both rear wheels so braking stays balanced.
Difficulty Level: Intermediate | Estimated Time: 3-4 hours
Assumption: These instructions cover the new-body brake system with an electronic parking brake.
⚠️ Safety & Precautions
- ⚠️ Support your Silverado with properly rated jack stands. Never work underneath a truck supported only by a jack.
- ⚠️ Do not activate the parking brake while a caliper is removed.
- ⚠️ Put the electronic parking brake in service mode before pushing the pistons inward.
- ⚠️ Never let a caliper hang from its rubber brake hose.
- ⚠️ Brake dust may be harmful. Do not blow it away with compressed air.
- ⚠️ Keep grease and fingerprints off every pad and rotor friction surface.
- ⚠️ Do not disconnect the battery because the parking-brake service procedure requires electrical power.
🔧 Required Tools
You'll need the following tools for this repair:
- 22mm deep socket
- 13mm socket
- 18mm socket
- 3/8-inch drive ratchet
- 1/2-inch drive breaker bar
- 1/2-inch drive torque wrench rated to 200 ft-lbs
- Rear brake piston compression tool (specialty)
- Bidirectional scan tool with electronic parking-brake service mode (specialty)
- 3-ton floor jack
- 3-ton jack stands
- Wheel chocks
- Caliper hanger
- Flat-blade screwdriver
- Small nylon trim tool
- Wire brake-cleaning brush
- Rubber mallet
- Brake-cleaner catch pan
- Safety glasses
- Nitrile gloves
🔩 Required Parts
HowToo sells all the parts you need for this repair:
- Rear brake pad and rotor kit - Qty: 1
- Rear brake rotors - Qty: 2, replace in pairs
- Rear brake pad set - Qty: 1
- Rear brake hardware kit - Qty: 1
- Rear brake pad wear sensor - Qty: 1 if damaged or worn through
- Silicone ceramic brake lubricant - Qty: 1 tube
- Aerosol brake cleaner - Qty: 2 cans
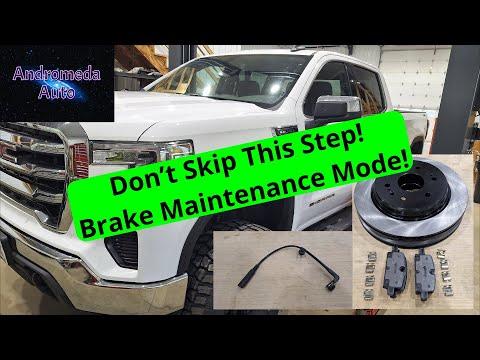
The PowerStop rear brake kit shown in the parts list is my straightforward matched-kit choice. Pads and rotors designed to work together remove some guesswork from a first brake job. Buy once, stop twice.
📋 Before You Begin
- 📋 Park on solid, level ground and place the transmission in Park.
- 📋 Block both front wheels securely, but leave the parking brake released.
- 📋 Open the hood and inspect the brake-fluid reservoir. Remove a little fluid if it is already at the maximum line.
- 📋 Connect the bidirectional scan tool. This is a scan tool capable of commanding vehicle components, not merely reading fault codes.
- 📋 Select Chevrolet > Silverado 1500 > Chassis > Electronic Parking Brake > Brake Pad Replacement Mode.
- 📋 Follow the scan-tool prompts until both rear parking-brake actuators fully retract.
- 📋 Switch the ignition off after the scan tool confirms service mode.
🔨 Step-by-Step Instructions
Follow these steps in order:
Step 1: Loosen the rear wheel nuts
- Use the 22mm deep socket and 1/2-inch breaker bar to loosen each rear wheel nut about one-half turn.
- Do not remove the wheel nuts while the truck is still on the ground.
Step 2: Raise and support the rear axle
- Use the 3-ton floor jack at a suitable rear axle lifting point.
- Position both 3-ton jack stands beneath solid axle support points.
- Lower the truck carefully onto the stands and gently shake it to verify stability.
- Keep the floor jack nearby as backup.
Step 3: Remove both rear wheels
- Use the 22mm deep socket and ratchet to remove the wheel nuts.
- Remove both rear wheels and slide them beneath the frame as an additional safety measure.
Step 4: Inspect and disconnect the wear sensor
- Locate the brake-pad wear-sensor wire on the equipped rear caliper.
- Use the small nylon trim tool to release its routing clips without pulling on the wire.
- Disconnect the electrical connector by pressing its locking tab.
- Replace the sensor if its tip has contacted the rotor or its wire insulation is damaged.
Step 5: Remove the rear caliper
- Use the 13mm socket and ratchet to remove the upper and lower caliper guide-pin bolts.
- Hold the guide pin with the appropriate wrench if it tries to rotate.
- Lift the caliper away from the bracket and support it with the caliper hanger.
- Do not twist, stretch or sharply bend the brake hose.
Step 6: Remove the old pads and hardware
- Use the flat-blade screwdriver to remove the inner and outer brake pads.
- Remove the stainless abutment clips from the caliper bracket. Abutment clips are the small metal guides supporting the pad ends.
- Compare the old inner and outer pads. Uneven wear may indicate a seized guide pin or sticking caliper.
Step 7: Remove the caliper bracket
- Use the 18mm socket and 1/2-inch breaker bar to remove both caliper-bracket bolts.
- Support the bracket as the final bolt comes out.
- Keep oil and grease away from the bracket’s pad-contact areas.
Step 8: Remove the old rotor
- Confirm the electronic parking brake remains released and in service mode.
- Pull the rotor straight off the hub.
- If it is rusted in place, strike the rotor hat between the wheel studs with the rubber mallet.
- Do not strike the wheel studs or the thin outer braking surface.
- If the rotor starts moving but catches, stop. The parking-brake mechanism may still be holding it.
Step 9: Clean the hub and bracket
- Place the brake-cleaner catch pan beneath the assembly.
- Use the wire brake-cleaning brush and brake cleaner to remove rust from the hub face.
- Clean the bracket beneath the abutment clips until the new clips sit completely flat.
- Wipe everything clean and dry.
- A dirty hub can create pedal pulsation.
Step 10: Prepare and install the new rotor
- Clean both friction surfaces of the new rotor with brake cleaner and a clean lint-free cloth.
- Install the rotor fully against the hub.
- Temporarily install one wheel nut by hand to hold the rotor flat while assembling the brake.
Step 11: Reinstall the caliper bracket
- Position the bracket over the rotor and start both bolts by hand.
- Use the 18mm socket and torque wrench to tighten the bracket bolts evenly.
- Torque to 200 Nm (148 ft-lbs).
Step 12: Service the guide pins and install hardware
- Pull each guide pin from its rubber boot by hand.
- Wipe the pin clean and inspect it for rust, scoring or binding.
- Apply a thin layer of silicone ceramic brake lubricant before reinserting each pin.
- Install the new abutment clips firmly into the bracket.
- Apply only a very thin film of lubricant where the pad tabs contact the clips.
Step 13: Compress the caliper pistons
- Watch the brake-fluid reservoir while pushing the pistons inward.
- Use the rear brake piston compression tool to press both pistons inward slowly and evenly.
- Do not force or rotate the pistons unless the tool instructions specifically require it.
- Stop if a piston binds, tilts or will not retract smoothly.
Step 14: Install the new brake pads
- Install the inner and outer pads into the bracket with the friction material facing the rotor.
- Make sure every pad tab sits squarely inside its abutment clip.
- Keep lubricant away from the pad material and rotor surfaces.
- Position any mechanical wear indicator the same way as the original pad.
Step 15: Reinstall the caliper
- Place the caliper over the new pads without pinching the piston boots.
- Start both guide-pin bolts by hand to prevent cross-threading.
- Use the 13mm socket and torque wrench to tighten both bolts.
- Torque to 100 Nm (74 ft-lbs).
Step 16: Reconnect the wear sensor
- Connect the sensor plug until its lock clicks.
- Route the wire through every original clip using the small nylon trim tool.
- Turn the hub by hand and verify the sensor wire cannot touch the rotor or wheel.
Step 17: Repeat the repair on the opposite side
- Repeat Steps 4 through 16 on the other rear wheel.
- Confirm both sides use matching pads, rotors and hardware.
Step 18: Reinstall the wheels
- Remove the temporary wheel nut holding each rotor.
- Install both wheels and start every wheel nut by hand.
- Use the 22mm deep socket to snug the nuts in a crossing pattern.
- Raise the rear slightly with the 3-ton floor jack, remove the jack stands and lower the truck.
- Use the 22mm deep socket and torque wrench to tighten the wheel nuts in a crossing pattern.
- Torque to 190 Nm (140 ft-lbs).
Step 19: Exit parking-brake service mode
- Connect the bidirectional scan tool with the ignition on.
- Select Chassis > Electronic Parking Brake > Exit Brake Pad Replacement Mode.
- Follow the prompts until both parking-brake actuators apply and release normally.
- Clear only brake-system codes created during the service.
✅ After Repair
- ✅ Before starting the engine, press the brake pedal slowly several times until it becomes firm.
- ✅ Check the brake-fluid level and correct it without filling above the maximum mark.
- ✅ Apply and release the electronic parking brake twice while stationary.
- ✅ Confirm there are no brake, ABS, parking-brake or wear-sensor warnings.
- ✅ Check around both calipers for fluid leaks and verify every hose and sensor wire is correctly routed.
- ✅ Perform a slow parking-area test before entering traffic.
- ✅ Bed in the pads using the instructions supplied with the brake kit. Avoid panic stops unless required for safety.
- ✅ Allow the brakes to cool after bedding. Do not hold the pedal firmly while stopped with very hot brakes.
- ✅ Recheck wheel-nut torque after approximately 80-160 km.
💰 DIY vs Shop Cost
Shop Cost: $600-$950 equivalent (parts + labor)
DIY Cost: $220-$400 equivalent (parts only)
You Save: $300-$600 equivalent by doing it yourself!
Local labor and imported-parts pricing vary considerably. This repair takes a shop approximately 2-3 hours.
🎯 Ready to get started?
HowToo makes it easy: same-day/2-day shipping on every part, plus all the tools and specialty tools you need! Check out the parts and tools sections below to add everything to your cart.