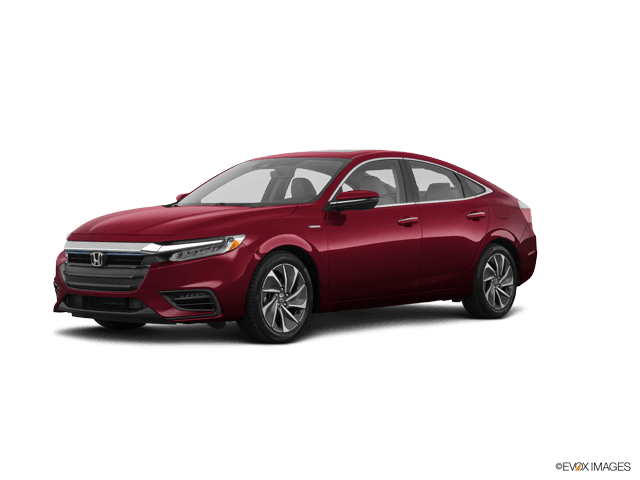







How to Replace Rear Brake Pads and Rotors on a 2019-2022 Honda Insight
Step-by-step guide with EPB maintenance mode, required tools, safety tips, and torque specs for 2019, 2020, 2021, 2022
How to Replace Rear Brake Pads and Rotors on a 2019-2022 Honda Insight
Step-by-step guide with EPB maintenance mode, required tools, safety tips, and torque specs for 2019, 2020, 2021, 2022


🔧 Insight - Rear Brake Pads and Rotor Replacement
The electronic parking brake is the make-or-break step on this job. Put it in maintenance mode before compressing either rear piston, then replace the pads and both rotors as an axle set. The matching rear-brake aisle is open beside this guide.
Difficulty Level: Intermediate | Estimated Time: 3-4 hours
Assumption: The calipers, hoses, and electronic parking-brake motors are reusable and undamaged.
⚠️ Safety & Precautions
- ⚠️ Support your Insight with jack stands. Never work under a floor-jack-only vehicle.
- ⚠️ Place the electronic parking brake in maintenance mode before compressing the pistons.
- ⚠️ Never allow the caliper to hang from its rubber brake hose.
- ⚠️ Don’t press the brake pedal while either caliper is removed.
- ⚠️ Don’t touch orange hybrid cables or high-voltage components. This repair doesn’t require high-voltage isolation.
- ⚠️ Use brake cleaner instead of compressed air to control brake dust.
- ⚠️ Keep grease, oil, and dirty hands away from pad faces and rotor friction surfaces.
- ⚠️ If a piston won’t retract with moderate pressure, stop. Don’t overpower the parking-brake mechanism.
- ⚠️ Disconnecting the 12-volt battery isn’t normally required when a scan tool controls maintenance mode.
🔧 Required Tools
You'll need the following tools for this repair:
- Floor jack rated 2-ton minimum
- Jack stands rated 2-ton minimum
- Wheel chocks
- 19mm socket
- 12mm socket
- 17mm socket
- 7mm hex-bit socket
- 14mm combination wrench
- 3/8-inch-drive ratchet
- 1/2-inch-drive breaker bar
- Torque wrench rated 10-150 ft-lbs
- EPB-capable diagnostic scan tool (specialty)
- Brake caliper piston compression tool (specialty)
- Number 3 JIS impact screwdriver (specialty)
- Flat-blade screwdriver
- Small wire brush
- Rubber mallet
- Caliper hanger
- Fluid syringe (specialty)
- Drain pan
- Shop towels
- Nitrile gloves
- Safety glasses
🔩 Required Parts
HowToo sells all the parts you need for this repair:
- Rear ceramic brake pad set - Qty: 1
- Rear brake rotors - Replace in pairs - Qty: 2
- Rear brake pad hardware kit - Qty: 1
- Silicone brake caliper grease - Qty: 1
- Non-chlorinated brake cleaner - Qty: 2 cans
- Honda-compatible DOT 3 brake fluid - Qty: 1 small bottle
A quality ceramic pad set with plain coated rotors is the smart street setup here. Drilled rotors add expense without helping normal Insight braking. Shiny holes don’t shorten the school run.
📋 Before You Begin
- 📋 Park on level, solid ground and select P.
- 📋 Turn Brake Hold off and release the electronic parking brake.
- 📋 Chock both sides of both front wheels with wheel chocks.
- 📋 Keep the key fob away from the vehicle after entering maintenance mode.
- 📋 Use the 19mm socket and breaker bar to loosen each rear lug nut about half a turn.
- 📋 Connect the EPB-capable scan tool to the diagnostic connector beneath the driver-side dashboard.
- 📋 Select Honda > Insight > ABS/VSA > Electric Parking Brake > Maintenance Mode. Tool wording may appear as Pad Replacement Mode or Brake Maintenance Mode.
- 📋 Wait for the scan tool to confirm that both rear parking-brake actuators have retracted.
🔨 Step-by-Step Instructions
Follow these steps in order:
Step 1: Activate rear-brake maintenance mode
- Use the EPB-capable diagnostic scan tool to enter rear-brake maintenance mode.
- Confirm that the parking-brake warning shown by the scan tool is expected for maintenance mode.
- Turn the vehicle completely off when directed, but leave the scan tool connected.
- If the scan tool cannot activate both actuators, stop the repair. Don’t attempt to force the pistons inward.
Step 2: Lift and support the rear
- Use the floor jack rated 2-ton minimum at the rear-center jacking point.
- Position the jack stands rated 2-ton minimum beneath the reinforced rear side support points.
- Lower the vehicle gently onto the stands and give it a firm stability check.
- Use the 19mm socket and ratchet to remove both rear wheels.
Step 3: Inspect the brake assembly
- Use the flashlight built into your work area or shop lighting to inspect the hose, caliper boot, and parking-brake wiring.
- Look for torn boots, leaking fluid, damaged wires, or one pad worn much thinner than its partner.
- If either caliper leaks or the piston boot is torn, replace or rebuild that caliper before continuing.
Step 4: Remove the rear caliper
- Remove the caliper guide fasteners using the fastener fitted to your caliper, normally the 7mm hex-bit socket or a 12mm socket.
- If a guide pin turns, hold it with the 14mm combination wrench while loosening the bolt.
- Lift the caliper from the bracket and support it with the caliper hanger.
- Don’t twist the hose or pull on the electronic parking-brake wiring.
Step 5: Remove the pads and hardware
- Pull the old inner and outer pads from the bracket by hand.
- Use the flat-blade screwdriver carefully if a pad is rusted into its clip.
- Remove the old abutment clips. Abutment clips are the thin stainless pieces supporting the ends of the pads.
- Compare inner and outer pad wear. A large difference points to a sticking guide pin or pad.
Step 6: Remove the caliper bracket
- Use the 17mm socket and breaker bar to remove both bracket-to-knuckle bolts.
- Support the bracket as the second bolt comes out.
- Keep both bolts clean and inspect their threads before reuse.
Step 7: Remove the old rotor
- Use the Number 3 JIS impact screwdriver to loosen the rotor retaining screws, if fitted.
- A JIS driver resembles a Phillips driver but fits Japanese screws more securely.
- Pull the rotor straight from the hub.
- If it’s stuck, use the rubber mallet around the rotor hat between the wheel studs.
- Don’t strike the braking surface or wheel studs with a steel hammer.
Step 8: Clean the hub and bracket
- Place the drain pan beneath the work area.
- Use the small wire brush to remove rust from the hub face and the bracket’s pad-contact areas.
- Spray the areas with non-chlorinated brake cleaner and wipe them with shop towels.
- Leave the hub face clean and flat. Rust trapped behind a rotor can cause pedal pulsation.
Step 9: Prepare and install the new rotor
- Spray both rotor friction surfaces with non-chlorinated brake cleaner.
- Wipe the surfaces completely dry using clean shop towels.
- Slide the rotor onto the hub without touching its friction surfaces.
- Install the retaining screws using the Number 3 JIS impact screwdriver.
- Tighten the retaining screws to 9.5 Nm (7 ft-lbs). They only locate the rotor.
Step 10: Reinstall the caliper bracket
- Position the bracket over the new rotor and start both bolts by hand.
- Use the 17mm socket and torque wrench to tighten the bracket bolts evenly.
- Torque to 80 Nm (59 ft-lbs).
Step 11: Service the guide pins
- Pull one guide pin out at a time by hand so their positions don’t get mixed.
- Wipe each pin clean with shop towels and inspect it for rust, pitting, or bending.
- Apply a thin coating of silicone brake caliper grease.
- Reinsert each pin and confirm that it slides smoothly while its rubber boot remains seated.
- Grease lightly. More isn’t better here.
Step 12: Install new hardware and pads
- Press the new abutment clips into the clean bracket by hand.
- Apply a paper-thin film of silicone brake caliper grease only where the pad tabs contact the clips.
- Install the inner and outer pads in the same orientation as the originals.
- Move each pad by hand. It should slide without binding.
- Keep all grease away from the pad lining and rotor.
Step 13: Retract the caliper piston
- Confirm on the EPB-capable diagnostic scan tool that maintenance mode remains active.
- Open the hood and inspect the brake-fluid reservoir level.
- If the reservoir is already near maximum, use the fluid syringe to remove a small amount.
- Use the brake caliper piston compression tool to press the piston slowly and squarely into the caliper.
- Watch the reservoir while compressing the piston so fluid doesn’t overflow.
- If the piston tilts, binds, or requires excessive force, stop and inspect the caliper.
Step 14: Reinstall the caliper
- Position the caliper over the pads without twisting its hose.
- Start both guide fasteners by hand to prevent cross-threading.
- Use the applicable 7mm hex-bit socket or 12mm socket with the torque wrench.
- Torque to 34 Nm (25 ft-lbs).
- Confirm that the parking-brake connector and brake hose are securely routed.
Step 15: Repeat the repair
- Repeat Steps 3 through 14 on the opposite rear brake.
- Replace pads and rotors on both sides even if only one side appears worn.
- Compare both sides before installing the wheels.
Step 16: Reinstall the rear wheels
- Install each wheel and start all lug nuts by hand.
- Use the 19mm socket to snug the nuts in a crisscross pattern.
- Use the floor jack rated 2-ton minimum to lift the vehicle slightly and remove the stands.
- Lower the vehicle fully onto the ground.
- Use the 19mm socket and torque wrench to tighten the lug nuts in a crisscross pattern.
- Torque to 108 Nm (80 ft-lbs).
Step 17: Exit maintenance mode
- Turn the vehicle on without selecting a drive position.
- Use the EPB-capable diagnostic scan tool and select ABS/VSA > Electric Parking Brake > Exit Maintenance Mode.
- Wait while both parking-brake motors extend and initialize.
- Apply and release the electronic parking brake once using its console switch.
- Clear only brake-system codes created during maintenance after confirming no active fault remains.
✅ After Repair
- ✅ Before selecting Drive, press the brake pedal repeatedly until it becomes firm.
- ✅ Check the brake-fluid reservoir and adjust it to the proper mark using DOT 3 fluid.
- ✅ Check around both calipers for leaks, loose wiring, or a twisted hose.
- ✅ Confirm the electronic parking brake applies and releases normally.
- ✅ Make several gentle stops below 15 km/h before entering normal traffic.
- ✅ Bed the pads with 6-10 moderate stops from approximately 50 km/h to 10 km/h, allowing cooling time between stops.
- ✅ Avoid panic stops and holding the hot brakes firmly at a standstill during the first 300 km.
- ✅ Recheck the lug-nut torque after approximately 80-100 km.
💰 DIY vs Shop Cost
Shop Cost: ₹18,000-₹32,000 (parts + labor)
DIY Cost: ₹8,000-₹18,000 (parts only, excluding a scan-tool purchase)
You Save: ₹8,000-₹14,000 by doing it yourself!
Labor around Sonīpat varies widely. This repair usually occupies a workshop for approximately 2-3 hours.
🎯 Ready to get started?
HowToo makes it easy: same-day/2-day shipping on every part, plus all the tools and specialty tools you need! Check out the parts and tools sections below to add everything to your cart.