


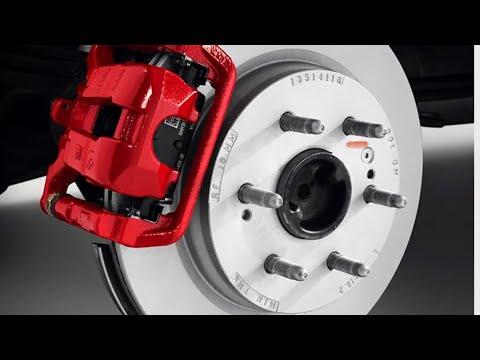







How to Replace Rear Brake Pads and Rotors on a 2019-2020 Cadillac XT4 (Trim: Sport)
Step-by-step guide with tools, torque specs, safety tips, and electronic parking brake service mode for 2019, 2020
How to Replace Rear Brake Pads and Rotors on a 2019-2020 Cadillac XT4 (Trim: Sport)
Step-by-step guide with tools, torque specs, safety tips, and electronic parking brake service mode for 2019, 2020


🔧 XT4 - Rear Brake Pad and Rotor Replacement
This job replaces both rear rotors, both sets of rear pads, and the pad hardware. Your XT4 uses an electronic parking brake, so the rear calipers must enter service mode before their pistons are compressed.
Difficulty Level: Intermediate | Estimated Time: 2.5-4 hours
Assumption: This procedure covers the stock 315 mm rear brake system. The parts sidebar is already showing matching rear brake components.
⚠️ Safety & Precautions
- ⚠️ Put the electronic parking brake into service mode before removing the calipers or compressing the pistons.
- ⚠️ Never force a rear piston inward while the parking-brake actuator is extended. That can destroy the actuator gears.
- ⚠️ Support your XT4 with jack stands. Never work under a vehicle supported only by a jack.
- ⚠️ Do not let a caliper hang from its rubber brake hose.
- ⚠️ Do not press the brake pedal while a caliper is removed.
- ⚠️ Use brake cleaner instead of compressed air because brake dust is harmful.
- Battery disconnection is not normally required, but a battery maintainer is strongly recommended during electronic parking-brake service.
🔧 Required Tools
You'll need the following tools for this repair:
- Floor jack (rated 3-ton minimum)
- Jack stands (rated 3-ton minimum)
- Wheel chocks
- Safety glasses
- Nitrile mechanic gloves
- 22mm socket (1/2-inch drive)
- 13mm socket (3/8-inch drive)
- 18mm socket (1/2-inch drive)
- Torx T30 bit socket
- Ratchet (3/8-inch drive)
- Ratchet (1/2-inch drive)
- Breaker bar (1/2-inch drive)
- Torque wrench (10-250 Nm range)
- Torque-angle gauge (specialty)
- Bidirectional scan tool with GM EPB functions (specialty)
- 12-volt battery maintainer
- Disc brake piston compression tool (specialty)
- Brake caliper hanger hook
- Flat-blade screwdriver
- Small pick tool
- Wire brush
- Rubber mallet
- Hub-cleaning abrasive pad
- Brake fluid test strips
A bidirectional scan tool can command vehicle modules, including retracting and resetting the electronic parking brake.
🔩 Required Parts
HowToo sells all the parts you need for this repair:
- Rear ceramic brake pad set for D2189 application - Qty: 1
- Rear vented brake rotors, 315 mm diameter - Qty: 2, replace in pairs
- Rear brake pad hardware kit - Qty: 1
- Rear caliper bracket bolts - Qty: 4, use new bolts if specified as one-time-use
- Brake parts cleaner - Qty: 2 cans
- Silicone ceramic brake lubricant - Qty: 1 tube
- DOT brake fluid matching the reservoir cap - Qty: 1 small sealed container, only if needed
For an everyday XT4, I'd use premium ceramic pads and fully coated smooth rotors. The coating is worthwhile around Sonīpat's monsoon moisture, and plain rotors are quieter than flashy drilled hardware. Brakes aren't the place to buy jewelry.
📋 Before You Begin
- Park on a solid, level surface. Shift into Park and chock both front wheels.
- Connect the 12-volt battery maintainer according to its instructions.
- Release the electronic parking brake using the switch.
- Connect the scan tool and select Chassis > Electronic Brake Control Module > Electronic Parking Brake > Service Mode.
- Command the parking brake into service mode and wait until both rear actuators finish moving.
- Leave the parking brake released and switch the ignition off after the scan tool confirms service mode.
- Open the hood and inspect the brake-fluid reservoir. Remove excess fluid if it is already at the maximum line.
🔨 Step-by-Step Instructions
Follow these steps in order:
Step 1: Loosen the rear wheel nuts
- Use the 22mm socket and breaker bar to loosen each rear wheel nut about half a turn.
- Do this while the tires are still touching the ground.
Step 2: Raise and support the rear
- Use the floor jack at an approved lifting point.
- Position the jack stands under the approved rear support points and lower the vehicle onto them.
- Give the body a firm push before working. It must remain completely stable.
Step 3: Remove both rear wheels
- Use the 22mm socket and ratchet to remove the wheel nuts.
- Remove the wheels and place them flat, away from your work area.
Step 4: Remove the first rear caliper
- Use the 13mm socket and 3/8-inch ratchet to remove the upper and lower guide-pin bolts.
- Hold the guide pin with a suitable wrench if it turns with the bolt.
- Lift the caliper from the pads. Use the caliper hanger hook to support it from the suspension.
- Do not unplug or remove the electronic parking-brake motor for a normal pad and rotor job.
- Reinstallation specification: Torque the guide-pin bolts to 31 Nm (23 ft-lbs).
Step 5: Remove the old pads and hardware
- Pull both pads from the bracket by hand.
- Use the flat-blade screwdriver carefully if a pad is stuck.
- Use the small pick tool to remove the stainless pad clips.
- Note the location of any mechanical wear indicator before discarding the pads.
Step 6: Remove the caliper bracket
- Use the 18mm socket and breaker bar to remove the two bracket bolts behind the rotor.
- Support the bracket as the final bolt comes out.
- Inspect the removed bolts. Replace them if the new rotor or hardware instructions identify them as torque-to-yield or one-time-use.
- Important: Confirm the exact rear bracket-bolt torque in current GM service information before reassembly. Do not substitute a generic torque because these fasteners retain the entire rear caliper assembly.
Step 7: Remove the old rotor
- Use the Torx T30 bit socket and 3/8-inch ratchet to remove the rotor retaining screw, if fitted.
- Pull the rotor straight off the hub.
- If rust holds it in place, strike the rotor hat between the wheel studs with the rubber mallet.
- Never hit the wheel studs, bearing hub, or rotor braking surface you intend to reuse.
Step 8: Clean the hub and bracket
- Spray the hub face and bracket with brake parts cleaner.
- Use the hub-cleaning abrasive pad to remove rust from the hub face.
- Use the wire brush under the pad-clip locations until the new clips sit completely flat.
- Wipe everything clean. Rust trapped behind a rotor can cause pedal vibration.
- Clean hubs make straight rotors.
Step 9: Prepare and install the new rotor
- Clean both braking surfaces with brake parts cleaner and a clean lint-free towel.
- Place the new rotor over the wheel studs.
- Install the retaining screw with the Torx T30 bit socket. Tighten it only to the verified GM specification. It merely holds the rotor during assembly.
- Install one wheel nut backward by hand to keep the rotor seated against the hub.
Step 10: Service the bracket and guide pins
- Pull each guide pin from its rubber boot by hand.
- Wipe the pin clean and inspect it for rust, scoring, or binding.
- Apply a thin coat of silicone ceramic brake lubricant and reinstall it into the correct bore.
- Install the new stainless pad clips by hand.
- Confirm every pin slides freely and each rubber boot seals around its pin.
Step 11: Reinstall the caliper bracket
- Position the bracket over the rotor and start both new bolts by hand.
- Use the 18mm socket, torque wrench, and torque-angle gauge to tighten the bolts exactly as specified by current GM service information.
- Do not reuse an angle-tightened bolt unless GM specifically permits reuse.
Step 12: Compress the caliper piston
- Verify again that the electronic parking brake remains in service mode.
- Place an old pad against the piston face.
- Use the disc brake piston compression tool to push the piston straight inward slowly.
- Watch the reservoir while compressing the piston so brake fluid does not overflow.
- Stop if the piston requires heavy force, turns sideways, or the parking-brake motor begins moving.
Step 13: Install the new pads
- Apply a very thin film of silicone ceramic brake lubricant to the pad ears where they contact the stainless clips.
- Keep all lubricant away from the rotor and pad friction material.
- Slide the inner and outer pads into the bracket by hand.
- The pads should move without being loose or requiring force.
Step 14: Reinstall the caliper
- Lower the caliper over the new pads without twisting the brake hose.
- Start both guide-pin bolts by hand.
- Use the 13mm socket and torque wrench to tighten them.
- Torque the guide-pin bolts to 31 Nm (23 ft-lbs).
Step 15: Repeat the repair on the other side
- Repeat Steps 4 through 14 on the opposite rear wheel.
- Always replace rear pads and rotors as complete axle pairs.
Step 16: Reinstall the wheels
- Remove the temporary wheel nut holding each rotor.
- Install each wheel and start all wheel nuts by hand.
- Use the 22mm socket and ratchet to snug them in a star pattern.
- Raise the vehicle with the floor jack, remove the jack stands, and lower it until the tires touch the ground.
- Use the 22mm socket and torque wrench in a star pattern.
- Torque the wheel nuts to 190 Nm (140 ft-lbs).
Step 17: Seat the pads and reset the parking brake
- Before starting the engine, press the brake pedal slowly several times until it becomes firm.
- Connect the scan tool and select Chassis > Electronic Brake Control Module > Electronic Parking Brake > Exit Service Mode.
- Command the actuators to reset and wait for the scan tool to confirm completion.
- Apply and release the electronic parking brake twice using its switch.
- Clear only brake-system fault codes caused during service. Do not erase unrelated diagnostic information.
✅ After Repair
- Check the brake-fluid level and correct it only with fresh fluid matching the reservoir-cap specification.
- Start the engine and confirm the brake pedal remains firm before shifting out of Park.
- Confirm the electronic parking brake applies and releases normally.
- Verify that no brake, ABS, stability-control, or parking-brake warning remains illuminated.
- Drive at walking speed first and make several gentle stops.
- Bed the pads using 6-10 moderate stops from approximately 55 km/h to 15 km/h, allowing cooling time between stops.
- Avoid hard emergency-style stops and holding the hot brakes at a complete stop during the initial bedding cycle.
- Recheck the wheel-nut torque after approximately 80 km.
💰 DIY vs Shop Cost
Shop Cost: $500-$850 (parts + labor)
DIY Cost: $160-$350 (parts only)
You Save: $340-$500 by doing it yourself!
Local labor pricing varies. This repair takes a shop approximately 1.5-2.5 hours.
🎯 Ready to get started?
HowToo makes it easy: same-day/2-day shipping on every part, plus all the tools and specialty tools you need! Check out the parts and tools sections below to add everything to your cart.
