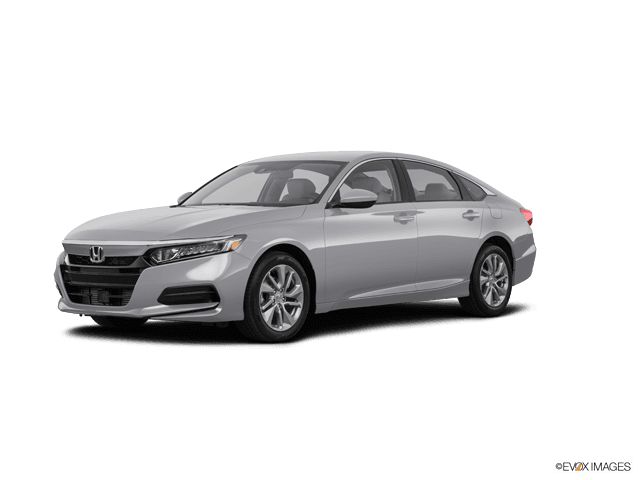

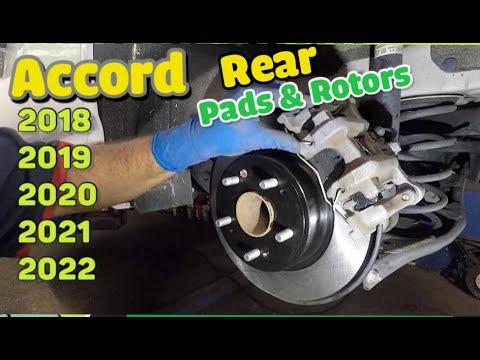






How to Replace Rear Brake Pads and Rotors on a 2018-2025 Honda Accord (Trim: EX)
Step-by-step guide with EPB maintenance mode, required tools, safety tips, and torque specs for 2018, 2019, 2020, 2023, 2024
How to Replace Rear Brake Pads and Rotors on a 2018-2025 Honda Accord (Trim: EX)
Step-by-step guide with EPB maintenance mode, required tools, safety tips, and torque specs for 2018, 2019, 2020, 2023, 2024


🔧 Accord - Rear Brake Pads and Rotor Replacement
This repair replaces both rear brake rotors and the rear brake pad set. Your Accord uses an electronic parking brake, so the rear calipers must be placed in maintenance mode before the pistons are compressed.
Difficulty Level: Intermediate | Estimated Time: 2-3 hours
⚠️ Safety & Precautions
- ⚠️ Replace the rear pads and rotors on both sides so braking remains balanced.
- ⚠️ Do not press the brake pedal or operate the parking-brake switch while a caliper is removed.
- ⚠️ Use the electronic parking brake maintenance mode before compressing either rear piston. Forcing a piston can damage its electric actuator.
- ⚠️ Never work beneath a vehicle supported only by a floor jack. Use correctly positioned jack stands.
- ⚠️ Brake dust can be harmful. Do not blow it away with compressed air.
- ⚠️ Do not let a caliper hang from its rubber brake hose.
- ⚠️ Battery disconnection is not required. Stable battery voltage is important while entering and exiting maintenance mode.
🔧 Required Tools
You'll need the following tools for this repair:
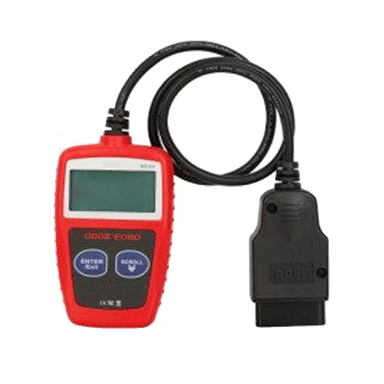
- Honda-compatible bidirectional scan tool with EPB service function (specialty)
- 12V battery maintainer rated 5-10 amps
- 1/2-inch-drive floor jack rated 2-ton minimum
- Jack stands rated 2-ton minimum
- Wheel chocks rated for passenger vehicles
- 19mm deep socket
- 12mm socket
- 14mm socket
- 17mm open-end wrench
- 3/8-inch-drive ratchet
- 1/2-inch-drive breaker bar
- 1/2-inch-drive torque wrench rated 40-150 Nm
- 3/8-inch-drive torque wrench rated 5-60 Nm
- No. 3 Phillips impact screwdriver
- 16-ounce ball-peen hammer
- M8 x 1.25 rotor removal bolts, 25mm minimum length
- Rear disc brake piston compression tool (specialty)
- Brake caliper hanger rated 25 pounds minimum
- Small flat-blade screwdriver
- Small nylon cleaning brush
- 10-inch adjustable pliers
- 150mm steel ruler
- Drain pan rated 2-quart minimum
- Clean lint-free shop towels
- Nitrile gloves rated 5-mil minimum
- ANSI Z87.1 safety glasses
- NIOSH-approved N95 dust mask
🔩 Required Parts
HowToo sells all the parts you need for this repair:
- Rear brake pad set with shims - Qty: 1
- Rear brake rotors - Qty: 2
- Rear brake pad hardware kit - Qty: 1
- Rear caliper guide-pin boots - Qty: 4 if damaged
- High-temperature silicone brake grease - Qty: 1 tube
- Non-chlorinated brake cleaner - Qty: 2 cans
- Honda DOT 3 brake fluid - Qty: 1 pint if topping off is required
📋 Before You Begin
- 📍 Park your Accord on firm, level ground. Leave the transmission in Park and switch the electronic parking brake off.
- 🔋 Connect the 12V battery maintainer according to its instructions. Do not use a boost or engine-start mode.
- 🛞 Place wheel chocks firmly against the front and rear of one front tire.
- 🧰 Connect the bidirectional scan tool to the diagnostic connector below the driver-side dashboard.
- 💻 Select Honda > Accord > 2019 > ABS/VSA > Electronic Parking Brake > Maintenance Mode. Menu wording varies slightly by scan-tool brand.
- 🛑 Follow the scan-tool prompts until it confirms that the parking-brake actuators are fully retracted. Switch the ignition off afterward, but leave the parking brake released.
🔨 Step-by-Step Instructions
Follow these steps in order:
Step 1: Loosen the Rear Wheel Nuts
- Use the 19mm deep socket and 1/2-inch breaker bar to loosen each rear wheel nut approximately one-half turn.
- Do not remove the nuts while your Accord is still on the ground.
Step 2: Raise and Support the Rear
- Use the 2-ton floor jack at the reinforced center rear lifting point.
- Place the 2-ton jack stands under the left and right rear body support points.
- Lower your Accord gently onto the stands, then lightly shake the body to confirm it is stable.
- Use the 19mm deep socket and ratchet to remove both rear wheels.
Step 3: Check the Brake-Fluid Level
- Open the hood and inspect the brake-fluid reservoir near the driver-side firewall.
- If the fluid is at the MAX line, use the clean shop towels and adjustable pliers to remove a small amount with a clean suitable extractor before compressing the pistons.
- Place the drain pan beneath the working area to catch cleaner and residue. Do not spill brake fluid on painted surfaces.
Step 4: Remove the Rear Caliper
- Work on one side at a time so the assembled side remains available as a reference.
- Use the 12mm socket and ratchet to remove the upper and lower caliper guide-pin bolts.
- If a guide pin turns, hold its hex with the 17mm open-end wrench while using the 12mm socket.
- Lift the caliper from the bracket and support it with the 25-pound brake caliper hanger.
- Use the small flat-blade screwdriver to remove the old pads and hardware without damaging the bracket.
- Photograph the hardware before removing it.
Step 5: Compress the Caliper Piston
- Confirm the scan tool still shows the electronic parking brake in maintenance mode.
- Place an old pad against the piston, then use the rear disc brake piston compression tool to press the piston slowly and straight into the caliper.
- Do not rotate the piston and do not use the electric actuator to pull it inward.
- Watch the brake-fluid reservoir while compressing the piston. Remove excess fluid before it overflows.
- Inspect the piston boot for tears, leakage, or twisting. Replace the caliper if the piston binds or the boot is damaged.
Step 6: Remove the Caliper Bracket
- Use the 14mm socket and 1/2-inch breaker bar to remove the two caliper-bracket mounting bolts.
- Lift the bracket away from the rotor.
- Do not reuse a bolt if its threads are stretched, damaged, or heavily corroded.
Step 7: Remove the Old Rotor
- Use the No. 3 Phillips impact screwdriver and 16-ounce hammer to loosen the rotor retaining screws, if fitted.
- If the rotor is stuck, thread the two M8 x 1.25 rotor removal bolts evenly into the rotor’s extraction holes.
- Use the 12mm socket and ratchet to turn each removal bolt a few turns at a time until the rotor releases.
- Remove the rotor, then remove the M8 bolts.
Step 8: Clean and Inspect the Hub
- Use brake cleaner, the nylon cleaning brush, and lint-free shop towels to clean rust and dirt from the hub face.
- Use the 150mm steel ruler across the hub face as a simple check for raised rust. The new rotor must sit completely flat.
- Do not apply grease or anti-seize between the hub and rotor.
Step 9: Install the New Rotor
- Use brake cleaner and lint-free shop towels to remove protective oil from both faces of the new rotor.
- Place the rotor squarely onto the hub.
- Install the retaining screws with the No. 3 Phillips impact screwdriver, if equipped. Torque to 10 Nm (7 ft-lbs) using the 3/8-inch torque wrench and appropriate No. 3 Phillips socket adapter.
- If no retaining screws were fitted, hold the rotor temporarily with two wheel nuts installed backward by hand.
Step 10: Service the Caliper Bracket
- Use the small flat-blade screwdriver to remove the old stainless pad clips.
- Use brake cleaner and the nylon cleaning brush to clean the clip seats thoroughly.
- Pull each guide pin from its rubber boot by hand. Wipe away the old grease with lint-free shop towels.
- Apply a thin film of high-temperature silicone brake grease to each guide pin, then reinstall it with the correct boot seated fully.
- Confirm both pins slide freely. Replace damaged or swollen boots.
- Press the new pad clips into the bracket by hand. Do not place grease beneath the clips.
Step 11: Reinstall the Caliper Bracket
- Position the bracket over the rotor and start both bolts by hand to prevent crossed threads.
- Use the 14mm socket and 1/2-inch torque wrench to tighten the bracket bolts. Torque to 108 Nm (80 ft-lbs).
Step 12: Install the New Brake Pads
- Apply a very thin film of high-temperature silicone brake grease to the pad ears where they touch the stainless clips.
- Keep grease away from the pad friction material and rotor faces.
- Install the inner and outer pads in the correct positions using your reference photo.
- Move each pad by hand. It should slide in the clips without binding.
Step 13: Reinstall the Caliper
- Lower the supported caliper over the new pads without twisting the brake hose.
- Start both guide-pin bolts by hand.
- Hold each turning guide pin with the 17mm open-end wrench, then use the 12mm socket and 3/8-inch torque wrench. Torque to 35 Nm (26 ft-lbs).
- Remove the brake caliper hanger and verify that the hose is not kinked or rubbing anything.
Step 14: Repeat on the Other Side
- Use the same tools and procedure to replace the pads and rotor on the opposite rear wheel.
- Before installing either wheel, use brake cleaner and lint-free shop towels to remove fingerprints or grease from each rotor face.
Step 15: Reinstall the Rear Wheels
- Install each wheel and start all wheel nuts by hand.
- Use the 19mm deep socket and ratchet to snug the nuts in a crisscross pattern.
- Use the floor jack to raise your Accord slightly, remove the jack stands, and lower it completely.
- Use the 19mm deep socket and 1/2-inch torque wrench to tighten the wheel nuts in a crisscross pattern. Torque to 108 Nm (80 ft-lbs).
Step 16: Exit Parking-Brake Maintenance Mode
- Connect or wake the Honda-compatible scan tool while the battery maintainer remains attached.
- Switch the ignition on without starting the engine.
- Select Honda > Accord > 2019 > ABS/VSA > Electronic Parking Brake > End Maintenance Mode.
- Follow the prompts until the scan tool confirms normal parking-brake operation.
- Use the scan tool to check for ABS or electronic parking-brake fault codes. Clear only codes created during the repair.
Step 17: Seat the Brake Pads
- Before moving your Accord, press the brake pedal slowly several times until it feels firm.
- Check the reservoir and add Honda DOT 3 brake fluid only if the level is below the proper mark.
- Operate the parking-brake switch once to apply it and once to release it. Confirm the warning indicator behaves normally.
✅ After Repair
- ✅ Check around both rear calipers for brake-fluid leaks.
- ✅ Confirm the brake pedal is firm before selecting Drive or Reverse.
- ✅ Perform an initial brake test at walking speed in a clear, level area.
- ✅ Bed in the pads with 8-10 moderate stops from approximately 50 km/h to 10 km/h. Allow about 30 seconds between stops and avoid coming to a complete stop with hot brakes.
- ✅ Drive for 10 minutes afterward with minimal braking to cool the brakes.
- ✅ Avoid panic stops and prolonged pedal holding for the first 300-500 km unless required for safety.
- ✅ Recheck the brake-fluid level after the road test. Do not fill above MAX.
- ✅ Recheck wheel-nut torque after approximately 50-100 km.
- ✅ If the EPB, ABS, or brake warning remains illuminated, stop driving and scan the system before proceeding.
💰 DIY vs Shop Cost
Shop Cost: ₹18,000-₹32,000 (parts + labor)
DIY Cost: ₹9,000-₹20,000 (parts only)
You Save: ₹9,000-₹12,000 by doing it yourself!
Labor rates around Sonīpat vary by workshop. This repair typically takes a shop approximately 1.5-2.5 hours, with imported or premium rotor brands increasing the parts cost.
🎯 Ready to get started?
HowToo makes it easy: same-day/2-day shipping on every part, plus all the tools and specialty tools you need! Check out the parts and tools sections below to add everything to your cart.