


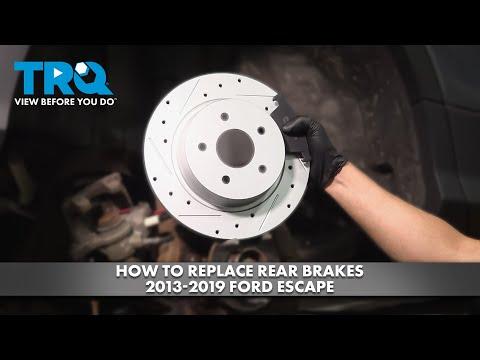







How to Replace Rear Brake Pads and Rotors on a 2017-2019 Ford Escape (Trim: SE)
Step-by-step DIY guide with tools, torque specs, safety tips, and electronic parking brake instructions for 2017, 2018, 2019
How to Replace Rear Brake Pads and Rotors on a 2017-2019 Ford Escape (Trim: SE)
Step-by-step DIY guide with tools, torque specs, safety tips, and electronic parking brake instructions for 2017, 2018, 2019


🔧 Escape - Rear Brake Pads and Rotor Replacement
This is an intermediate DIY job because your Escape uses an electronic parking brake. Put that system into maintenance mode before compressing either rear caliper piston, then replace the pads and both rear rotors as a complete axle set.
Difficulty Level: Intermediate | Estimated Time: 2-4 hours
Assumption: These instructions cover the stock rear disc brakes on your FWD Escape. Ford confirms that this model uses an electric parking brake. fordservicecontent.com
⚠️ Safety & Precautions
- ⚠️ Work on firm, level pavement and support the Escape with jack stands. Never rely on the jack alone.
- ⚠️ Chock both front wheels because the parking brake must remain released.
- ⚠️ Enter parking-brake maintenance mode before touching the calipers. Forcing an active piston inward can damage the electric actuator.
- ⚠️ Do not press the brake pedal while a caliper is removed.
- ⚠️ Never let a caliper hang from its rubber brake hose.
- ⚠️ Brake dust can be harmful. Do not blow it away with compressed air.
- ⚠️ Brake cleaner is flammable. Keep it away from sparks and hot surfaces.
- ⚠️ Battery disconnection is not normally required. Keep the battery adequately charged while operating the parking-brake system.
🔧 Required Tools
You'll need the following tools for this repair:
- 1/2-inch drive breaker bar
- 1/2-inch drive torque wrench rated 20-150 ft-lbs
- 3/8-inch drive ratchet
- 13mm socket
- 15mm open-end wrench
- 15mm socket
- 18mm socket
- 19mm deep socket
- 6-inch socket extension
- Rear brake piston compression tool (specialty)
- Floor jack rated 2-ton minimum
- Jack stands rated 2-ton minimum
- Wheel chocks
- Medium flat-blade screwdriver
- 12-inch bungee cord
- 16-ounce rubber mallet
- Small wire brush
- Disposable fluid syringe
- Safety glasses
- Nitrile gloves
🔩 Required Parts
HowToo sells all the parts you need for this repair:
- Rear ceramic brake pad set - Qty: 1
- Rear brake rotors - Qty: 2, replace as a pair
- Rear brake hardware kit - Qty: 1
- Brake parts cleaner - Qty: 2 cans
- High-temperature silicone brake lubricant - Qty: 1 packet
- Medium-strength removable threadlocker - Qty: 1 tube
📋 Before You Begin
- Park on level pavement, shift into Park and chock both front wheels.
- Leave the parking brake released. Ford warns that the electric parking brake can apply automatically under some conditions, so maintenance mode is essential. fordservicecontent.com
- Loosen each rear wheel nut about one-quarter turn before lifting the vehicle.
- Open the hood and check the brake-fluid reservoir. Remove a little fluid with the syringe if it is near the MAX line.
- Do not open a bleeder screw or disconnect a brake hose during a normal pad-and-rotor replacement.
🔨 Step-by-Step Instructions
Follow these steps in order:
Step 1: Enter Electronic Parking Brake Maintenance Mode
- Switch the ignition on without starting the engine.
- Use the brake pedal and parking-brake switch to fully release the parking brake.
- Switch the ignition off.
- Press the accelerator pedal fully down and hold it there.
- Push the electric parking-brake switch downward and keep holding it.
- While holding both controls, switch the ignition on and then off within about five seconds.
- Switch the ignition back on while continuing to hold both controls.
- Release the controls when the cluster displays Park Brake Maintenance Mode or indicates that maintenance mode is active.
- Listen for the rear parking-brake motors retracting. Ford identifies maintenance mode as the special operating mode used for rear brake service. fordservicecontent.com
Step 2: Raise and Support the Rear
- Use the floor jack at an approved rear lifting point.
- Place both jack stands under the rear side support points.
- Lower the Escape gently onto the stands and give it a firm stability check.
- Use the 19mm deep socket to remove the rear wheel nuts and wheels.
- Slide each wheel under the rocker as backup.
Step 3: Remove the Rear Caliper
- Turn the steering wheel straight and work on one side at a time.
- Use the 13mm socket to remove the upper and lower caliper guide-pin bolts.
- If a guide pin spins, hold its flats with the 15mm open-end wrench.
- Lift the caliper from the bracket and hang it with the bungee cord.
- Remove the old inner and outer pads.
- Do not twist, stretch or kink the brake hose.
Step 4: Compress the Caliper Piston
- Confirm that maintenance mode remains displayed before moving the piston.
- Place an old pad against the piston.
- Use the rear brake piston compression tool to press the piston slowly and evenly into the caliper.
- Watch the reservoir while compressing it. Remove excess fluid with the syringe before it spills.
- The piston should move smoothly. Stop if it binds, tilts or requires extreme force.
- Slow pressure protects seals and avoids a fluid geyser.
Step 5: Remove the Caliper Bracket
- Use the 18mm socket, breaker bar and extension to remove the two bracket-to-knuckle bolts.
- Lift the bracket away from the rotor.
- Keep the guide pins clean. Do not mix the upper and lower pins if their shapes differ.
Step 6: Remove the Old Rotor
- Pull the rotor straight from the wheel hub.
- If rust holds it in place, strike the rotor hat between the wheel studs with the rubber mallet.
- Do not strike the studs, wheel bearing or thin rotor braking surface.
- Use the wire brush to clean rust from the hub face.
- The new rotor must sit completely flat. Rust trapped behind it can cause pedal pulsation later.
Step 7: Prepare the New Rotor and Bracket
- Spray both braking surfaces of the new rotor with brake cleaner and wipe them dry.
- Install the clean rotor over the wheel studs.
- Remove the old stainless pad clips from the bracket with the flat-blade screwdriver.
- Use the wire brush to clean the clip seating areas.
- Install the new clips from the hardware kit.
- Remove, clean and lightly lubricate each guide pin with silicone brake lubricant.
- Keep lubricant off the rotor and pad friction material.
Step 8: Reinstall the Caliper Bracket
- Position the bracket over the rotor.
- Apply a small amount of removable threadlocker to clean bracket-bolt threads if the replacement instructions specify it.
- Start both bolts by hand to prevent cross-threading.
- Use the 18mm socket and torque wrench to tighten the bracket bolts to 115 Nm (85 ft-lbs).
Step 9: Install the New Pads
- Apply a very thin layer of silicone brake lubricant where the pad ears contact the stainless clips.
- Install the inner and outer pads into the bracket.
- Keep every friction surface completely dry and grease-free.
- Slide the pads by hand. They should move without binding.
Step 10: Reinstall the Caliper
- Lower the caliper over the new pads without twisting the hose.
- Align the guide pins and start both guide-pin bolts by hand.
- Use the 13mm socket and hold the pin with the 15mm wrench if necessary.
- Tighten the guide-pin bolts to 28 Nm (21 ft-lbs).
- Repeat Steps 3 through 10 on the opposite side.
Step 11: Reinstall the Wheels
- Clean the wheel mounting faces with the wire brush.
- Install each wheel and start all five nuts by hand.
- Use the 19mm deep socket to snug the nuts in a star pattern.
- Raise the vehicle with the floor jack, remove both stands and lower it completely.
- Use the torque wrench and 19mm socket to tighten the wheel nuts in a star pattern to 135 Nm (100 ft-lbs).
Step 12: Exit Electronic Parking Brake Maintenance Mode
- Switch the ignition on without starting the engine.
- Press the accelerator pedal fully down and hold it.
- Pull the parking-brake switch upward and hold it.
- Switch the ignition off and then on while holding both controls.
- Release the controls when the maintenance-mode message disappears and the electric parking brake cycles.
- Apply and release the parking brake once using the switch.
- If the mode does not exit, do not drive until the procedure is repeated successfully or the system is operated with a compatible scan tool.
✅ After Repair
- Before starting the engine, slowly pump the brake pedal until it becomes firm. This seats the pistons against the new pads.
- Check the brake-fluid level and adjust it between MIN and MAX using the fluid type marked on the reservoir cap.
- Start the engine and confirm that the pedal remains firm.
- Apply and release the electronic parking brake. Confirm that no parking-brake or brake-system warning remains illuminated.
- Inspect both rear calipers and hoses for leaks or twisted routing.
- Perform a walking-speed brake test before entering traffic.
- Bed the pads using 5-8 moderate stops from approximately 30 mph to 5 mph. Do not come to a complete stop with a hot pedal held firmly.
- Drive for several minutes afterward to let the brakes cool.
- Recheck the wheel-nut torque after approximately 50 miles.
💰 DIY vs Shop Cost
Shop Cost: $450-$750 USD equivalent for parts and labor
DIY Cost: $110-$250 USD equivalent for pads, two rotors and hardware
You Save: Approximately $250-$500 by doing it yourself!
Labor rates vary by area. This repair normally takes a shop approximately 1.5-2.5 hours.
🎯 Ready to get started?
HowToo has opened the matching brake aisle for your Escape, including rear pads, rotors, kits and hardware. Check the parts and tools sections below to add everything you need to your cart.
