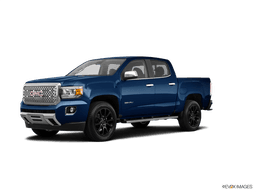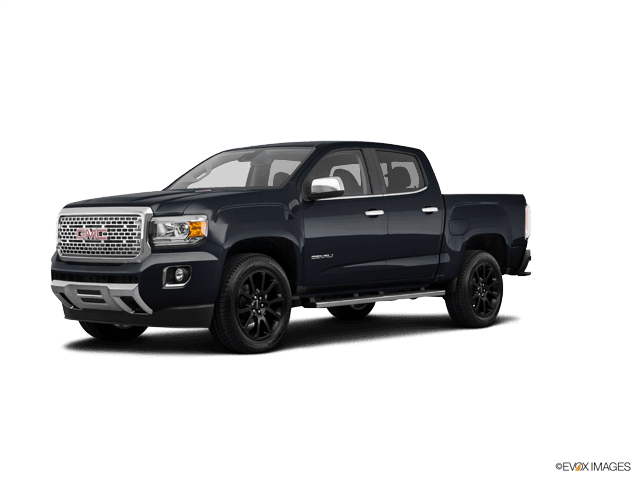

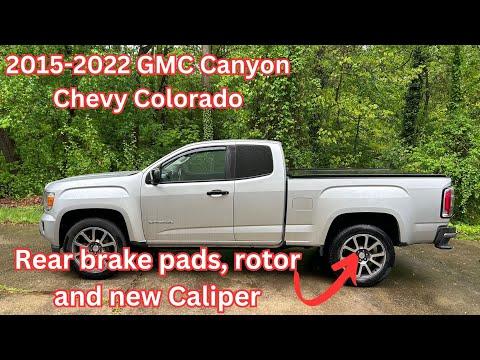






How to Replace Rear Brake Pads and Rotors on a 2015-2020 GMC Canyon (Trim: Denali)
Step-by-step DIY instructions covering tools, parts, parking brake safety, and installation for 2015, 2016, 2017, 2018, 2019, 2020
How to Replace Rear Brake Pads and Rotors on a 2015-2020 GMC Canyon (Trim: Denali)
Step-by-step DIY instructions covering tools, parts, parking brake safety, and installation for 2015, 2016, 2017, 2018, 2019, 2020


🔧 Canyon - Rear Brake Pad and Rotor Replacement
Replace the rear pads and both rotors together. Your Canyon uses a small parking-brake drum inside each rear rotor, so the parking brake must remain released during removal.
Difficulty Level: Intermediate | Estimated Time: 3-5 hours
Assumption: The calipers, hoses, and parking-brake shoes are reusable and undamaged.
⚠️ Safety & Precautions
- ⚠️ Work on level, solid ground and chock both front wheels.
- ⚠️ Support your Canyon with jack stands. Never work beneath a vehicle supported only by a jack.
- ⚠️ Leave the parking brake completely released before removing the rear rotors.
- ⚠️ Brake dust is harmful. Don’t use compressed air or blow dust with your mouth.
- ⚠️ Never let a caliper hang from its rubber brake hose.
- ⚠️ Don’t press the brake pedal while a caliper is removed.
- ⚠️ Keep grease, penetrating oil, and dirty hands away from pad and rotor friction surfaces.
- ⚠️ Battery disconnection isn’t required for this repair.
- ⚠️ Obtain the exact GM torque specifications before final assembly. Don’t guess on brake fasteners.
🔧 Required Tools
You'll need the following tools for this repair:
- 1/2-inch drive breaker bar
- 1/2-inch drive metric socket set, 13-24mm
- 3/8-inch drive metric socket set, 10-18mm
- Metric combination wrench set, 10-24mm
- 1/2-inch drive torque wrench, 30-200 ft-lbs
- 3/8-inch drive torque wrench, 10-80 ft-lbs
- Floor jack rated 3-ton minimum
- Jack stands rated 3-ton minimum
- Wheel chocks, two-piece set
- Rear caliper piston compression tool (specialty)
- Brake caliper hanger (specialty)
- Flat-blade screwdriver, 6-inch
- Brake spring adjustment spoon (specialty)
- Dead-blow hammer, 2-pound
- Wire brush, stainless-steel
- Brake parts cleaning brush, nylon
- Dial indicator with magnetic base (specialty)
- Brake rotor runout gauge adapter (specialty)
- Disposable drain pan, 2-quart minimum
- Nitrile gloves
- Safety glasses
- Disposable dust mask rated N95
🔩 Required Parts
HowToo sells all the parts you need for this repair:
- Rear brake pad and rotor kit - Pads: 1 set, Rotors: 2, Hardware: 1 set
- Synthetic brake caliper lubricant - Qty: 1
- Aerosol brake cleaner - Qty: 2 cans
- High-temperature anti-seize compound - Qty: 1 small tube
- Parking-brake shoes and hardware - Qty: 1 set each, only if contaminated, cracked, or worn
Replace rear pads and rotors in axle pairs. One shiny new rotor and one tired old rotor is false economy.
📋 Before You Begin
- Park your Canyon on level pavement, shift into Park, and switch off the engine.
- Release the parking brake fully and verify the parking-brake warning light is off.
- Place the wheel chocks firmly against the front and rear of one front tire.
- Check the brake-fluid reservoir. Remove a little fluid with a clean suction tool if it is already at the maximum line.
- Photograph both brake assemblies before disassembly. This gives you a reference for clips and pad orientation.
- Perform one rear corner at a time. The untouched side remains your visual reference.
🔨 Step-by-Step Instructions
Follow these steps in order:
Step 1: Loosen the rear wheel nuts
- Keep the tires on the ground and use the 1/2-inch breaker bar with the correctly fitting socket.
- Loosen every rear lug nut about one-quarter turn. Don’t remove them yet.
Step 2: Raise and support the rear
- Use the 3-ton floor jack at an approved rear lifting point.
- Position both 3-ton jack stands beneath approved frame support points.
- Lower your Canyon onto the stands, then gently shake the body to confirm stability.
- Remove the lug nuts and wheels using the metric socket set.
Step 3: Inspect the exposed brake assembly
- Use the safety glasses, N95 mask, and brake cleaner to wet down loose dust.
- Inspect the rubber brake hose for cracking, wetness, or swelling.
- Check the caliper for brake-fluid leakage and compare inner-pad wear with outer-pad wear.
- Uneven pad wear usually means a sticking slide pin or caliper problem that must be corrected.
Step 4: Remove the rear caliper
- Use the correctly fitting metric wrench or metric socket on the caliper guide-pin bolts.
- Hold the guide pin with a wrench if it tries to rotate.
- Remove both guide-pin bolts and lift the caliper away from the pads.
- Hang the caliper from the suspension using the brake caliper hanger.
- Don’t disconnect the brake hose. Bleeding normally isn’t needed for a pad-and-rotor replacement.
Step 5: Remove the old pads and hardware
- Pull the inner and outer pads from the bracket by hand.
- Use the flat-blade screwdriver to remove the stainless abutment clips.
- An abutment clip is the thin metal piece that lets each pad slide smoothly in its bracket.
- Note the position of any mechanical wear indicator before discarding the pads.
Step 6: Retract the caliper piston
- Place an old pad against the piston face.
- Use the rear caliper piston compression tool to press the piston straight and slowly into the caliper.
- Watch the brake-fluid reservoir while compressing the piston. Stop if fluid approaches the top.
- If the piston binds, tilts, or requires excessive force, stop and replace or repair the caliper.
- Slow pressure protects the piston seal.
Step 7: Remove the caliper mounting bracket
- Use the 1/2-inch breaker bar and correctly fitting socket to loosen both bracket bolts.
- Remove the bracket and place its bolts where they cannot become mixed with guide-pin bolts.
- Inspect the bolt threads. Replace stretched, damaged, or heavily corroded bolts.
Step 8: Remove the rear rotor
- Confirm again that the parking brake is fully released.
- Remove any rotor retaining screw or factory transport clip using the correctly fitting hand tool.
- Pull the rotor straight outward by hand.
- If it will not move, use the dead-blow hammer around the rotor hat between the wheel studs.
- If the rotor moves slightly and then catches, the parking-brake shoes are holding it.
- Use the flat-blade screwdriver to remove the backing-plate access plug.
- Use the brake adjustment spoon to retract the parking-brake shoe adjuster a few clicks at a time.
- Never force the rotor over the shoes. That can tear the parking-brake hardware apart.
Step 9: Inspect the parking-brake assembly
- Use brake cleaner and the nylon brush to clean the drum-in-hat parking-brake area.
- Drum-in-hat means the rotor’s center also acts as a small drum for the parking brake.
- Replace the shoes if the lining is loose, cracked, oil-soaked, or worn very thin.
- Check that all springs are attached and the adjuster turns freely.
- Don’t apply ordinary grease to parking-brake shoe linings or the rotor’s internal drum surface.
Step 10: Prepare the hub and new rotor
- Use the stainless-steel wire brush to remove rust and scale from the hub face.
- Clean around the wheel studs without damaging their threads.
- Wipe the hub clean using brake cleaner and a lint-free cloth.
- Apply an extremely thin film of anti-seize compound around the hub pilot only.
- Do not put anti-seize on wheel studs, rotor faces, or lug-nut seats.
- Clean both friction faces of the new rotor using brake cleaner.
Step 11: Install and check the new rotor
- Place the new rotor over the wheel studs and parking-brake shoes.
- Temporarily secure it using three lug nuts installed backward by hand.
- Attach the dial indicator with magnetic base and position its tip near the outer rotor face.
- Rotate the rotor slowly and observe lateral runout, which is side-to-side rotor wobble.
- If runout exceeds the GM service limit, clean the hub again and index the rotor to another stud position.
- Remove the temporary lug nuts after completing the measurement.
Step 12: Service the caliper bracket and slide pins
- Use the wire brush to clean rust beneath the old abutment clips.
- Install the new clips fully into their original positions.
- Pull each slide pin from its rubber boot by hand.
- Wipe the pin clean and inspect it for rust, grooves, or seized movement.
- Apply a light coat of synthetic brake caliper lubricant to each smooth slide-pin surface.
- Keep lubricant away from threads, pad faces, rotor faces, and rubber parts unless the product states rubber compatibility.
Step 13: Reinstall the caliper bracket
- Position the bracket over the rotor and start both mounting bolts by hand.
- Use the 1/2-inch torque wrench to tighten the bracket bolts to the exact GM specification for your Canyon.
- Do not substitute a generic torque value. Confirm the current service specification before driving.
Step 14: Install the new brake pads
- Apply a very thin layer of synthetic brake caliper lubricant where the pad ears contact the stainless clips.
- Install the inner and outer pads in the same orientation as the original pads.
- Place any mechanical wear indicator in the matching original location.
- Confirm both pads slide in the clips without excessive force.
Step 15: Reinstall the caliper
- Place the caliper over the new pads without twisting the brake hose.
- Start both guide-pin bolts by hand to prevent cross-threading.
- Use the 3/8-inch torque wrench to tighten the guide-pin bolts to the exact GM service specification.
- Do not guess the guide-pin torque. These smaller fasteners can be damaged by overtightening.
Step 16: Repeat on the opposite side
- Use the same tools and sequence on the other rear wheel.
- Compare pad, clip, and wear-indicator orientation with the completed side.
- Confirm both brake hoses remain untwisted and both calipers move freely on their guide pins.
Step 17: Reinstall the wheels
- Clean the wheel and rotor mating surfaces using the wire brush.
- Install each wheel and start all lug nuts by hand.
- Snug the nuts in a star pattern using the metric socket.
- Raise your Canyon slightly with the floor jack, remove the stands, and lower the tires to the ground.
- Use the 1/2-inch torque wrench and tighten the lug nuts in a star pattern to the specification listed in the owner information for your wheel package.
✅ After Repair
- With the engine off, press the brake pedal repeatedly until it becomes firm.
- Do not move your Canyon if the pedal remains soft or sinks toward the floor.
- Check the brake-fluid level and correct it without filling above the maximum mark.
- Apply and release the parking brake several times. Confirm both rear wheels release normally.
- Start the engine and hold firm pedal pressure for 30 seconds while checking for abnormal pedal movement.
- Perform a cautious test at walking speed before entering traffic.
- Bed the pads using the pad manufacturer’s instructions. A common process uses several moderate slowdowns with cooling time between them.
- Avoid emergency stops, towing, or holding the hot brakes at a complete stop during initial bedding.
- Recheck lug-nut torque after approximately 50-100 miles.
- Investigate pulling, scraping, smoke, excessive heat, warning lights, or a soft pedal before further driving.
💰 DIY vs Shop Cost
Shop Cost: $450-$800 (parts + labor)
DIY Cost: $130-$300 (parts only)
You Save: $320-$500 by doing it yourself!
Shop labor rates vary but typically run $100-$150/hour. This repair takes a shop approximately 2-3 hours.
🎯 Ready to get started?
HowToo makes it easy: same-day/2-day shipping on every part, plus all the tools and specialty tools you need! Check out the parts and tools sections below to add everything to your cart.