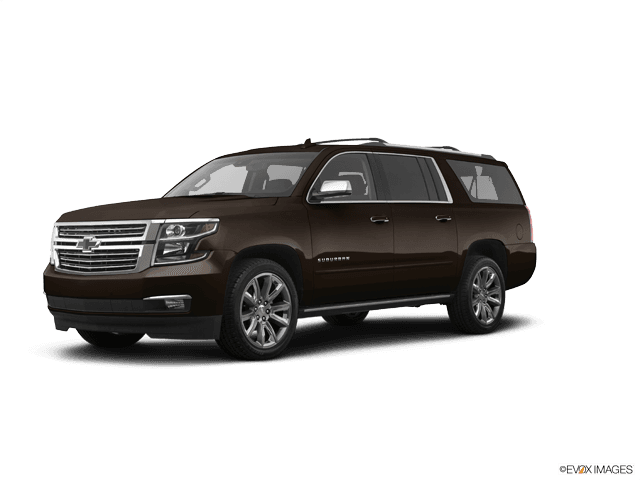








How to Replace Rear Brake Pads and Rotors on a 2015-2020 Chevrolet Suburban (Trim: Premier)
Step-by-step DIY guide with required tools, parts, torque specs, and safety tips for 2015, 2016, 2017, 2018, 2019, 2020
How to Replace Rear Brake Pads and Rotors on a 2015-2020 Chevrolet Suburban (Trim: Premier)
Step-by-step DIY guide with required tools, parts, torque specs, and safety tips for 2015, 2016, 2017, 2018, 2019, 2020


🔧 Suburban - Rear Brake Pad and Rotor Replacement
This repair replaces the rear brake pads and both rear rotors on your Suburban. The parking brake uses small drum-style shoes inside each rear rotor, so the parking brake must be fully released before removing the rotors.
Difficulty Level: Intermediate | Estimated Time: 2-3 hours
Assumption: Factory rear brakes and mechanical foot-operated parking brake are installed.
⚠️ Safety & Precautions
- ⚠️ Work on level, solid ground and block both front wheels.
- ⚠️ Support your Suburban with jack stands under the rear axle tubes. Never rely on a floor jack alone.
- ⚠️ Release the parking brake completely before attempting to remove either rotor.
- ⚠️ Do not press the brake pedal while a caliper is removed.
- ⚠️ Support each caliper with a hanger. Never let it hang from its rubber brake hose.
- ⚠️ Brake dust can be harmful. Do not use compressed air to clean the brakes.
- ⚠️ The battery does not need to be disconnected because this system does not require electronic parking-brake service mode.
🔧 Required Tools
You'll need the following tools for this repair:
- 3-ton floor jack
- 3-ton jack stands
- Heavy-duty wheel chocks
- 22mm deep socket
- 13mm socket
- 18mm socket
- Torx T30 bit socket
- 3/8-inch drive ratchet
- 1/2-inch drive breaker bar
- 10-60 Nm torque wrench
- 40-250 Nm torque wrench
- Large brake caliper piston compressor (specialty)
- Flat-blade screwdriver
- Impact screwdriver with Torx T30 bit (specialty)
- Brake caliper hanger
- Rubber mallet
- Small wire brush
- Drain pan
- Plastic trim tool
- Nitrile gloves
- Safety glasses
- NIOSH-approved N95 dust mask
🔩 Required Parts
HowToo sells all the parts you need for this repair:
- 🔩 Rear brake pad set with wear indicators - Qty: 1
- 🔩 Rear brake rotors - Replace in pairs - Qty: 2
- 🔩 Rear brake pad hardware kit - Qty: 1
- 🔩 High-temperature silicone brake lubricant - Qty: 1
- 🔩 Non-chlorinated brake cleaner - Qty: 2 cans
- 🔩 Medium-strength removable threadlocker - Qty: 1
- 🔩 DOT 3 brake fluid - Qty: 1 pint, only if topping up is necessary
📋 Before You Begin
- 📋 Park on level pavement, shift into Park, switch off the engine, and remove the key from the vehicle.
- 📋 Release the foot-operated parking brake completely.
- 📋 Place heavy-duty wheel chocks firmly against the front and rear of both front tires.
- 📋 Open the hood and locate the brake-fluid reservoir. Use a plastic trim tool to remove the reservoir cap and check the level.
- 📋 If the reservoir is completely full, remove a small amount of fluid before compressing the pistons so it cannot overflow.
- 📋 No infotainment menu, scan tool, battery disconnect, or parking-brake service mode is required.
🔨 Step-by-Step Instructions
Follow these steps in order:
Step 1: Loosen the Rear Wheel Nuts
- 🛞 Use a 22mm deep socket and 1/2-inch breaker bar to loosen each rear wheel nut about one-half turn.
- Do not remove the nuts until your Suburban is securely supported.
Step 2: Raise and Support the Rear
- 🔧 Position the 3-ton floor jack beneath a strong rear axle lifting point, avoiding the differential cover and brake lines.
- Raise the rear and place 3-ton jack stands beneath the axle tubes near the suspension mounting areas.
- Lower the axle carefully onto the stands, leave the floor jack lightly touching the axle, and gently push the body to verify stability.
Step 3: Remove Both Rear Wheels
- 🛞 Use the 22mm deep socket and 3/8-inch ratchet to remove the wheel nuts.
- Remove both wheels and slide them beneath the body as an additional safety measure.
Step 4: Remove the Rear Caliper
- 🔧 Place a drain pan beneath the brake assembly to catch cleaner and debris.
- Use a 13mm socket and 3/8-inch ratchet to remove the upper and lower caliper guide-pin bolts.
- If a guide pin turns, hold its flats with the appropriate wrench while loosening the bolt.
- Lift the caliper from the bracket and suspend it with a brake caliper hanger.
- Never pull or twist the brake hose.
Step 5: Remove the Old Brake Pads
- 🧤 Wear safety glasses, gloves, and an N95 dust mask.
- Pull the inner and outer pads from the caliper bracket by hand.
- Use a flat-blade screwdriver only if the pads are stuck, taking care not to damage the bracket.
- Note the position of the pad wear indicator before discarding the old pads.
Step 6: Compress the Caliper Pistons
- 🔧 Place an old brake pad across the piston faces.
- Use the large brake caliper piston compressor to push the pistons straight and slowly into the caliper.
- A piston compressor applies even pressure so the pistons retract without becoming crooked.
- Watch the brake-fluid reservoir and stop if fluid approaches the top.
- Do not twist the pistons; this is not an electronic parking-brake caliper.
Step 7: Remove the Caliper Bracket
- 🔧 Use an 18mm socket and 1/2-inch breaker bar to remove the two caliper bracket bolts.
- Remove the bracket and place it on a clean work surface.
- These bolts are tight. Keep the socket squarely seated to avoid rounding the bolt heads.
Step 8: Remove the Rotor Retaining Screw
- 🔩 Use a Torx T30 bit socket and 3/8-inch ratchet to remove the rotor retaining screw.
- If seized, seat the bit fully and use the impact screwdriver with Torx T30 bit.
- Do not continue if the bit begins slipping because the screw head can strip.
Step 9: Remove the Old Rotor
- 🔨 Pull the rotor straight off the hub. Use a rubber mallet around the rotor hat if rust holds it in place.
- If the rotor moves slightly but catches on the parking-brake shoes, use a flat-blade screwdriver through the rotor access opening to retract the star-wheel adjuster a few clicks.
- The star-wheel adjuster is a small toothed wheel that changes parking-brake shoe clearance.
- Do not force the rotor over the parking-brake shoes because their retaining hardware can be damaged.
Step 10: Inspect the Parking Brake
- 🔍 Use the brake cleaner and drain pan to clean the parking-brake area without creating airborne dust.
- Inspect the shoes for loose lining, deep cracks, fluid contamination, or uneven wear.
- Check that the springs and retaining clips remain correctly seated.
- If the shoes or hardware are damaged, stop and replace the parking-brake components before installing the rotor.
Step 11: Clean the Hub and New Rotor
- 🧹 Use the small wire brush to remove rust from the flat hub face and center pilot.
- Keep the brush away from the parking-brake shoe friction material and wheel-speed sensor wiring.
- Use non-chlorinated brake cleaner to remove protective oil from both friction faces of each new rotor.
- Wipe the rotor dry with a clean lint-free cloth.
- A clean hub helps prevent brake vibration.
Step 12: Install the New Rotor
- 🔩 Slide the clean rotor over the parking-brake shoes and fully against the hub.
- If necessary, use a flat-blade screwdriver to adjust the star wheel until the rotor slides on without force.
- Install the retaining screw with the Torx T30 bit socket and 10-60 Nm torque wrench.
- Torque to 12 Nm (106 in-lbs).
- Rotate the rotor by hand. A faint, even parking-brake drag is acceptable; binding is not.
Step 13: Service the Caliper Bracket
- 🔧 Remove the old stainless pad clips from the bracket by hand.
- Use the small wire brush to clean rust beneath the clips.
- Install the new hardware clips fully into the bracket.
- Pull each guide pin from its rubber boot, wipe it clean, and inspect it for corrosion or damage.
- Apply a thin film of high-temperature silicone brake lubricant to each guide pin and reinstall it without trapping air in the boot.
- Apply a very thin film of lubricant where the pad ears contact the clips. Keep lubricant off pad and rotor friction surfaces.
Step 14: Reinstall the Caliper Bracket
- 🔩 Apply medium-strength removable threadlocker to clean caliper bracket bolt threads.
- Position the bracket and start both 18mm bolts by hand.
- Use an 18mm socket and 40-250 Nm torque wrench to tighten both bolts.
- Torque to 200 Nm (148 ft-lbs).
Step 15: Install the New Brake Pads
- 🧩 Slide the inner and outer pads into the new clips by hand.
- Match the new pad orientation to the old pads, including the wear-indicator position.
- Make sure both pads move smoothly in the bracket without excessive looseness.
- Do not apply lubricant to the pad friction material.
Step 16: Reinstall the Caliper
- 🔧 Lower the caliper over the new pads without twisting the brake hose.
- Align the guide pins and start both 13mm bolts by hand.
- Use a 13mm socket and 10-60 Nm torque wrench to tighten both guide-pin bolts.
- Torque to 42 Nm (31 ft-lbs).
- Repeat Steps 4-16 on the opposite rear brake.
Step 17: Reinstall the Wheels
- 🛞 Install each wheel and start all wheel nuts by hand.
- Use the 22mm deep socket and 3/8-inch ratchet to snug the nuts in a crossing pattern.
- Remove the safety wheels from beneath the body, raise the axle with the 3-ton floor jack, and remove the jack stands.
- Lower your Suburban until the tires touch the ground without carrying the vehicle's full weight.
- Use the 22mm deep socket and 40-250 Nm torque wrench to tighten the wheel nuts in a crossing pattern.
- Torque to 190 Nm (140 ft-lbs).
Step 18: Restore Brake Pedal Pressure
- 🦶 With the engine off, press the brake pedal slowly several times until it becomes firm.
- Do not move your Suburban until the pedal is firm and remains at a consistent height.
- Check the brake-fluid reservoir and use DOT 3 brake fluid only if the level is below the proper mark.
- Reinstall the reservoir cap securely by hand.
✅ After Repair
- ✅ Inspect both calipers, hoses, and bleeder screws for any brake-fluid leakage.
- ✅ Start the engine and confirm the brake pedal remains firm under steady pressure.
- ✅ Apply and release the parking brake several times, then verify both rear wheels rotate without binding.
- ✅ Perform a slow test in a safe area. Confirm normal stopping before entering traffic.
- ✅ Bed in the new pads with 8-10 moderate stops from approximately 50 km/h to 15 km/h, allowing about 30 seconds of driving between stops.
- ✅ Avoid holding the hot brakes firmly at a complete stop during bedding.
- ✅ Allow the brakes to cool for at least 15 minutes after bedding.
- ✅ Recheck wheel-nut torque to 190 Nm (140 ft-lbs) after approximately 80-160 km.
💰 DIY vs Shop Cost
Shop Cost: $550-$900 (parts + labor)
DIY Cost: $220-$420 (parts only)
You Save: $330-$480 by doing it yourself!
Imported-part pricing in Haryana may be higher. Shop labor rates vary, but this repair takes a shop approximately 1.5-2.0 hours.
🎯 Ready to get started?
HowToo makes it easy: same-day/2-day shipping on every part, plus all the tools and specialty tools you need! Check out the parts and tools sections below to add everything to your cart.