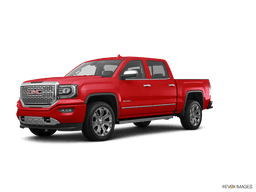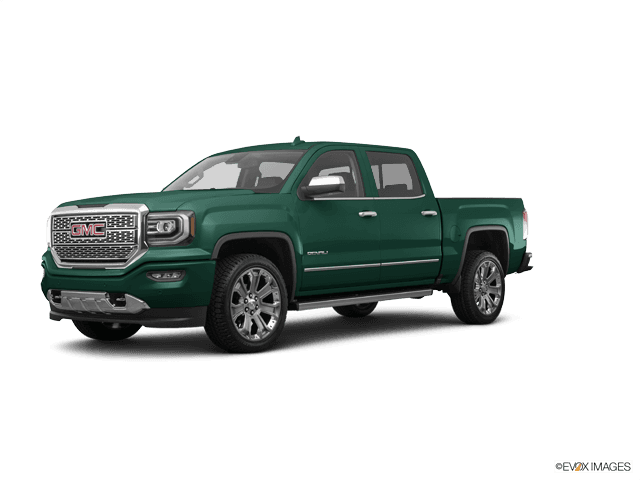

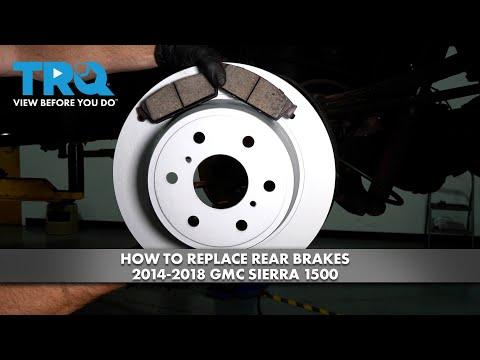







How to Replace Rear Brake Pads and Rotors on a 2014-2018 GMC Sierra 1500
Step-by-step DIY instructions with required tools, parts, torque specs, and safety tips for 2014, 2015, 2016, 2017, 2018
How to Replace Rear Brake Pads and Rotors on a 2014-2018 GMC Sierra 1500
Step-by-step DIY instructions with required tools, parts, torque specs, and safety tips for 2014, 2015, 2016, 2017, 2018


🔧 Sierra 1500 - Rear Brake Pads and Rotor Replacement
This repair replaces the rear brake pads and both rear rotors on your Sierra 1500. The rear calipers use conventional push-in pistons, while the parking brake uses separate shoes inside each rotor hat.
Difficulty Level: Intermediate | Estimated Time: 2-3 hours
⚠️ Safety & Precautions
- ⚠️ Work on level, solid ground and chock both front wheels.
- ⚠️ Do not engage the parking brake after lifting the truck; it must remain released so the rotors can come off.
- ⚠️ Support your Sierra 1500 with jack stands under the rear axle. Never rely on a floor jack alone.
- ⚠️ Brake dust may be harmful. Do not blow it away with compressed air.
- ⚠️ Never press the brake pedal while a caliper is removed.
- ⚠️ Hang each caliper securely. Never let it pull on the rubber brake hose.
- ⚠️ Battery disconnection is not required because this truck does not use an electronic parking-brake motor.
🔧 Required Tools
You'll need the following tools for this repair:
- Safety glasses
- Nitrile mechanic gloves
- Wheel chocks
- Floor jack rated 3-ton minimum
- Jack stands rated 3-ton minimum
- 22mm deep socket
- 13mm socket
- 18mm socket
- 18mm combination wrench
- Torx T30 bit socket
- 3/8-inch-drive ratchet
- 1/2-inch-drive breaker bar
- 1/2-inch-drive torque wrench rated 20-200 ft-lbs
- 3/8-inch-drive inch-pound torque wrench
- Brake caliper piston compression tool (specialty)
- Brake caliper hanger (specialty)
- Flat-blade screwdriver
- Brake spring adjustment spoon (specialty)
- Dead-blow hammer
- Small wire brush
- Hub-cleaning wire brush
- Brake cleaner catch pan
- Plastic brake-fluid syringe
🔩 Required Parts
HowToo sells all the parts you need for this repair:
- Rear brake pad set with hardware - Qty: 1
- Rear brake rotors - Replace in pairs - Qty: 2
- Brake parts cleaner - Qty: 2 cans
- High-temperature silicone brake lubricant - Qty: 1
- Medium-strength removable threadlocker - Qty: 1
- DOT 3 brake fluid - Qty: 1 small sealed bottle
📋 Before You Begin
- 📍 Park your Sierra 1500 on level pavement, shift into Park, switch off the engine, and chock both sides of both front wheels.
- 🔓 Release the foot-operated parking brake completely.
- 🧰 Open the hood and locate the brake-fluid reservoir. Clean around its cap before opening it.
- 📏 Check the fluid level. If it is near MAX, remove a small amount with the plastic brake-fluid syringe so it cannot overflow when the pistons are compressed.
- 🛞 Loosen each rear wheel nut approximately one-quarter turn with the 22mm deep socket and breaker bar before lifting.
- 📱 No infotainment service mode or scan-tool parking-brake command is required.
🔨 Step-by-Step Instructions
Follow these steps in order:
Step 1: Lift and support the rear axle
- Position the 3-ton floor jack beneath the center of the rear axle housing. Do not place it on the differential cover.
- Raise the rear wheels, then position the 3-ton jack stands beneath the axle tubes near the leaf springs.
- Lower the axle onto the stands and gently push the truck to verify that it is stable.
Step 2: Remove both rear wheels
- Use the 22mm deep socket and 1/2-inch breaker bar to remove the wheel nuts.
- Remove both wheels and place them flat away from the work area.
- Complete one side before dismantling the other.
Step 3: Remove the rear caliper
- Use the 13mm socket and 3/8-inch ratchet to remove the upper and lower caliper guide-pin bolts.
- If a guide pin turns, hold its flats with the 18mm combination wrench while loosening the bolt with the 13mm socket.
- Lift the caliper from the bracket and support it with the brake caliper hanger.
- Do not disconnect the brake hose.
Step 4: Remove the old brake pads
- Pull the inner and outer pads from the caliper bracket by hand.
- Use the flat-blade screwdriver to remove the stainless pad-support clips.
- Observe the pad wear. Uneven wear may indicate seized guide pins or a sticking caliper.
Step 5: Compress the caliper piston
- Place an old pad against the piston, then use the brake caliper piston compression tool to push the piston slowly and evenly into the caliper.
- This is a straight push-in piston. Do not twist it.
- Watch the brake-fluid reservoir and remove excess fluid with the plastic brake-fluid syringe if necessary.
- Stop if the piston binds, leaks, or requires extreme force; the caliper may need replacement.
Step 6: Remove the caliper bracket
- Use the 18mm socket and 1/2-inch breaker bar to remove the two caliper-bracket bolts.
- Lift the bracket away and place it on a clean surface.
- Clean the bracket’s clip seats with the small wire brush and brake parts cleaner over the catch pan.
Step 7: Remove the rear rotor
- Use the Torx T30 bit socket and 3/8-inch ratchet to remove the rotor-retaining screw.
- Pull the rotor straight from the hub.
- If the rotor will not move, verify that the parking brake is completely released.
- Use the dead-blow hammer to strike around the rotor hat between the wheel studs. Do not strike the studs.
- If the parking-brake shoes are holding the rotor, remove the rubber access plug and use the flat-blade screwdriver with the brake spring adjustment spoon to retract the star-wheel adjuster slightly.
- The star-wheel adjuster is the toothed wheel that changes parking-brake shoe clearance.
Step 8: Inspect the parking brake
- Use the safety glasses and inspect the parking-brake shoes inside the rotor area.
- Check for cracked, loose, oil-soaked, or severely worn friction material.
- Check the axle-seal area for gear-oil leakage. Repair any leak before installing the new rotor.
- Do not apply lubricant to the parking-brake shoe friction surfaces.
Step 9: Clean the hub and new rotor
- Use the hub-cleaning wire brush to remove rust from the hub face without damaging the wheel studs.
- The hub face must be smooth so the new rotor sits flat and does not cause pedal pulsation.
- Use brake parts cleaner and the catch pan to clean both friction surfaces of the new rotor.
- Wipe the rotor dry with a clean, lint-free towel.
Step 10: Install the new rotor
- Slide the clean rotor over the wheel studs and parking-brake shoes.
- If it will not slide on, use the brake spring adjustment spoon through the access opening to retract the parking-brake adjuster slightly.
- Install the retaining screw with the Torx T30 bit socket and inch-pound torque wrench.
- Torque to 12 Nm (106 in-lbs).
Step 11: Service and install the caliper bracket
- Pull each guide pin from its rubber boot by hand and wipe it clean.
- Apply a thin coating of high-temperature silicone brake lubricant to the smooth guide-pin surfaces. Do not lubricate the threaded ends.
- Reinstall the guide pins and confirm that they slide freely while the boots remain seated.
- Apply medium-strength removable threadlocker to clean caliper-bracket bolt threads.
- Position the bracket and start both bolts by hand to prevent cross-threading.
- Use the 18mm socket and 1/2-inch torque wrench to tighten both bracket bolts.
- Torque to 200 Nm (148 ft-lbs).
Step 12: Install the new pads
- Press the new stainless pad-support clips into the cleaned bracket by hand.
- Apply a very thin layer of high-temperature silicone brake lubricant where the pad ears contact the clips.
- Keep lubricant completely off the pad and rotor friction surfaces.
- Slide the inner and outer pads into the bracket. They should move without binding.
Step 13: Reinstall the caliper
- Remove the caliper from the brake caliper hanger and place it over the new pads.
- Make sure the brake hose is not twisted.
- Start both guide-pin bolts by hand.
- Use the 13mm socket and torque wrench to tighten the guide-pin bolts. Hold a turning guide pin with the 18mm combination wrench.
- Torque to 42 Nm (31 ft-lbs).
Step 14: Repeat on the opposite side
- Use the same listed tools and repeat Steps 3 through 13 on the other rear wheel.
- Replace rear pads and rotors on both sides, even if only one side appears worn.
Step 15: Install the rear wheels
- Clean the wheel-to-rotor mating surfaces with the small wire brush. Do not apply grease or anti-seize.
- Install each wheel and start every wheel nut by hand.
- Use the 22mm deep socket and ratchet to snug the nuts in a crossing pattern.
- Raise the axle slightly with the 3-ton floor jack, remove the jack stands, and lower the truck fully.
- Use the 22mm deep socket and 1/2-inch torque wrench to tighten the wheel nuts in a crossing pattern.
- Torque to 190 Nm (140 ft-lbs).
Step 16: Restore brake pressure
- Before starting the engine, press the brake pedal slowly several times until it becomes firm.
- Do not move your Sierra 1500 until the pedal is firm.
- Check the reservoir and add fresh DOT 3 brake fluid only if needed. Do not fill above MAX.
✅ After Repair
- ✅ Start the engine and hold steady pressure on the brake pedal. The pedal should remain firm and must not sink.
- 🔍 Inspect both rear calipers and brake hoses for fluid leakage.
- 🅿️ Apply and release the parking brake several times, then verify that it holds the truck safely on a mild incline.
- 🚗 Perform a slow test in a safe area. Confirm normal stopping and check for scraping, pulling, vibration, or warning lights.
- 🔥 Bed in the pads with 8-10 moderate stops from approximately 50 km/h to 15 km/h. Avoid coming to a complete stop with hot brakes.
- 🌡️ Drive for several minutes without heavy braking to let the brakes cool.
- 🔧 Recheck wheel-nut torque after approximately 80-160 km.
💰 DIY vs Shop Cost
Shop Cost: ₹35,000-₹65,000 (parts + labor)
DIY Cost: ₹18,000-₹38,000 (parts only)
You Save: ₹17,000-₹27,000 by doing it yourself!
Local labor and imported-part prices vary. This repair takes a shop approximately 2-3 hours.
🎯 Ready to get started?
HowToo makes it easy: same-day/2-day shipping on every part, plus all the tools and specialty tools you need! Check out the parts and tools sections below to add everything to your cart.