

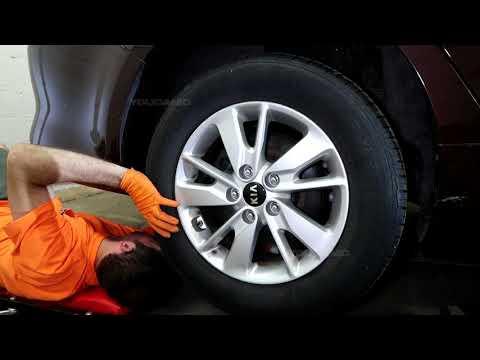







How to Replace Rear Brake Pads and Rotors on a 2013-2019 Kia Optima (Trim: LX | Engine: Inline 4 2.4L)
Step-by-step DIY guide with required tools, parts, torque specs, and safety tips for 2013
How to Replace Rear Brake Pads and Rotors on a 2013-2019 Kia Optima (Trim: LX | Engine: Inline 4 2.4L)
Step-by-step DIY guide with required tools, parts, torque specs, and safety tips for 2013


🔧 Optima - Rear Brake Pad and Rotor Replacement
This repair replaces the rear brake pads and both rear rotors on your Optima. The rear parking brake uses small shoes inside each rotor, so the parking brake must remain released while removing the rotors.
Difficulty Level: Intermediate | Estimated Time: 2-3 hours
⚠️ Safety & Precautions
- ⚠️ Work on level, solid ground and support the Optima with jack stands. Never rely on the floor jack alone.
- ⚠️ Keep the parking brake released because its shoes contact the inside of each rear rotor.
- ⚠️ Chock both front wheels securely before lifting the rear.
- ⚠️ Brake dust can be harmful. Do not blow it away with compressed air.
- ⚠️ Never allow a caliper to hang from its rubber brake hose.
- ⚠️ Open the brake-fluid reservoir before compressing the pistons, and remove excess fluid if it approaches the top.
- ⚠️ Battery disconnection is not required for the standard foot-operated parking brake fitted to the LX.
🔧 Required Tools
You'll need the following tools for this repair:
- Safety glasses
- Nitrile mechanic gloves
- Wheel chocks rated for passenger vehicles
- Floor jack rated 2-ton minimum
- Jack stands rated 2-ton minimum
- 21mm deep socket
- 14mm socket
- 17mm socket
- 3/8-inch drive ratchet
- 1/2-inch drive breaker bar
- 1/2-inch drive torque wrench rated 20-150 ft-lbs
- Phillips No. 3 impact screwdriver
- Brake caliper piston compression tool (specialty)
- Flat-blade brake adjusting screwdriver
- Rubber mallet
- M8 x 1.25 rotor-removal bolts
- Small wire brush
- Drain pan rated 2-quart minimum
- Plastic trim syringe rated 60mL minimum
- Caliper hanger hook (specialty)
🔩 Required Parts
HowToo sells all the parts you need for this repair:
- Rear brake pad set - Qty: 1
- Rear brake rotors - Qty: 2
- Rear brake pad hardware kit - Qty: 1
- High-temperature silicone brake lubricant - Qty: 1
- Non-chlorinated brake cleaner - Qty: 2 cans
- DOT 3 or DOT 4 brake fluid - Qty: 1 small sealed bottle
Replace both rear rotors and all rear pads together.
📋 Before You Begin
- 📋 Park the Optima on level pavement, shift into Park, switch off the engine, and leave the parking brake completely released.
- 📋 Place wheel chocks firmly against the front and rear of both front tires.
- 📋 Open the hood and loosen the brake-fluid reservoir cap. Cover the surrounding paint because brake fluid damages paint.
- 📋 Check the reservoir level. Use the 60mL plastic syringe to remove a little fluid if it is already near MAX.
- 📋 No infotainment setting, scan-tool command, battery registration, or brake-service mode is required for the standard LX parking brake.
🔨 Step-by-Step Instructions
Follow these steps in order:
Step 1: Loosen the Rear Wheel Nuts
- Use the 21mm deep socket and 1/2-inch breaker bar to loosen each rear wheel nut about one-half turn.
- Do not remove the nuts while the Optima is still on the ground.
Step 2: Raise and Support the Rear
- Use the 2-ton floor jack at the reinforced rear center lifting point or lift one side at a time using the marked pinch-weld jack points.
- Place the 2-ton jack stands under the reinforced rear pinch-weld support points.
- Lower the Optima gently onto the stands, then push lightly on the body to confirm it is stable.
- Leave the jack nearby as a backup.
Step 3: Remove the Rear Wheels
- Use the 21mm deep socket and 3/8-inch ratchet to remove the wheel nuts.
- Remove both rear wheels and place them flat away from the work area.
Step 4: Remove the Rear Caliper
- Place the 2-quart drain pan below the brake assembly to catch cleaner and debris.
- Use the 14mm socket and 3/8-inch ratchet to remove the upper and lower caliper guide-pin bolts.
- If a guide pin turns, hold its flats with the 17mm socket while loosening the 14mm bolt.
- Lift the caliper away from the pads and support it with the caliper hanger hook.
- Do not disconnect the brake hose.
Step 5: Remove the Old Brake Pads and Bracket
- Pull the inner and outer pads from the caliper bracket by hand.
- Use the 17mm socket and 1/2-inch breaker bar to remove both caliper-bracket bolts.
- Remove the bracket from the hub assembly.
- Note the position of any wear indicator before discarding the old pads.
Step 6: Remove the Rear Rotor
- Use the Phillips No. 3 impact screwdriver to remove the rotor retaining screw, if equipped.
- Confirm again that the parking brake pedal is fully released.
- If the rotor will not slide off, use the flat-blade brake adjusting screwdriver through the rotor access hole to retract the parking-brake shoe adjuster slightly.
- If rust holds the rotor to the hub, thread the two M8 x 1.25 rotor-removal bolts evenly into the rotor’s extraction holes using the 3/8-inch ratchet until the rotor releases.
- Use the rubber mallet around the rotor hat if additional gentle persuasion is needed.
- Never strike the wheel studs or braking surface with a steel hammer.
Step 7: Inspect the Parking Brake and Hub
- Inspect the parking-brake shoes inside the rotor area for broken lining, grease contamination, or loose hardware.
- Use the small wire brush to remove rust from the hub face and center pilot.
- Spray non-chlorinated brake cleaner onto the hub area and wipe away loosened debris with a clean shop towel.
- Do not apply lubricant to the hub face, rotor, pads, or parking-brake shoe lining.
Step 8: Prepare and Install the New Rotor
- Spray both friction surfaces of the new rotor with non-chlorinated brake cleaner and wipe them completely dry.
- Slide the new rotor over the hub and parking-brake shoes.
- Use the Phillips No. 3 impact screwdriver to reinstall the retaining screw, if equipped. Tighten it snugly without stripping the head.
- Rotate the rotor by hand. A faint shoe drag is acceptable, but the rotor must turn without binding.
Step 9: Service the Caliper Bracket
- Use the small wire brush to clean corrosion from the bracket surfaces beneath the pad hardware.
- Install the new stainless-steel pad hardware by hand.
- Remove each guide pin by hand, wipe it clean, and inspect its rubber boot.
- Apply a thin coat of high-temperature silicone brake lubricant to each guide pin, then reinstall it without trapping air in the boot.
- Apply only a very thin coat of lubricant where the pad tabs contact the hardware.
- Keep all lubricant away from pad friction material and rotor surfaces.
Step 10: Reinstall the Caliper Bracket
- Position the bracket over the new rotor and start both bolts by hand.
- Use the 17mm socket and torque wrench to tighten the bracket bolts to Torque to 68 Nm (50 ft-lbs).
Step 11: Compress the Caliper Piston
- Place an old brake pad against the piston face.
- Use the brake caliper piston compression tool to press the piston slowly and straight into the caliper bore.
- Watch the brake-fluid reservoir while compressing the piston. Use the 60mL plastic syringe if fluid approaches the top.
- Stop if the piston tilts, binds, or the rubber dust boot folds inward.
Step 12: Install the New Brake Pads
- Install the new inner and outer pads into the bracket by hand.
- Confirm that the pad tabs sit fully inside the new hardware and slide without binding.
- Lower the caliper over the new pads without twisting the brake hose.
- Start both guide-pin bolts by hand to prevent cross-threading.
- Use the 14mm socket and torque wrench to tighten the guide-pin bolts to Torque to 35 Nm (26 ft-lbs).
Step 13: Repeat on the Opposite Side
- Repeat Steps 4 through 12 on the other rear wheel using the same listed tools.
- Compare both sides before installing the wheels. The hoses, pad hardware, and guide-pin boots should sit the same way.
Step 14: Reinstall the Rear Wheels
- Place each wheel onto its hub and install all wheel nuts by hand.
- Use the 21mm deep socket and 3/8-inch ratchet to tighten the nuts lightly in a star pattern.
- Use the 2-ton floor jack to raise the Optima slightly, remove the jack stands, and lower it fully to the ground.
- Use the 21mm deep socket and torque wrench to tighten the wheel nuts in a star pattern to Torque to 108-127 Nm (80-94 ft-lbs).
Step 15: Restore Brake Pedal Pressure
- With the engine off, press and release the brake pedal slowly several times until it feels firm.
- Check the brake-fluid level and adjust it to the MAX line using fresh DOT 3 or DOT 4 brake fluid if needed.
- Install and tighten the reservoir cap by hand.
- Do not drive if the pedal remains soft or sinks toward the floor.
✅ After Repair
- ✅ Start the engine and hold firm pressure on the brake pedal for 30 seconds. The pedal should remain steady.
- ✅ Press and release the parking-brake pedal several times, then confirm both rear wheels release normally.
- ✅ Check around both calipers and brake hoses for fluid leaks.
- ✅ Perform a slow test in a safe area before entering traffic.
- ✅ Bed in the pads with 8-10 moderate stops from about 50 km/h to 10 km/h, allowing time between stops for cooling.
- ✅ Avoid emergency stops and holding the brake pedal while stationary with hot brakes for the first 300 km.
- ✅ Recheck wheel-nut torque after 80-160 km.
💰 DIY vs Shop Cost
Shop Cost: ₹22,000-₹40,000 (parts + labor)
DIY Cost: ₹10,000-₹22,000 (parts only)
You Save: ₹12,000-₹18,000 by doing it yourself!
Labor rates around Sonīpat vary by workshop. This repair takes a shop approximately 1.5-2.5 hours.
🎯 Ready to get started?
HowToo makes it easy: same-day/2-day shipping on every part, plus all the tools and specialty tools you need! Check out the parts and tools sections below to add everything to your cart.