
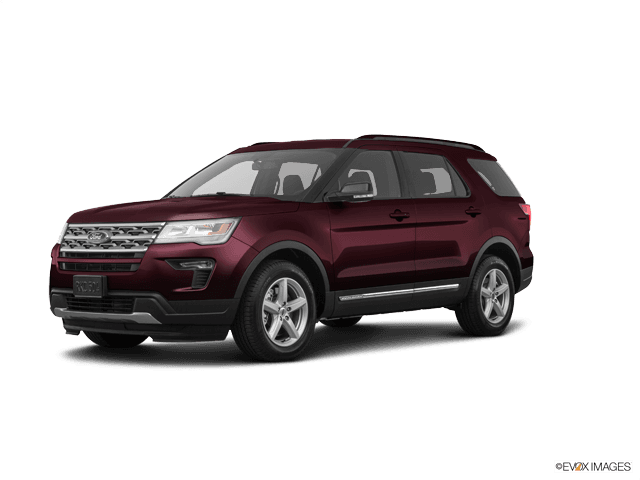

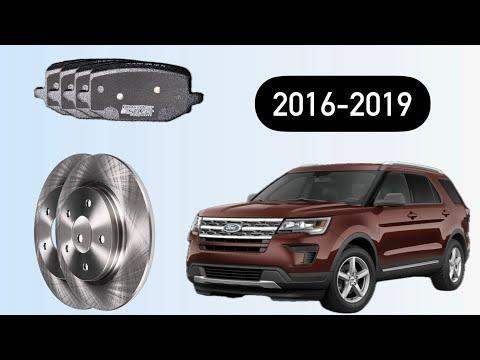







How to Replace Rear Brake Pads and Rotors on a 2013-2019 Ford Explorer (Trim: Platinum)
Step-by-step DIY instructions with required tools, parts, torque specs, and safety tips for 2013, 2014, 2015, 2016, 2017, 2018, 2019
How to Replace Rear Brake Pads and Rotors on a 2013-2019 Ford Explorer (Trim: Platinum)
Step-by-step DIY instructions with required tools, parts, torque specs, and safety tips for 2013, 2014, 2015, 2016, 2017, 2018, 2019


🔧 Explorer - Rear Brake Pads and Rotor Replacement
This is a manageable intermediate repair if you work one side at a time. You’ll remove both rear calipers and brackets, replace both rotors and the complete rear pad set, then carefully seat and break in the new brakes.
Your Explorer uses a foot-operated parking brake, not an electronic parking brake, so there’s no scan-tool service mode. The parking-brake pedal must remain fully released while removing the rotors. fordservicecontent.com
Difficulty Level: Intermediate | Estimated Time: 2-3 hours
⚠️ Safety & Precautions
- ⚠️ Work on level, solid ground. Never support your Explorer with only a floor jack.
- ⚠️ Chock both front wheels and leave the transmission in Park.
- ⚠️ Release the parking brake before removing either rear rotor.
- ⚠️ Never press the brake pedal while a caliper is removed.
- ⚠️ Hang each caliper securely. Never let it dangle from its rubber hose.
- ⚠️ Wear safety glasses and avoid breathing brake dust.
- ⚠️ Do not disconnect or open a brake hose. Brake bleeding normally isn’t required.
- ⚠️ Do not drive until the brake pedal is firm.
🔧 Required Tools
You'll need the following tools for this repair:
- 19mm deep socket
- 13mm socket
- 15mm open-end wrench
- Caliper bracket socket or bit matched to installed bolts
- 3/8-inch drive ratchet
- 1/2-inch drive breaker bar
- Torque wrench rated 20-150 ft-lbs minimum
- Rear disc brake piston compression tool (specialty)
- 6-inch C-clamp
- Flat-blade screwdriver
- Brake-adjusting spoon (specialty)
- Small rubber mallet
- Wire hub-cleaning brush
- Nylon brake-hardware brush
- Bungee cord or mechanic’s wire
- Floor jack rated 2-ton minimum
- Jack stands rated 2-ton minimum
- Wheel chocks
- Disposable nitrile gloves
- Safety glasses
🔩 Required Parts
HowToo sells all the parts you need for this repair:
- Rear brake pad set - Qty: 1
- Rear brake rotors - Qty: 2, replace in pairs
- Rear brake hardware kit - Qty: 1
- Replacement caliper anchor bolts - Qty: 4, if specified with the selected hardware
- Silicone ceramic brake lubricant - Qty: 1 tube
- Brake-parts cleaner - Qty: 2 cans
- Disposable shop towels - Qty: 1 pack
The brake aisle is open beside this guide. Match the pad and rotor option marked for the rear position because the catalog includes several brake packages.
📋 Before You Begin
- Park your Explorer on level pavement and place the transmission in Park.
- Keep the parking-brake pedal fully released throughout rotor removal.
- Chock both sides of both front tires.
- Open the hood and check the brake-fluid reservoir. Remove a little fluid if it’s already at the maximum mark.
- Loosen each rear lug nut about one-quarter turn with the 19mm socket before lifting.
- Take a photo of the original pad clips and hardware before disassembly.
- Complete one side first so the untouched side remains a visual reference.
🔨 Step-by-Step Instructions
Follow these steps in order:
Step 1: Raise and support the rear
- Use the floor jack at an approved rear lifting point.
- Position the jack stands under the approved body support points on both sides.
- Lower the vehicle gently onto the stands, then give it a firm stability check.
- Use the 19mm socket and ratchet to remove both rear wheels.
Step 2: Remove the rear caliper
- Use the 13mm socket to remove the upper and lower caliper guide-pin bolts.
- If a guide pin turns, hold its flats with the 15mm open-end wrench.
- Lift the caliper from the bracket. Use the flat-blade screwdriver only for gentle assistance.
- Hang the caliper from the suspension with the bungee cord or mechanic’s wire.
- Do not stretch, twist or kink the brake hose.
- Remove the old inner and outer pads.
Step 3: Remove the caliper bracket
- Use the correctly matched bracket socket or bit and the 1/2-inch breaker bar to remove both anchor bolts.
- These bolts are considerably tighter than the small guide-pin bolts.
- Lift the bracket away and place it on a clean surface.
- Inspect the bracket for cracks, damaged threads or severe corrosion.
Step 4: Remove the old rotor
- Confirm once more that the parking-brake pedal is fully released.
- Pull the rotor straight off the hub.
- If stuck to the hub, strike the rotor hat between the wheel studs with the rubber mallet.
- If it moves slightly but catches on the parking-brake shoes, remove the access plug and use the brake-adjusting spoon to retract the shoe adjuster.
- Do not force the rotor over the parking-brake shoes. That can tear the hardware loose.
- Rust loses arguments to patience, not bigger hammers.
Step 5: Inspect the parking brake
- Use the safety glasses and inspect the small parking-brake shoes inside the rotor area.
- Check that the friction lining is attached and free of brake fluid or grease.
- Check the springs, retainers and adjuster for damage or heavy corrosion.
- Replace damaged parking-brake parts before installing the new rotor.
- Do not spray lubricant onto the shoe linings.
Step 6: Clean the hub and new rotor
- Use the wire hub-cleaning brush to remove rust from the hub face.
- Keep the wheel studs and hub center undamaged.
- Wipe the hub clean with brake-parts cleaner and shop towels.
- Spray both friction faces of the new rotor with brake-parts cleaner.
- Wipe until the towel no longer picks up oily residue.
- Install the clean rotor over the wheel studs.
- Hold it flat with one reversed lug nut tightened only finger-tight.
Step 7: Service the caliper bracket
- Use the nylon brake-hardware brush to clean the pad-support areas.
- Remove the slide pins by hand, one at a time, so they return to their original positions.
- Wipe each pin clean and inspect its rubber boot for tears.
- Apply a thin layer of silicone ceramic brake lubricant to the smooth slide-pin surfaces.
- Do not use petroleum grease because it can damage the rubber boots.
- Install the new stainless pad clips from the hardware kit.
- Apply only a very thin film of lubricant where the pad ears contact the clips.
- Keep all lubricant away from the rotor and pad friction material.
Step 8: Reinstall the caliper bracket
- Position the bracket over the new rotor.
- Start both anchor bolts by hand to prevent cross-threading.
- Use the matched bracket socket or bit and torque wrench to tighten both bolts.
- Torque the rear caliper anchor bolts to 165 Nm (122 ft-lbs). Ford recall instructions for this Explorer platform specify this value. manuals.plus)
- Use new anchor bolts when the replacement instructions or bolt coating requires them.
Step 9: Compress the caliper piston
- Place an old brake pad against the piston face.
- Use the rear disc brake piston compression tool or 6-inch C-clamp to press the piston straight and slowly into the caliper.
- Watch the brake-fluid reservoir so it doesn’t overflow.
- Stop if the piston tilts, binds or requires extreme force.
- Do not disconnect the brake hose to make the piston easier to compress.
Step 10: Install the new pads
- Install the inner and outer pads into the bracket with their friction surfaces facing the rotor.
- Confirm the pad ears sit fully inside the new hardware clips.
- Place the caliper over the pads without twisting the brake hose.
- Start both guide-pin bolts by hand.
- Hold a turning guide pin with the 15mm open-end wrench.
- Use the 13mm socket and torque wrench to tighten the guide-pin bolts.
- Torque the rear guide-pin bolts to 35 Nm (26 ft-lbs). howtoo.com
Step 11: Repeat on the opposite side
- Repeat Steps 2 through 10 on the other rear wheel.
- Compare pad and hardware orientation with the completed side.
- Replace pads and rotors on both rear sides. Never replace only one side.
Step 12: Reinstall the wheels
- Remove the temporary reversed lug nut from each rotor.
- Mount each wheel and start every lug nut by hand.
- Use the 19mm socket to snug the nuts in a star pattern.
- Raise your Explorer slightly with the floor jack and remove the jack stands.
- Lower the vehicle completely.
- Use the 19mm socket and torque wrench to tighten the lug nuts in a star pattern.
- Torque the wheel lug nuts to 135 Nm (100 ft-lbs). howtoo.com
✅ After Repair
- Press the brake pedal repeatedly until it becomes firm. This moves the pistons against the new pads.
- Do not shift from Park until the pedal is firm.
- Check the brake-fluid reservoir and adjust it to the correct level.
- Apply and release the parking-brake pedal several times.
- Confirm both rear wheels rotate without severe drag, grinding or scraping.
- Make a slow test stop in a safe area before entering traffic.
- For bedding, make 6-8 moderate stops from about 30 mph to 5 mph without triggering ABS.
- Drive several minutes between stops to cool the brakes.
- Avoid holding the brake pedal hard while stopped with extremely hot new brakes.
- Recheck the lug-nut torque after approximately 50 miles.
💰 DIY vs Shop Cost
Shop Cost: $450-$850 (parts + labor)
DIY Cost: $120-$300 (parts only)
You Save: $250-$550 by doing it yourself!
Shop labor rates vary but typically run $100-$150/hour. This repair takes a shop approximately 2-3 hours.
🎯 Ready to get started?
HowToo makes it easy: same-day/2-day shipping on every part, plus all the tools and specialty tools you need! Check out the parts and tools sections below to add everything to your cart.
