


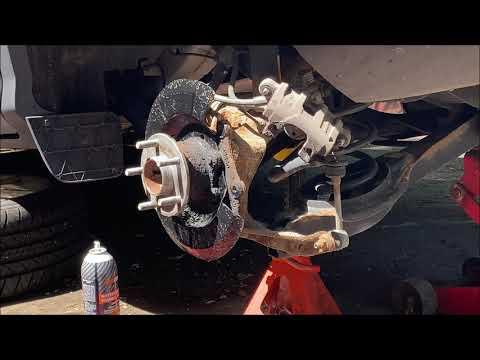






How to Replace Rear Brake Pads and Rotors on a 2013-2016 Ford Escape (Trim: S)
Step-by-step DIY instructions with tools, parts, torque specs, and safety tips for 2013, 2014, 2015, 2016
How to Replace Rear Brake Pads and Rotors on a 2013-2016 Ford Escape (Trim: S)
Step-by-step DIY instructions with tools, parts, torque specs, and safety tips for 2013, 2014, 2015, 2016


🔧 Escape - Rear Brake Pad and Rotor Replacement
This is a manageable driveway repair, but the rear caliper pistons must be rotated while being pushed inward. Don’t attack them with a normal clamp. The built-in parking-brake mechanism won’t appreciate it.
Difficulty Level: Intermediate | Estimated Time: 2-3 hours
Assumption: This procedure covers the stock rear disc brakes and manual parking brake on your Escape.
⚠️ Safety & Precautions
- ⚠️ Work on level, solid ground and support your Escape with jack stands.
- ⚠️ Never work beneath a vehicle supported only by a floor jack.
- ⚠️ Release the parking brake before removing either rear caliper.
- ⚠️ Chock both front wheels because the parking brake must remain released.
- ⚠️ Don’t press the brake pedal while a caliper is removed.
- ⚠️ Never let a caliper hang from its rubber brake hose.
- ⚠️ Wear safety glasses and avoid breathing brake dust.
- ⚠️ If a piston won’t rotate inward smoothly, stop and inspect the caliper rather than forcing it.
- ⚠️ Battery disconnection isn’t required.
🔧 Required Tools
You'll need the following tools for this repair:
- 1/2-inch drive breaker bar
- 1/2-inch drive torque wrench rated to 150 ft-lbs
- 3/8-inch drive ratchet
- 19mm deep socket
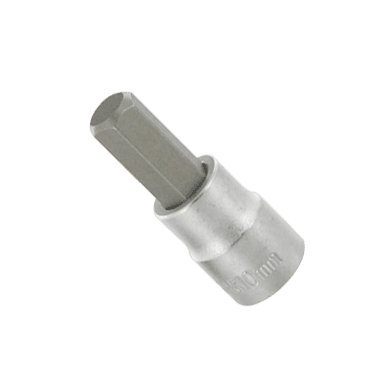
- 7mm hex-bit socket
- 13mm socket
- 15mm wrench
- 15mm socket
- 18mm socket
- Rear brake piston wind-back tool kit (specialty)
- Flat-blade screwdriver
- Small wire brush
- Rubber mallet
- Brake caliper hanger
- Drain pan
- Floor jack rated 2-ton minimum
- Jack stands rated 2-ton minimum
- Wheel chocks
- Nitrile gloves
- Safety glasses
A brake piston wind-back tool presses and rotates the piston at the same time.
🔩 Required Parts
HowToo sells all the parts you need for this repair:
- Rear brake pad set - Qty: 1
- Rear brake rotors - Qty: 2, replace in pairs
- Rear disc brake hardware kit - Qty: 1
- Brake cleaner - Qty: 2 cans
- Silicone or ceramic brake lubricant - Qty: 1 tube
- Medium-strength removable threadlocker - Qty: 1 tube
- DOT 4 brake fluid - Qty: 1 small sealed bottle, only if adjustment is required
The brake aisle is open beside this guide with vehicle-matched rear pads, rotors, hardware and calipers.
📋 Before You Begin
- 📋 Park your Escape on level pavement and shift into Park.
- 📋 Leave the engine off and place wheel chocks firmly against both sides of the front tires.
- 📋 Release the parking brake completely.
- 📋 Open the hood and inspect the brake-fluid reservoir. If it is at the MAX line, remove a small amount with a clean fluid syringe before retracting the pistons.
- 📋 Don’t leave the reservoir open. Brake fluid absorbs moisture quickly.
- 📋 Confirm that the replacement rotors match the old rotor diameter and thickness before dismantling both sides.
- 📋 Complete one side at a time so the assembled side remains available as a reference.
🔨 Step-by-Step Instructions
Follow these steps in order:
Step 1: Loosen the rear wheel nuts
- Use the 19mm deep socket and breaker bar to loosen each rear wheel nut about one-quarter turn.
- Don’t remove the nuts while the vehicle is on the ground.
Step 2: Raise and support the rear
- Use the 2-ton floor jack at an approved rear lifting point.
- Place the 2-ton jack stands beneath the reinforced rear support points.
- Lower your Escape gently onto the stands, then give the body a firm stability check.
Step 3: Remove the rear wheels
- Use the 19mm deep socket to remove the wheel nuts.
- Remove both rear wheels and slide one beneath the body as a secondary precaution.
Step 4: Inspect the brake assembly
- Check the rubber brake hose for cracks, wetness or twisting.
- Check the caliper parking-brake lever and cable for free movement.
- Look for uneven inner-versus-outer pad wear. A major difference can indicate seized slide pins or a sticking caliper.
Step 5: Remove the caliper
- Use the 7mm hex-bit socket or the applicable socket from the tool list to remove the two caliper guide-pin bolts.
- Use the 15mm wrench to hold a guide pin if it turns with the bolt.
- Lift the caliper from the bracket. Use the flat-blade screwdriver only for light assistance if the pads are tight.
- Hang the caliper from the suspension with the brake caliper hanger.
- Never pull, twist or support the caliper by its hose.
Step 6: Remove the old pads and hardware
- Remove the inner and outer pads by hand.
- Use the flat-blade screwdriver to remove the stainless pad clips from the bracket.
- Note the position of any wear indicator, spring or pad backing plate.
Step 7: Retract the rear caliper piston
- Fit the correct adapter from the rear brake piston wind-back tool kit into the slots on the piston face.
- Rotate the piston clockwise while applying steady inward pressure.
- Watch the brake-fluid reservoir and remove excess fluid with a clean syringe if it approaches the rim.
- Stop if the piston binds, the boot twists badly or fluid leaks from the caliper.
- Finish with the piston slots positioned to engage the locating pin on the inner pad, if the pad has one.
- Slow pressure protects the piston seal.
Step 8: Remove the caliper bracket
- Use the 15mm or 18mm socket and breaker bar to remove the two bracket bolts.
- Support the bracket as the final bolt comes out.
- Keep the bolts clean and inspect their threads for damage.
Step 9: Remove the old rotor
- Pull the rotor straight from the wheel hub.
- If it is rusted in place, strike the rotor hat between the wheel studs with the rubber mallet.
- Rotate the rotor while tapping. Don’t strike the wheel studs or braking surface with a steel hammer.
- Confirm again that the parking brake is fully released if the rotor refuses to move.
Step 10: Clean the hub
- Use the small wire brush to remove rust from the hub face and center pilot.
- Use brake cleaner and a clean towel to leave the mounting face dry.
- Don’t leave rust flakes between the hub and rotor. That can create rotor runout and pedal pulsation.
Step 11: Prepare and install the new rotor
- Place the rotor over the drain pan and clean both braking surfaces with brake cleaner.
- Wipe it dry with a clean, lint-free towel.
- Install the rotor on the hub and hold it flat with one wheel nut installed backward by hand.
Step 12: Service the caliper bracket
- Use the small wire brush to clean the bracket surfaces beneath the stainless clips.
- Remove each slide pin by hand. Clean it and inspect its rubber boot.
- Apply a thin coat of silicone or ceramic brake lubricant to each smooth slide pin.
- Don’t use petroleum grease on rubber brake components.
- Install the new stainless hardware clips and confirm they sit completely flat.
Step 13: Reinstall the caliper bracket
- Position the bracket over the rotor and start both bolts by hand.
- Apply medium-strength removable threadlocker only if specified by the bolt or service procedure.
- Use the 18mm socket and torque wrench to tighten the bracket bolts.
- Do not guess this torque: verify the exact rear bracket specification for the installed fasteners before final tightening.
Step 14: Install the new pads
- Apply a very thin film of silicone or ceramic brake lubricant where the pad ears contact the stainless clips.
- Install the inner and outer pads in the correct positions.
- Keep all lubricant away from the pad material and rotor faces.
Step 15: Reinstall the caliper
- Lower the caliper over the new pads without twisting its brake hose.
- Confirm that any inner-pad locating pin engages the piston correctly.
- Start both guide-pin bolts by hand, then tighten them with the 7mm hex-bit socket.
- Do not guess this torque: verify the exact guide-pin specification for the installed bolt style before final tightening.
- Confirm the caliper slides freely before moving to the opposite side.
Step 16: Repeat on the opposite side
- Use the same tools and procedure on the other rear brake.
- Compare the old pads from both sides. Uneven wear should be diagnosed before driving.
Step 17: Reinstall the wheels
- Remove the temporary wheel nut holding each rotor.
- Clean the wheel-to-rotor mounting surfaces with the small wire brush.
- Install each wheel and start every wheel nut by hand.
- Snug the nuts in a star pattern with the 19mm deep socket.
- Lower your Escape until the tires touch the ground without carrying the vehicle’s full weight.
- Use the torque wrench and 19mm deep socket to tighten the wheel nuts in a star pattern to 135 Nm (100 ft-lbs). Ford also directs owners to recheck them within 100 miles or 160 kilometers. fordservicecontent.com)
✅ After Repair
- ✅ Before starting the engine, press the brake pedal slowly several times until it becomes firm.
- ✅ Don’t move your Escape if the pedal remains soft or travels close to the floor.
- ✅ Check the brake-fluid level and adjust it between MIN and MAX using fresh DOT 4 brake fluid.
- ✅ Apply and release the parking brake several times to settle its mechanism.
- ✅ Confirm the parking brake holds the vehicle before relying on it normally.
- ✅ Check around both calipers for fluid leaks.
- ✅ Perform the first test at walking speed in a clear, level area.
- ✅ Make several gentle stops and confirm there is no pulling, grinding or abnormal pedal movement.
- ✅ Follow the pad manufacturer’s bedding procedure. If none is supplied, use moderate stops with cooling time and avoid sitting still with very hot brakes clamped.
- ✅ Recheck the wheel-nut torque after approximately 160 kilometers.
💰 DIY vs Shop Cost
Shop Cost: $450-$750 equivalent, depending on local labor and parts
DIY Cost: $90-$250 equivalent for pads, two rotors, hardware and supplies
You Save: Approximately $250-$500 by doing it yourself!
Labor rates vary widely by location. This repair usually takes a shop approximately 1.5-2.5 hours.
🎯 Ready to get started?
HowToo makes it easy: same-day/2-day shipping on every part, plus all the tools and specialty tools you need! Check out the parts and tools sections below to add everything to your cart.
