

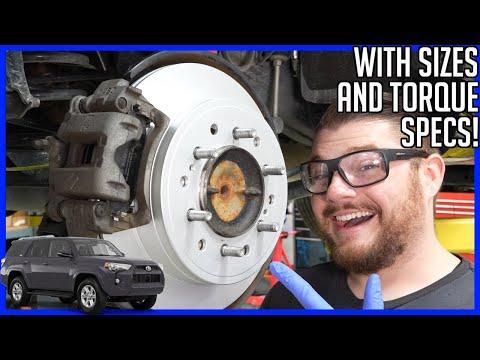







How to Replace Rear Brake Pads and Rotors on a 2010-2024 Toyota 4Runner (Trim: TRD Off-Road)
Step-by-step DIY guide with required tools, parts, torque specs, and safety tips for 2010, 2011, 2012, 2013, 2014, 2015, 2016, 2017, 2018, 2019, 2020, 2021, 2022, 2023, 2024
How to Replace Rear Brake Pads and Rotors on a 2010-2024 Toyota 4Runner (Trim: TRD Off-Road)
Step-by-step DIY guide with required tools, parts, torque specs, and safety tips for 2010, 2011, 2012, 2013, 2014, 2015, 2016, 2017, 2018, 2019, 2020, 2021, 2022, 2023, 2024


🔧 4Runner - Rear Brake Pad and Rotor Replacement
This repair replaces the rear brake pads and both rear rotors on your 4Runner. The parking-brake shoes sit inside each rear rotor, so the parking brake must remain released and may need adjustment before the rotors will come off.
Difficulty Level: Intermediate | Estimated Time: 2-4 hours
Assumption: The factory rear calipers and drum-style parking brake are still installed.
⚠️ Safety & Precautions
- ⚠️ Work on level, solid ground and support your 4Runner with jack stands. Never work beneath a vehicle supported only by a floor jack.
- ⚠️ Leave the parking brake completely released. It operates shoes inside the rear rotors.
- ⚠️ Chock both front wheels because the parking brake cannot be used during this repair.
- ⚠️ Brake dust can be harmful. Do not blow it away with compressed air; wet it with brake cleaner.
- ⚠️ Never press the brake pedal while a caliper is removed.
- ⚠️ Do not let a caliper hang from its rubber brake hose.
- ⚠️ Brake fluid damages paint. Check the reservoir while compressing the pistons and remove excess fluid if necessary.
- ⚠️ Battery disconnection is not required.
🔧 Required Tools
You'll need the following tools for this repair:
- 3-ton hydraulic floor jack
- 3-ton jack stands
- Heavy-duty wheel chocks
- 21mm deep socket
- 17mm socket
- 19mm socket
- 10mm socket
- 3/8-inch drive ratchet
- 1/2-inch drive breaker bar
- 1/2-inch drive torque wrench rated 20-150 ft-lbs
- 8-inch C-clamp or disc-brake piston compressor
- Rear brake caliper hanger hooks
- Flat-blade screwdriver with 6-inch shaft
- Small hooked pick
- M8 × 1.25 rotor-removal bolts
- 16-ounce rubber mallet
- Stiff nylon brake-cleaning brush
- Wheel-hub cleaning brush
- Brake-fluid suction syringe
- Disposable shop towels
- Nitrile mechanic gloves
- Safety glasses
🔩 Required Parts
HowToo sells all the parts you need for this repair:
- Rear brake pad set - Qty: 1
- Rear brake rotors - Replace in pairs - Qty: 2
- Rear brake pad hardware kit - Qty: 1
- Rear brake pad wear indicators - Qty: 2
- High-temperature silicone brake lubricant - Qty: 1
- Non-chlorinated brake cleaner - Qty: 2 cans
- DOT 3 brake fluid - Qty: 1 small bottle
📋 Before You Begin
- 📋 Park your 4Runner on level pavement, shift into Park, switch off the engine, and release the parking brake completely.
- 📋 Place heavy-duty wheel chocks firmly in front of and behind both front tires.
- 📋 Open the hood and inspect the brake-fluid reservoir. Use the brake-fluid suction syringe to remove a small amount if the fluid is near the MAX line.
- 📋 Confirm that the replacement rotors match the originals before dismantling both sides.
- 📋 Photograph the pad clips and wear-indicator positions before removing them.
- 📋 No infotainment service mode or scan-tool command is required for the mechanical parking brake.
🔨 Step-by-Step Instructions
Follow these steps in order:
Step 1: Loosen the Rear Wheel Nuts
- Use a 21mm deep socket and 1/2-inch breaker bar to loosen each rear wheel nut about one-quarter turn.
- Do not remove the nuts while the tires are still carrying the vehicle’s weight.
Step 2: Raise and Support the Rear Axle
- Position the 3-ton floor jack beneath the center of the rear differential housing and raise the rear of your 4Runner.
- Place 3-ton jack stands beneath the rear axle housing on both sides, clear of brake lines and suspension brackets.
- Lower the axle carefully onto the stands, leave the floor jack lightly contacting the differential, and push the body gently to verify stability.
Step 3: Remove the Rear Wheels
- Use the 21mm deep socket and ratchet to remove the wheel nuts.
- Lift off both rear wheels and place them flat away from the work area.
- Complete one side before dismantling the other.
Step 4: Remove the Rear Caliper
- Use the 17mm socket and breaker bar to remove the two rear caliper mounting bolts.
- Slide the caliper away from the rotor. If it is tight, rock it gently by hand rather than pulling on the hose.
- Support the caliper with a caliper hanger hook. The rubber brake hose must remain free of tension and twisting.
- Do not disconnect the brake hose, so brake bleeding should not be necessary.
Step 5: Remove the Old Brake Pads and Hardware
- Use the small hooked pick to remove the old pads and stainless-steel hardware clips from the caliper bracket.
- Note the location of each wear indicator. A wear indicator is the small metal tab that squeals when the pad becomes thin.
- Inspect the caliper for torn rubber boots, fluid leakage, severe rust, or a seized piston. Stop and replace or rebuild damaged components before continuing.
Step 6: Remove the Caliper Bracket
- Use the 19mm socket and 1/2-inch breaker bar to remove the two caliper-bracket bolts.
- Lift the bracket away and keep its bolts clean.
- Use brake cleaner, shop towels, and the stiff nylon brush to clean the bracket’s pad-contact surfaces.
Step 7: Retract the Parking-Brake Shoes if Needed
- Look through the rotor access opening and rotate the rotor until the parking-brake adjuster is accessible.
- If the rotor will not slide outward, use the flat-blade screwdriver to turn the star-wheel adjuster and retract the parking-brake shoes.
- A star-wheel adjuster is a small toothed wheel that changes the parking-brake shoe clearance.
- If turning it makes the rotor tighter, turn it in the opposite direction until the rotor rotates freely.
Step 8: Remove the Old Rotor
- Pull the rotor straight off the hub by hand.
- If rust holds it in place, thread two M8 × 1.25 rotor-removal bolts evenly into the rotor’s threaded extraction holes.
- Use the 10mm socket and ratchet to tighten each extraction bolt a little at a time, alternating sides until the rotor releases.
- Use the rubber mallet around the rotor hat if additional vibration is needed. Do not strike the wheel studs or parking-brake components.
- Remove both extraction bolts with the 10mm socket before installing the new rotor.
Step 9: Inspect the Parking-Brake Components
- Use the safety glasses, brake cleaner, shop towels, and nylon brush to clean the parking-brake assembly without disturbing its springs.
- Inspect the shoes for cracks, missing lining, grease contamination, or uneven wear.
- Inspect the springs and adjuster for corrosion or damage. Replace faulty parking-brake parts before installing the rotor.
Step 10: Clean the Hub and New Rotor
- Use the wheel-hub cleaning brush to remove rust from the hub face. The new rotor must sit completely flat against it.
- Use brake cleaner and shop towels to remove protective oil from both friction faces and the inner parking-brake drum of the new rotor.
- Do not apply grease or anti-seize to the wheel studs, lug-nut seats, rotor friction surfaces, or parking-brake drum.
Step 11: Install and Adjust the New Rotor
- Slide the clean rotor over the wheel studs and parking-brake shoes.
- Use two wheel nuts installed backward by hand to hold the rotor flush against the hub. Use only finger pressure.
- Use the flat-blade screwdriver through the access opening to expand the star-wheel adjuster until the rotor locks.
- Turn the adjuster back in the opposite direction until the rotor rotates with only a faint, even drag.
- Repeat the adjustment if the rotor binds at one point or rotates with no contact at all.
Step 12: Reinstall the Caliper Bracket
- Position the cleaned bracket over the rotor and start both bracket bolts by hand.
- Use the 19mm socket and torque wrench to tighten both bracket bolts to 104 Nm (77 ft-lbs).
Step 13: Compress the Caliper Piston
- Place an old brake pad against the piston and use the 8-inch C-clamp or disc-brake piston compressor to push the piston slowly and evenly into the caliper.
- Watch the brake-fluid reservoir while compressing the piston. Use the suction syringe if the fluid approaches the reservoir opening.
- Stop if the piston tilts, binds, or requires excessive force. This indicates a caliper problem.
Step 14: Install New Pad Hardware and Pads
- Press the new stainless-steel hardware clips into the caliper bracket by hand.
- Apply a very thin film of high-temperature silicone brake lubricant where the pad ears contact the hardware.
- Keep lubricant completely off the pad friction material and rotor surfaces.
- Install the pads in the same orientation as the originals, with the wear indicators matching the photographed positions.
- Pads should slide freely without rattling.
Step 15: Reinstall the Rear Caliper
- Remove the caliper from its hanger and position it over the new pads without twisting the hose.
- Start both caliper mounting bolts by hand to prevent cross-threading.
- Use the 17mm socket and torque wrench to tighten the caliper mounting bolts to 88 Nm (65 ft-lbs).
- Rotate the rotor by hand and verify that it moves with light pad contact but does not bind.
Step 16: Repeat on the Opposite Side
- Use the same listed tools and repeat Steps 4 through 15 on the other rear wheel.
- Compare the second side with the completed side if clip or wear-indicator positioning is unclear.
Step 17: Reinstall the Rear Wheels
- Remove the temporary wheel nuts holding each rotor by hand.
- Install each wheel and start all wheel nuts by hand.
- Use the 21mm deep socket and ratchet to snug the nuts in a crisscross pattern.
- Use the floor jack to lift the axle, remove the jack stands, and lower your 4Runner until the tires contact the ground fully.
- Use the 21mm deep socket and torque wrench to tighten the wheel nuts in a crisscross pattern to 112 Nm (83 ft-lbs).
✅ After Repair
- ✅ Before starting the engine, press and release the brake pedal repeatedly until it becomes firm. Do not move your 4Runner until the pedal is firm.
- ✅ Check the brake-fluid reservoir and adjust it to the MAX line with fresh DOT 3 brake fluid. Do not overfill it.
- ✅ Apply and release the parking brake several times, then confirm that it holds your 4Runner securely on a gentle incline.
- ✅ Check around both calipers for brake-fluid leakage and verify that no hose is twisted.
- ✅ Perform a slow test in a safe area. Confirm normal braking and listen for scraping or knocking.
- ✅ Bed in the pads with 8-10 moderate stops from approximately 50 km/h to 15 km/h. Allow about 30 seconds between stops and avoid coming to a complete stop with hot brakes.
- ✅ Drive for 10 minutes afterward with minimal braking to cool the brakes. Avoid hard stops for the first 300 km unless required for safety.
- ✅ Recheck wheel-nut torque to 112 Nm (83 ft-lbs) after approximately 80-100 km.
💰 DIY vs Shop Cost
Shop Cost: ₹28,000-₹50,000 (parts + labor)
DIY Cost: ₹14,000-₹30,000 (parts only)
You Save: ₹14,000-₹20,000 by doing it yourself!
Rates in the Sonīpat/Delhi NCR area vary by workshop and parts brand. This repair takes a shop approximately 2-3 hours.
🎯 Ready to get started?
HowToo makes it easy: same-day/2-day shipping on every part, plus all the tools and specialty tools you need! Check out the parts and tools sections below to add everything to your cart.