

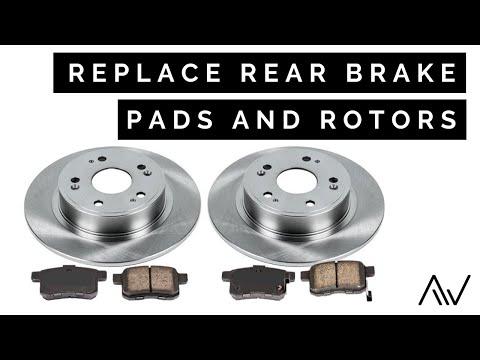





How to Replace Rear Brake Pads and Rotors on a 2008-2017 Honda Accord (Engine: V6 3.5L)
Step-by-step guide with EPB maintenance mode, tools, safety tips, and torque specs for 2008, 2009, 2010, 2011, 2012, 2013, 2014, 2015, 2016, 2017
How to Replace Rear Brake Pads and Rotors on a 2008-2017 Honda Accord (Engine: V6 3.5L)
Step-by-step guide with EPB maintenance mode, tools, safety tips, and torque specs for 2008, 2009, 2010, 2011, 2012, 2013, 2014, 2015, 2016, 2017


🔧 Accord - Rear Brake Pads and Rotors Replacement
Replacing the rear brakes means installing new pads and rotors on both sides. Your Accord has an electronic parking brake, so its motors must be placed in maintenance mode before the caliper pistons are compressed.
Difficulty Level: Intermediate | Estimated Time: 2-3 hours
Assumption: Factory electronic parking-brake calipers are installed.
⚠️ Safety & Precautions
- ⚠️ Work on solid, level ground and chock both front wheels.
- ⚠️ Support your Accord with jack stands. Never rely only on a floor jack.
- ⚠️ Release the electronic parking brake and enter maintenance mode before compressing either piston.
- ⚠️ Do not press the brake pedal or operate the parking-brake switch while a caliper is removed.
- ⚠️ Never let a caliper hang from its brake hose or electrical wiring.
- ⚠️ Wear safety glasses and gloves. Do not use compressed air on brake dust.
- 🔥 Brake cleaner is flammable. Keep it away from heat, sparks, and flames.
- 🔋 Do not disconnect the battery; electrical power is needed for parking-brake maintenance mode.
🔧 Required Tools
You'll need the following tools for this repair:
- Honda-compatible bidirectional scan tool with EPB service function (specialty)
- 19mm lug-nut socket
- 12mm socket
- 17mm socket
- 17mm combination wrench
- 3/8-inch drive ratchet
- 1/2-inch drive breaker bar
- 3/8-inch drive torque wrench rated 10-60 Nm
- 1/2-inch drive torque wrench rated 40-150 Nm
- JIS No. 3 impact screwdriver
- Rear brake piston compression tool (specialty)
- Small flat-blade screwdriver
- Medium wire brush
- Brake-caliper hangers
- M8 x 1.25 rotor-removal bolts
- Floor jack rated 2-ton minimum
- Jack stands rated 2-ton minimum
- Wheel chocks
- Clean shop towels
- Safety glasses
- Nitrile mechanic gloves
🔩 Required Parts
HowToo sells all the parts you need for this repair:
- Rear brake pad set - Replace both sides - Qty: 1
- Rear brake rotors - Replace in pairs - Qty: 2
- Rear brake pad hardware kit - Qty: 1
- Rear rotor retaining screws - Qty: 2
- High-temperature silicone brake lubricant - Qty: 1
- Non-chlorinated brake cleaner - Qty: 2 cans
📋 Before You Begin
- 🅿️ Park your Accord on level pavement with the transmission in Park.
- 🛞 Chock both sides of the front tires because the parking brake must remain released.
- 🧴 Check the brake-fluid reservoir. Fluid rises when the pistons are compressed.
- 🔌 Connect the bidirectional scan tool to the diagnostic connector beneath the driver-side dashboard. “Bidirectional” means it can command the parking-brake motors.
- 📱 No infotainment-menu procedure is required.
🔨 Step-by-Step Instructions
Follow these steps in order:
Step 1: Enter Electronic Parking-Brake Maintenance Mode
- Switch the ignition ON without starting the engine.
- Press the brake pedal and release the electronic parking brake with the console switch.
- Use the Honda-compatible scan tool and select Honda > ABS/VSA > Electronic Parking Brake > Maintenance Mode or Brake Pad Replacement.
- Follow the scan-tool prompts to retract both rear parking-brake actuators.
- Wait until both motors stop and the scan tool confirms retraction, then switch the ignition OFF.
- Do not proceed if either motor fails to retract or the scan tool reports a fault.
Step 2: Loosen the Rear Lug Nuts
- Use the 19mm lug-nut socket and 1/2-inch breaker bar to loosen each rear lug nut about one-half turn.
- Leave the lug nuts installed until your Accord is safely supported.
Step 3: Raise and Support the Rear
- Use the 2-ton floor jack at the approved rear-center lifting point to raise your Accord.
- Place the 2-ton jack stands beneath the reinforced rear side support points.
- Lower your Accord onto the stands and gently verify that it is stable.
- Use the 19mm socket and 3/8-inch ratchet to remove the rear wheels.
Step 4: Remove the First Rear Caliper
- Work on one side at a time so the other side remains available as a reference.
- Use the 12mm socket and 3/8-inch ratchet to remove the upper and lower caliper slide-pin bolts.
- If a slide pin rotates, hold its flats with the 17mm combination wrench.
- Lift off the caliper and support it with a brake-caliper hanger.
- Do not pull on the hose or electronic parking-brake wiring.
Step 5: Remove the Pads and Caliper Bracket
- Pull the inner and outer pads from the bracket by hand.
- Use the small flat-blade screwdriver to remove the stainless pad clips.
- Use the 17mm socket and 1/2-inch breaker bar to remove the two caliper-bracket bolts.
- Lift the bracket away from the rotor.
Step 6: Remove the Old Rotor
- Use the JIS No. 3 impact screwdriver to remove the rotor-retaining screw. JIS is the Japanese cross-head screw standard and fits better than a Phillips driver.
- If the rotor is seized, thread both M8 x 1.25 rotor-removal bolts into its extraction holes.
- Use the 12mm socket and 3/8-inch ratchet to tighten the bolts evenly, alternating between them until the rotor releases.
- Remove the bolts and pull the rotor from the hub.
Step 7: Clean the Hub
- Use the medium wire brush to remove rust from the flat hub face and raised center pilot.
- Apply brake cleaner to a clean shop towel and wipe the hub clean.
- Make sure no rust scale remains that could prevent the rotor from sitting flat.
- A clean hub helps prevent brake vibration.
Step 8: Service the Caliper Bracket
- Pull both slide pins from the bracket by hand, keeping each pin in its original position.
- Use clean shop towels to wipe away the old lubricant.
- Inspect the rubber boots and replace any that are torn, swollen, or hardened.
- Apply a thin layer of high-temperature silicone brake lubricant to each slide pin.
- Reinsert the pins and make sure the rubber boots are fully seated.
- Use the medium wire brush to clean the bracket beneath the stainless pad clips.
- Press the new clips into place by hand.
- Apply a very thin film of silicone brake lubricant where the pad tabs contact the clips.
- Keep all lubricant off the rotor and pad friction material.
Step 9: Install the New Rotor
- Spray both rotor faces with non-chlorinated brake cleaner.
- Use clean shop towels to wipe the rotor completely dry.
- Place the rotor over the wheel studs and align its retaining-screw hole.
- Install the new screw with the JIS No. 3 impact screwdriver and tighten it to 10 Nm (7 ft-lbs).
Step 10: Install the Caliper Bracket
- Position the bracket over the rotor and start both mounting bolts by hand.
- Use the 17mm socket and 1/2-inch torque wrench to tighten both bracket bolts to 108 Nm (80 ft-lbs).
Step 11: Compress the Caliper Piston
- Check the brake-fluid reservoir and watch for overflow as the piston moves inward.
- Use the rear brake piston compression tool to press the piston straight and slowly into the caliper.
- Do not rotate the piston or pinch its rubber dust boot.
- Stop if the piston requires excessive force; use the scan tool to verify that maintenance mode remains active.
Step 12: Install the New Brake Pads
- Install the new inner and outer pads into the bracket by hand.
- Make sure the pad tabs are seated fully inside the new clips.
- Use brake cleaner and a clean shop towel to remove fingerprints or lubricant from the rotor.
Step 13: Reinstall the Caliper
- Lower the caliper over the new pads without twisting its hose.
- Start both slide-pin bolts by hand to prevent damaged threads.
- If necessary, hold the slide pin with the 17mm combination wrench.
- Use the 12mm socket and 3/8-inch torque wrench to tighten the slide-pin bolts to 23 Nm (17 ft-lbs).
- Verify that the slide-pin boots, brake hose, and parking-brake wiring are properly positioned.
Step 14: Replace the Opposite Rear Brake
- Use the same listed tools and repeat Steps 4 through 13 on the other side.
- Always replace rear pads and rotors on both sides.
Step 15: Reinstall the Wheels
- Install both wheels and start every lug nut by hand.
- Use the 19mm socket and 3/8-inch ratchet to snug the lug nuts in a crisscross pattern.
- Use the floor jack to raise your Accord, remove the jack stands, and lower it fully.
- Use the 19mm socket and 1/2-inch torque wrench to tighten the lug nuts in a crisscross pattern to 108 Nm (80 ft-lbs).
Step 16: Exit Maintenance Mode
- Switch the ignition ON without starting the engine.
- Use the scan tool and select Honda > ABS/VSA > Electronic Parking Brake > End Maintenance Mode.
- Follow the prompts to extend and initialize both parking-brake actuators.
- Use the scan tool to check and clear any ABS/VSA or parking-brake fault codes.
- Do not drive until the scan tool confirms that maintenance mode has ended.
✅ After Repair
- 🦶 Pump the brake pedal slowly until it becomes firm before moving your Accord.
- 🧴 Check that the brake-fluid level is between the MIN and MAX marks.
- 🔍 Inspect both calipers for leaks, trapped boots, loose parts, or stretched wiring.
- 🅿️ Apply and release the electronic parking brake three times and verify normal operation.
- 🚗 Make a slow test stop in a safe area. Stop immediately if the pedal feels soft or your Accord pulls strongly.
- 🔥 Make 8-10 moderate stops from about 50 km/h to 15 km/h, allowing roughly 30 seconds of cooling between stops.
- 🛑 Avoid unnecessary hard braking for the first 300 km while the pads seat against the rotors.
- 🔧 Recheck wheel-lug torque after approximately 80-100 km.
💰 DIY vs Shop Cost
Shop Cost: ₹18,000-₹32,000 (parts + labor)
DIY Cost: ₹9,000-₹18,000 (parts only)
You Save: ₹9,000-₹14,000 by doing it yourself!
Panipat labor and imported-parts prices vary. This repair takes a shop approximately 1.5-2.5 hours.
🎯 Ready to get started?
HowToo makes it easy: same-day/2-day shipping on every part, plus all the tools and specialty tools you need! Check out the parts and tools sections below to add everything to your cart.