


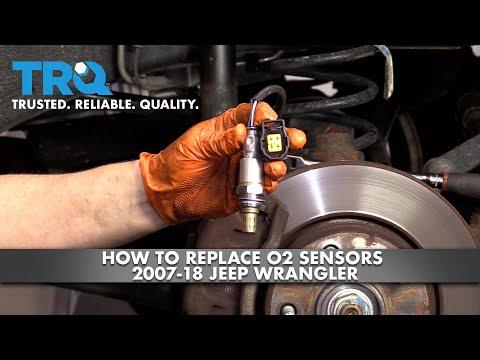


How to Replace Oxygen (O2) Sensors on a 2012 Jeep Wrangler (Upstream & Downstream)
Step-by-step DIY instructions with required tools/parts, safety tips, sensor locations, and 30 ft-lb torque spec for 2005, 2006
How to Replace Oxygen (O2) Sensors on a 2012 Jeep Wrangler (Upstream & Downstream)
Step-by-step DIY instructions with required tools/parts, safety tips, sensor locations, and 30 ft-lb torque spec for 2005, 2006
🔧 Wrangler - Oxygen Sensor Replacement
Your Wrangler uses oxygen (O2) sensors to measure exhaust oxygen so the computer can adjust fueling and monitor the catalytic converters. Replacing faulty sensors can fix check-engine lights, poor fuel economy, and failed emissions tests.
Difficulty Level: Intermediate | Estimated Time: 1.5-3.0 hours
⚠️ Safety & Precautions
- ⚠️ Exhaust parts get extremely hot—work on a cold engine.
- ⚠️ Support the Jeep with jack stands on a solid, level surface; never rely on a jack.
- ⚠️ Keep penetrating oil off hot exhaust and away from sparks/flames.
- ⚠️ Do not twist the sensor harness; unplug connectors before removing sensors.
- ⚠️ If you disconnect the battery, you may lose radio presets.
🔧 Required Tools
You'll need the following tools for this repair:
- Safety glasses
- Mechanic gloves
- Wheel chocks
- Floor jack (rated 3-ton minimum)
- Jack stands (rated 3-ton minimum)
- 3/8" drive ratchet
- 3/8" drive extension set
- 3/8" drive breaker bar
- Torque wrench (10–100 ft-lbs range)
- Oxygen sensor socket 22mm (7/8") (specialty)
- Penetrating oil
- Small flathead screwdriver
- 10mm wrench
🔩 Required Parts
HowToo sells all the parts you need for this repair:
- Upstream oxygen sensor (Sensor 1) - Qty: 2
- Downstream oxygen sensor (Sensor 2) - Qty: 2
- High-temperature anti-seize compound - Qty: 1
📋 Before You Begin
- Park on level ground, shift to Park (or in gear if manual), and set the parking brake.
- Chock the rear wheels with wheel chocks.
- Let the exhaust cool completely (at least 1 hour after driving).
- If you want extra safety while unplugging connectors, disconnect the negative battery cable using a 10mm wrench.
- Know the sensor naming: “Upstream/Sensor 1” is before the catalytic converter; “Downstream/Sensor 2” is after it. “Bank 1/Bank 2” refers to which side of the engine (each exhaust manifold is a bank).
🔨 Step-by-Step Instructions
Follow these steps in order:
Step 1: Raise and support the Wrangler
- Lift the front with a floor jack (rated 3-ton minimum) at the proper front jacking point.
- Set it down securely on jack stands (rated 3-ton minimum).
- Give the Jeep a firm shake test before getting underneath.
Step 2: Locate all O2 sensors
- Look along the exhaust for sensors screwed into the pipes with a wire harness coming off them.
- Upstream sensors are closer to the engine (before the catalytic converters).
- Downstream sensors are farther back (after the catalytic converters).
- Take a photo of each connector routing.
Step 3: Unplug the sensor electrical connector
- Spray the connector area lightly if dusty, then wipe clean.
- Release the connector lock tab using a small flathead screwdriver, then separate the connector by hand.
- If the harness is clipped to the body/frame, carefully free it so it can rotate with the sensor.
Step 4: Pre-soak the sensor threads
- Spray the sensor’s threaded area with penetrating oil.
- Wait 5–10 minutes, then re-spray once if it looks very rusty.
- Penetrating oil saves stripped threads.
Step 5: Remove the old oxygen sensor
- Slide the harness through the slot in the oxygen sensor socket 22mm (7/8") (specialty).
- Use a 3/8" drive ratchet with a 3/8" drive extension set to loosen the sensor.
- If it won’t break loose, switch to a 3/8" drive breaker bar and apply steady pressure.
- Once loose, spin it out by hand and remove it.
Step 6: Prepare the new sensor
- Compare the new sensor to the old one (connector shape, harness length, and thread size).
- If the new sensor threads are not pre-coated, apply a tiny amount of high-temperature anti-seize compound to the threads only.
- Keep anti-seize off the sensor tip (the vented end).
Step 7: Install the new oxygen sensor
- Start the sensor by hand and turn several full turns to avoid cross-threading.
- Tighten using the oxygen sensor socket 22mm (7/8") (specialty) and a torque wrench (10–100 ft-lbs range).
- Torque to 40 Nm (30 ft-lbs)
Step 8: Reconnect the wiring and secure the harness
- Plug the connector back in until it clicks.
- Re-attach any harness clips so the wiring stays away from the exhaust.
- Repeat Steps 3–8 for the remaining sensors (upstream and downstream).
Step 9: Reinstall and lower the Wrangler
- Remove tools from under the Jeep.
- Raise slightly with the floor jack (rated 3-ton minimum), remove the jack stands (rated 3-ton minimum), and lower to the ground.
- If you disconnected the battery, reconnect the negative terminal using a 10mm wrench.
✅ After Repair
- Start the engine and listen/inspect for exhaust leaks near where you worked.
- If you had a check-engine light, clear codes with a scan tool, or drive normally and see if it returns.
- Take a short test drive, then re-check that no harness is touching the exhaust.
- If the light comes back with the same O2 code, there may be a wiring issue or an exhaust leak.
💰 DIY vs Shop Cost
Shop Cost: $450-$1,000 (parts + labor)
DIY Cost: $180-$600 (parts only)
You Save: $270-$400 by doing it yourself!
Shop labor rates vary but typically run $100-$150/hour. This repair takes a shop approximately 1.5-3.0 hours.
🎯 Ready to get started?
HowToo makes it easy: same-day/2-day shipping on every part, plus all the tools and specialty tools you need! Check out the parts and tools sections below to add everything to your cart.
