








How to Replace Low-Beam Headlight Bulbs (H11) on a 2014 Subaru Outback
Step-by-step DIY guide with tools, parts list, safety tips, and access tricks for both sides for 2005, 2006, 2007, 2008, 2009, 2010, 2011, 2012, 2013, 2014
How to Replace Low-Beam Headlight Bulbs (H11) on a 2014 Subaru Outback
Step-by-step DIY guide with tools, parts list, safety tips, and access tricks for both sides for 2005, 2006, 2007, 2008, 2009, 2010, 2011, 2012, 2013, 2014


🔧 Outback - Headlight Bulb Replacement
You’ll be replacing the two low-beam headlight bulbs (left and right). On your Outback, the bulbs install from behind the headlight housing in the engine bay, and access is tight—so you may need to move a couple items out of the way.
Assumption: “Headlight bulbs” = the two low-beam bulbs (one per side).
Difficulty Level: Intermediate | Estimated Time: 0.5-1.5 hours
⚠️ Safety & Precautions
- ⚠️ Turn the lights OFF and let the headlight housings cool before touching bulbs (halogen bulbs get extremely hot).
- ⚠️ Do not touch the glass of the new bulb with bare fingers; skin oil can shorten bulb life. If you touch it, clean with rubbing alcohol and a lint-free towel.
- ⚠️ If you remove the battery for access, disconnect the negative terminal first and reconnect it last.
- ⚠️ Keep keys out of the ignition so no one turns the lights on while your hands are near the bulb opening.
🔧 Required Tools
You'll need the following tools for this repair:
- 10mm socket
- 1/4" ratchet
- 6" socket extension
- Trim clip removal tool
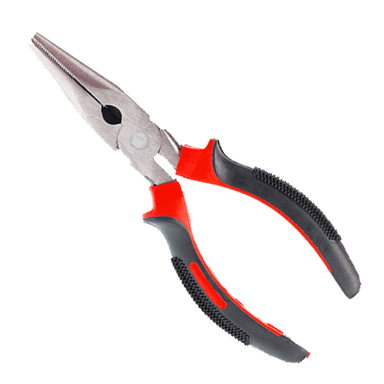
- Needle-nose pliers
- Flashlight
- Nitrile gloves
- Safety glasses
- Torque wrench (inch-pound or small ft-lb)
🔩 Required Parts
HowToo sells all the parts you need for this repair:
- Low-beam headlight bulb (H11) - Qty: 2
- Dielectric grease - Qty: 1
- Rubbing alcohol (70%+) - Qty: 1
- Lint-free towels - Qty: 2
📋 Before You Begin
- Park on level ground, shift to neutral, and set the parking brake.
- Open the hood and use a flashlight to locate the rear of each headlight housing.
- If you’ll be moving/removing the battery for access, use a 10mm socket to disconnect the negative battery terminal first. Negative off first, on last.
- Torque note: Subaru does not specify a unique torque for the bulb itself; for small clamps/hold-downs, tighten securely without stripping. Use the torque wrench only if you have the factory spec available for your hardware.
🔨 Step-by-Step Instructions
Follow these steps in order:
Step 1: Identify the correct bulbs (low beams)
- Use a flashlight to look behind each headlight housing for the low-beam bulb socket (this is the main “headlight” beam).
- Confirm your replacement bulbs are H11 (Qty 2) before you start.
Step 2: Make room to reach the driver-side bulb (left side)
- If access is tight, remove the battery (common on this model).
- Use a 10mm socket and 1/4" ratchet to loosen and remove the battery terminals (negative first, then positive).
- Use a 10mm socket with a 6" extension to remove the battery hold-down hardware, then lift the battery out carefully.
- Set the battery on the ground, upright.
Step 3: Remove the driver-side low-beam bulb
- Put on nitrile gloves and safety glasses.
- Locate the low-beam electrical connector at the back of the headlight.
- Press the connector lock tab and pull the connector straight off (use needle-nose pliers gently if needed—don’t crush it).
- Twist the bulb counterclockwise to unlock it (about 1/4 turn), then pull the bulb straight out.
Step 4: Install the new driver-side low-beam bulb
- If you accidentally touch the bulb glass, clean it using rubbing alcohol (70%+) and lint-free towels, then let it dry.
- Apply a tiny smear of dielectric grease inside the electrical connector (not on the glass).
- Insert the new bulb into the housing (match the tabs), then twist clockwise to lock.
- Reconnect the electrical connector until it clicks.
Step 5: Make room to reach the passenger-side bulb (right side)
- On this model, the washer fluid filler neck can block your hand.
- Use a trim clip removal tool (or needle-nose pliers carefully) to release any clips holding the washer filler neck to the body area near the headlight.
- Move the filler neck aside just enough to reach the bulb (do not kink hoses).
Step 6: Remove and install the passenger-side low-beam bulb
- Use the same method as the driver side: unplug connector, twist bulb counterclockwise, remove.
- Install the new bulb without touching the glass, twist clockwise to lock, then reconnect the connector until it clicks.
Step 7: Reinstall what you moved (battery and/or washer neck)
- If removed, reinstall the battery and hold-down using a 10mm socket and 1/4" ratchet.
- Reconnect battery terminals using a 10mm socket: positive first, then negative last.
- If you moved the washer filler neck, re-secure it with its clips using a trim clip removal tool or needle-nose pliers.
- Torque to XX Nm (YY ft-lbs) (if you have the factory spec for your battery hold-down/terminals; otherwise tighten securely without stripping).
✅ After Repair
- Start your Outback and turn on low beams to confirm both sides light up evenly.
- Check high beams and turn signals to ensure you didn’t bump any connectors nearby.
- At night, park ~25 feet from a wall and verify both beams look even. If one looks off, the bulb may not be fully seated and locked.
💰 DIY vs Shop Cost
Shop Cost: $120-$250 (parts + labor)
DIY Cost: $30-$90 (parts only)
You Save: $90-$160 by doing it yourself!
Shop labor rates vary but typically run $100-$150/hour. This repair takes a shop approximately 0.5-1.0 hours.
🎯 Ready to get started?
HowToo makes it easy: same-day/2-day shipping on every part, plus all the tools and specialty tools you need! Check out the parts and tools sections below to add everything to your cart.