


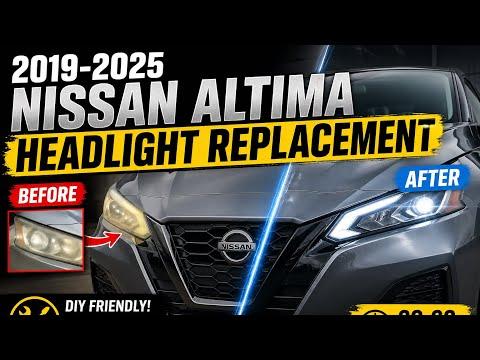







How to Replace LED Headlight Assemblies on a 2019-2021 Nissan Altima
Diagnose both failed headlights, remove the bumper, and install sealed LED units safely for 2019, 2020, 2021
How to Replace LED Headlight Assemblies on a 2019-2021 Nissan Altima
Diagnose both failed headlights, remove the bumper, and install sealed LED units safely for 2019, 2020, 2021


🔧 Altima - Headlight Replacement
Don’t buy replacement headlight bulbs for your Altima. The Edition ONE includes the Platinum equipment package and uses sealed LED headlights. Nissan lists no replaceable low-beam or high-beam bulb for this system. If an LED light source has failed, the affected headlight assembly is replaced as a unit. prods.nissanusa.com)
The H11 bulbs displayed in the parts results are for Altimas equipped with halogen headlights, not your Edition ONE. If both headlights stopped simultaneously, diagnose the shared power supply or lighting controls before replacing two expensive assemblies. Parts catalogs occasionally offer a very confident wrong turn.
Difficulty Level: Advanced | Estimated Time: 2-4 hours for both assemblies
⚠️ Safety & Precautions
- ⚠️ Turn the ignition and every exterior light off before disconnecting anything.
- ⚠️ Disconnect the negative battery terminal and wait at least three minutes before working near front wiring.
- ⚠️ Support the bumper cover while removing it. Pulling it loose can damage parking-sensor and exterior-light wiring.
- ⚠️ Protect the painted bumper and fender edges with masking tape.
- ⚠️ Don’t open, drill, or attempt to replace components inside the sealed LED assembly.
- ⚠️ Don’t replace both assemblies until power, ground, connectors, and fuses have been tested.
🔧 Required Tools
You'll need the following tools for this repair:
- 10mm socket
- 10mm combination wrench
- 1/4-inch drive ratchet
- 1/4-inch drive 6-inch extension
- Plastic trim-clip removal tool
- Plastic panel-removal wedge
- Digital multimeter rated for 12-volt automotive circuits
- Low-current LED circuit test light
- Masking tape rated for automotive paint
- Magnetic parts tray
- Fender cover
- Work gloves
- Safety glasses
🔩 Required Parts
HowToo sells all the parts you need for this repair:
- LED headlight assembly - Qty: 1 per failed side
- Front bumper-cover retaining clips - Qty: As needed
Important: Replace only the assembly proven faulty. The left and right assemblies are different parts, and a “bulb-only” H11 conversion isn’t appropriate for the factory LED housing.
📋 Before You Begin
- 📋 Park your Altima on level ground, select Park, and apply the parking brake.
- 📋 Record the original headlight aim against a wall before removing an assembly.
- 📋 Switch the headlights off and keep the intelligent key away from the vehicle.
- 📋 Open the hood, then use the 10mm wrench to disconnect the negative battery terminal.
- 📋 Wait at least three minutes before disconnecting front lighting connectors.
- 📋 Apply automotive masking tape along the bumper-to-fender and bumper-to-headlight seams.
🔨 Step-by-Step Instructions
Follow these steps in order:
Step 1: Confirm the Actual Failure
- Turn the ignition on and test low beams, high beams, daytime running lights, and parking lights before disconnecting the battery.
- If both complete headlight assemblies are dark, check the related fuses and scan the body-control system before removing the bumper.
- Use the digital multimeter and wiring information to test power and ground at each headlight connector.
- If power or ground is missing, repair that circuit instead of replacing the assembly.
- Two simultaneous failures usually share a cause.
Step 2: Disconnect the Battery
- Switch the ignition off and remove the intelligent key from the work area.
- Use the 10mm wrench to loosen the negative battery-terminal nut.
- Lift the terminal from the battery post and isolate it so it can’t spring back.
Step 3: Remove the Upper Bumper Retainers
- Use the plastic trim-clip removal tool to lift the center pins from the upper grille and bumper-cover clips.
- Remove the released clips and place them in the magnetic parts tray.
- Use the 10mm socket and ratchet for any upper bolts present.
- Don’t force a clip that hasn’t released. Its center pin must rise before the body comes out.
Step 4: Release the Fender-Liner Corners
- Turn the steering wheel away from the side being serviced for more working room.
- Use the plastic trim-clip removal tool to remove the forward wheel-liner retainers.
- Use the 10mm socket and ratchet to remove any bumper-corner screws.
- Repeat on the opposite side when removing both assemblies.
Step 5: Release the Lower Bumper Cover
- Use the plastic trim-clip removal tool to remove the lower bumper and splash-shield clips.
- Use the 10mm socket and ratchet to remove the lower bolts.
- Keep clips and bolts grouped by location in the magnetic parts tray.
Step 6: Detach the Bumper Corners
- Use the plastic panel-removal wedge at the bumper-to-fender seam.
- Pull each bumper corner outward gently until its retaining tabs release.
- Support the bumper cover instead of allowing it to hang from its wiring.
- Disconnect the accessible bumper electrical connectors by pressing their locking tabs.
Step 7: Remove the Bumper Cover
- With a helper supporting the opposite side, slide the bumper cover forward.
- Set it face-up on a padded, clean surface.
- Inspect every mounting tab before continuing. Broken tabs can leave uneven panel gaps.
Step 8: Remove the Failed Headlight Assembly
- Use the 10mm socket, extension, and ratchet to remove the headlight mounting bolts.
- Support the headlight while removing its final fastener.
- Pull the assembly forward only far enough to access the electrical connectors.
- Press each connector lock and unplug the wiring. Don’t pull on the wires.
- Remove the assembly from the vehicle.
Step 9: Install the Replacement Assembly
- Compare the old and replacement assemblies before installation. Connector positions and mounting tabs must match.
- Connect the wiring until every lock clicks securely.
- Place the locating pins into their guides without forcing them.
- Start every mounting bolt by hand, then use the 10mm socket and ratchet to tighten them evenly.
- Use Nissan service-information torque values for your exact headlamp fasteners. Don’t guess or overtighten the plastic mounting tabs.
Step 10: Test Before Reassembling
- Use the 10mm wrench to reconnect the negative battery terminal temporarily.
- Test the low beam, high beam, daytime running light, parking light, turn signal, and High Beam Assist operation.
- If operation is correct, switch everything off and disconnect the negative terminal again.
- If the replacement remains dark, stop and test the circuit. A second assembly won’t repair missing power or communication.
Step 11: Reinstall the Bumper Cover
- With a helper, reconnect all bumper wiring and position the cover against the vehicle.
- Engage the center guides first, then press each bumper corner into its fender retainers by hand.
- Use the 10mm socket and ratchet to reinstall the lower and wheel-opening fasteners.
- Use the plastic trim-clip removal tool to reinstall reusable clips with their center pins raised, then press the pins flush.
- Check the bumper-to-fender and bumper-to-headlight gaps before final tightening.
Step 12: Reconnect and Aim the Lights
- Use the 10mm wrench to reconnect and secure the negative battery terminal.
- Park on level ground facing the same wall used before disassembly.
- Turn on the low beams and compare the cutoff height and side-to-side alignment with the original marks.
- Have the headlight aim professionally checked if the cutoff moved or the assembly was replaced after collision damage.
✅ After Repair
- ✅ Confirm both low and high beams operate without warnings.
- ✅ Confirm daytime running lights, parking lights, turn signals, and High Beam Assist work normally.
- ✅ Check that every electrical connector and bumper fastener is secure.
- ✅ Inspect the headlight and bumper gaps for even alignment.
- ✅ Verify the beam pattern at night without dazzling oncoming traffic.
- ✅ Scan the body-control and driver-assistance systems if a warning remains illuminated.
💰 DIY vs Shop Cost
Shop Cost: Approximately $1,200-$2,200 for two LED assemblies plus labor
DIY Cost: Approximately $250-$1,850 depending on replacement-assembly brand
You Save: Approximately $250-$600 in labor by doing it yourself!
Shop labor rates vary by region. This repair typically takes a shop approximately 2-3 hours, plus diagnosis and headlight aiming.
🎯 Ready to get started?
The correct move is to diagnose the circuit first, then replace only the failed sealed LED assembly. The headlight aisle is open in the sidebar, but skip every H11 bulb listing for your Edition ONE.
🚗 Get parts fast with HowToo! We offer competitive prices and same-day/2-day shipping on every part, plus all the tools and specialty tools you need! Check out the parts and tools sections below to add everything to your cart.
