

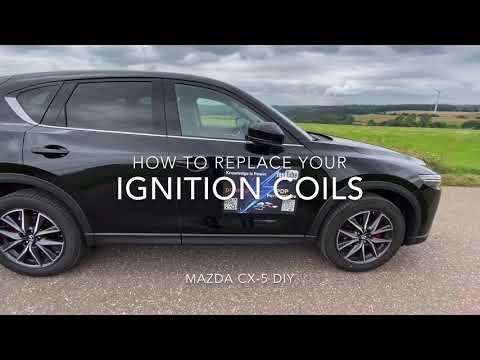






How to Replace Ignition Coils on a 2022-2024 Mazda CX-5 2.5L (Trim: Grand Touring | Engine: Inline 4 2.5L)
Step-by-step DIY instructions with required tools, parts, torque specs, and safety tips for 2022, 2023, 2024
How to Replace Ignition Coils on a 2022-2024 Mazda CX-5 2.5L (Trim: Grand Touring | Engine: Inline 4 2.5L)
Step-by-step DIY instructions with required tools, parts, torque specs, and safety tips for 2022, 2023, 2024


🔧 CX-5 - Ignition Coil Replacement
This is a straightforward job. The four ignition coils sit directly on top of the spark plugs, beneath the plastic engine cover. Replace the diagnosed bad coil, or all four only if testing shows multiple failures.
Difficulty Level: Beginner | Estimated Time: 30-60 minutes
Assumption: This procedure covers your naturally aspirated 2.5L engine.
⚠️ Safety & Precautions
- ⚠️ Park on level ground, select Park, and apply the parking brake.
- ⚠️ Let the engine cool completely before touching the coils.
- ⚠️ Disconnect the negative battery terminal before unplugging the coils. Mazda’s service procedure specifies this precaution. charm.li
- ⚠️ Never pull an electrical connector by its wires.
- ⚠️ Keep dirt out of the open spark-plug wells.
- ⚠️ Do not start the engine while any coil is disconnected.
🔧 Required Tools
You'll need the following tools for this repair:
- 8mm socket
- 10mm socket
- 1/4-inch drive ratchet
- 1/4-inch drive 6-inch extension
- 1/4-inch drive torque wrench rated 2-20 Nm
- Plastic trim tool
- Shop vacuum with narrow nozzle
- Small nylon cleaning brush
- Nitrile gloves
- Safety glasses
🔩 Required Parts
HowToo sells all the parts you need for this repair:
- Ignition coil - Qty: 1 per diagnosed faulty cylinder
- Ignition coils - Qty: 4 only if replacing the complete set
- Dielectric grease - Qty: 1 small tube
The matching ignition-coil aisle is open in the parts sidebar. I’d favor an OE-quality coil over the cheapest option, especially if you’re replacing only one. Nobody wants to repeat this easy job because the bargain coil wasn’t such a bargain.
📋 Before You Begin
- 🚗 Switch the ignition completely off and remove the key from the vehicle.
- 🕒 Wait at least five minutes after shutting down the engine.
- 📱 If you have a diagnostic trouble code, note the cylinder before clearing it. Codes P0351 through P0354 identify the ignition-coil circuits for cylinders 1 through 4.
- 🔋 Open the hood and disconnect the negative battery terminal with a 10mm socket.
- 🧹 Clean loose dirt from around the engine cover before removing anything.
- 📍 Cylinder 1 is at the passenger-side end of the engine, nearest the drive belt.
🔨 Step-by-Step Instructions
Follow these steps in order:
Step 1: Disconnect the Battery
- Use a 10mm socket and 1/4-inch drive ratchet to loosen the negative battery-terminal clamp.
- Lift the clamp from the negative post and position it where it cannot spring back into contact.
- Do not allow the ratchet to bridge between the battery terminal and nearby metal.
Step 2: Remove the Engine Cover
- Grip the plastic engine cover near its mounting points.
- Pull straight upward to release the cover from its rubber mounting grommets.
- If one corner sticks, lift it gently with the plastic trim tool.
- Set the cover somewhere clean so its underside does not collect grit.
Step 3: Locate the Faulty Coil
- Identify the correct coil before unplugging anything. There are four coils in a straight row across the top of the engine.
- If replacing more than one coil, work on one cylinder at a time. This prevents crossed connectors and dropped debris.
- Use the shop vacuum and small nylon cleaning brush to remove dirt around the coil and spark-plug well.
Step 4: Disconnect the Coil Connector
- Press the release tab on the ignition-coil electrical connector.
- Pull the connector straight backward by its plastic housing.
- If it does not release, push the connector inward first, press the tab again, and then pull it off.
- Do not pry hard on the locking tab. Heat makes old connector plastic brittle.
Step 5: Remove the Hold-Down Bolt
- Use the 8mm socket, 6-inch extension, and 1/4-inch drive ratchet to remove the single coil hold-down bolt. An illustrated procedure for this CX-5 generation also identifies an 8mm fastener. paulstravelpictures.com)
- Place the bolt in a clean container so it cannot fall into the engine compartment.
Step 6: Remove the Ignition Coil
- Hold the coil by its solid upper body.
- Twist it gently from side to side to release the rubber boot from the spark plug.
- Pull the coil straight upward and out of the spark-plug well.
- Inspect the old coil for oil, coolant, water, cracking, carbon tracking, or a torn boot.
- If oil is inside the well, the valve-cover or spark-plug-tube sealing issue should be repaired before fitting the new coil.
Step 7: Prepare the New Coil
- Compare the new and old coils. The connector, mounting ear, boot length, and internal spring should match.
- Apply only a very thin film of dielectric grease inside the opening of the rubber boot.
- Dielectric grease is a non-conductive silicone grease that helps keep moisture out and prevents the boot from sticking.
- Do not pack the boot with grease and do not put grease on the electrical connector terminals.
Step 8: Install the New Coil
- Lower the new coil straight into the spark-plug well.
- Push downward until the boot is fully seated over the spark plug.
- Align the coil’s mounting ear with the threaded bolt hole.
- Start the hold-down bolt by hand for several turns. Stop if it does not turn easily.
- Use the 8mm socket and torque wrench to tighten the bolt to 8-11 Nm (71-97 in-lbs). Mazda service information specifies this range. charm.li
- That bolt needs finesse, not muscle.
Step 9: Reconnect the Electrical Connector
- Push the electrical connector straight onto the new coil until its lock clicks.
- Give the connector housing a gentle tug to confirm it is locked.
- Repeat Steps 3 through 9 for any additional diagnosed coils.
Step 10: Reinstall the Engine Cover
- Check that no tools, bolts, or cleaning material remain on the engine.
- Align the engine-cover mounting sockets with the rubber grommets.
- Press directly over each mounting point until the cover seats securely.
Step 11: Reconnect the Battery
- Place the negative clamp fully onto the battery post.
- Use the 10mm socket and ratchet to tighten the clamp until it cannot rotate by hand.
- Do not overtighten or crush the battery terminal.
✅ After Repair
- ✅ Start the engine and let it idle for several minutes.
- ✅ Confirm the engine runs smoothly without shaking, hesitation, or unusual clicking.
- ✅ Verify that the check-engine light is not flashing. A flashing light indicates an active misfire, so shut the engine off.
- ✅ If you have an OBD-II scan tool, clear the old fault code and check for returning codes after a short drive.
- ✅ If the same cylinder still misfires, inspect the spark plug, coil connector, wiring, injector, and cylinder compression before buying more coils.
- ✅ Clock and convenience settings may need to be restored after the battery disconnect.
💰 DIY vs Shop Cost
Shop Cost: $180-$450 for one coil, or $550-$1,000 for four
DIY Cost: Approximately $20-$160 per coil, depending on brand
You Save: Approximately $100-$400 by doing it yourself!
Shop labor rates vary but typically run $100-$150/hour. This repair takes a shop approximately 0.5-1.0 hour.
🎯 Ready to get started?
HowToo makes it easy: same-day/2-day shipping on every part, plus all the tools and specialty tools you need! Check out the parts and tools sections below to add everything to your cart.