


How to Replace Ignition Coils on a 2019 Chevrolet Traverse (3.6L V6)
Step-by-step coil swap for front and rear banks with tools, parts list, and 10 Nm (89 in-lbs) torque specs for 2018, 2019, 2020, 2021, 2022
How to Replace Ignition Coils on a 2019 Chevrolet Traverse (3.6L V6)
Step-by-step coil swap for front and rear banks with tools, parts list, and 10 Nm (89 in-lbs) torque specs for 2018, 2019, 2020, 2021, 2022
🔧 Traverse - Ignition Coil Replacement
Your Traverse has one ignition coil per cylinder (6 total). Replacing a bad coil restores a strong spark so the engine runs smooth and stops misfiring (shaking, flashing check-engine light, loss of power).
Difficulty Level: Intermediate | Estimated Time: 1.0-2.5 hours
⚠️ Safety & Precautions
- Work on a cool engine to avoid burns.
- Keep hands/tools away from the radiator fans; they can turn on automatically.
- If the check-engine light is flashing, avoid driving hard—misfires can damage the catalytic converters.
- Disconnect the negative battery cable if you’re uncomfortable unplugging engine connectors.
- Do not pull on wiring; press the connector tab and pull the plastic housing.
🔧 Required Tools
You'll need the following tools for this repair:
- Safety glasses
- Nitrile gloves
- Floor jack (rated 3-ton minimum)
- Jack stands (rated 3-ton minimum)
- Wheel chocks
- 1/4" ratchet
- 3/8" ratchet
- 3/8" torque wrench (5–30 ft-lbs range)
- 10mm socket
- 8mm socket
- 6" extension (3/8" drive)
- Trim clip removal tool
- Flat-blade screwdriver
- Needle-nose pliers
- Shop light
- Paint marker
🔩 Required Parts
HowToo sells all the parts you need for this repair:
- Ignition coil - Qty: 1-6
- Upper intake manifold gasket set - Qty: 1 (recommended if rear coils are replaced)
- Dielectric grease - Qty: 1 (optional)
📋 Before You Begin
- Park on level ground, shift to Park, and set the parking brake.
- Open the hood and let the engine fully cool.
- If disconnecting the battery: use a 10mm socket to remove the negative cable and isolate it so it can’t touch the terminal.
- Plan your approach:
- Front bank coils are easy to access.
- Rear bank coils usually require removing the upper intake manifold (also called the intake plenum).
🔨 Step-by-Step Instructions
Follow these steps in order:
Step 1: Remove the engine cover
- Grip the cover and pull straight up to release the rubber grommets.
- Set it aside.
Step 2: Decide which coils you’re replacing
- If you’re replacing only one coil, use a paint marker to label the suspect cylinder location first.
- Tip: Replacing coils in pairs is common.
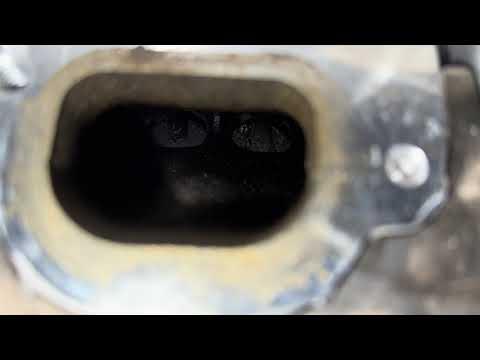
Step 3: Replace a front bank coil (easy access)
- Locate the coil on the front side of the engine (closest to the radiator).
- Press the connector tab and unplug the coil electrical connector.
- Use a 10mm socket with a 1/4" ratchet to remove the coil retaining bolt.
- Twist the coil slightly and pull straight up to remove it from the spark plug tube.
- If using dielectric grease (a silicone grease that helps prevent moisture/corrosion), apply a very thin film inside the new coil boot.
- Push the new coil straight down until it fully seats.
- Install the coil bolt with a 10mm socket, then Torque to 10 Nm (89 in-lbs) using a 3/8" torque wrench (a tool that tightens bolts to a precise setting).
- Reconnect the electrical connector until it clicks.
Step 4: Access the rear bank coils (upper intake manifold removal)
- Remove the intake duct:
- Use an 8mm socket to loosen the hose clamps.
- Use a flat-blade screwdriver and/or needle-nose pliers to release any clips/PCV fresh-air tube connection.
- Lift the duct out.
- Unplug any connectors attached to the upper intake manifold area (use a trim clip removal tool as needed so you don’t break retainers).
- Remove the upper intake manifold bolts using a 10mm socket with a 3/8" ratchet and a 6" extension.
- Lift the upper intake manifold straight up and off, then set it on a clean surface.
- Remove and discard the old upper intake manifold gaskets.
Step 5: Replace a rear bank coil
- With the upper intake manifold off, locate the coils on the rear side of the engine (closest to the firewall).
- Unplug the coil electrical connector.
- Use a 10mm socket to remove the coil retaining bolt.
- Twist and pull the coil straight up to remove it.
- Apply a very thin film of dielectric grease inside the new coil boot (optional).
- Install the new coil and bolt, then Torque to 10 Nm (89 in-lbs).
- Reconnect the electrical connector until it clicks.
Step 6: Reinstall the upper intake manifold
- Install new upper intake manifold gaskets onto the manifold or lower sealing surface (match the originals).
- Set the upper intake manifold in place carefully—don’t pinch the gaskets.
- Install the bolts finger-tight, then tighten evenly using a 10mm socket.
- Torque to 10 Nm (89 in-lbs) using a 3/8" torque wrench.
- Reconnect all hoses and electrical connectors you removed.
Step 7: Reinstall the intake duct and engine cover
- Reinstall the intake duct and tighten clamps using an 8mm socket.
- Reinstall the engine cover by pressing it onto the grommets.
✅ After Repair
- If you disconnected the battery, reconnect it using a 10mm socket and make sure the terminal is tight.
- Start the engine and let it idle for 1–2 minutes. Listen for hissing (vacuum leak) and confirm the idle is smooth.
- Test drive gently, then do a few moderate accelerations.
- If the check-engine light stays on, scan for codes—misfire codes may need clearing after the fix.
- Recheck that every intake clamp and connector is fully seated.
💰 DIY vs Shop Cost
Shop Cost: $300-$900 (parts + labor)
DIY Cost: $60-$450 (parts only)
You Save: $240-$450+ by doing it yourself!
Shop labor rates vary but typically run $100-$150/hour. This repair takes a shop approximately 1.0-2.5 hours.
🎯 Ready to get started?
HowToo makes it easy: same-day/2-day shipping on every part, plus all the tools and specialty tools you need! Check out the parts and tools sections below to add everything to your cart.
