

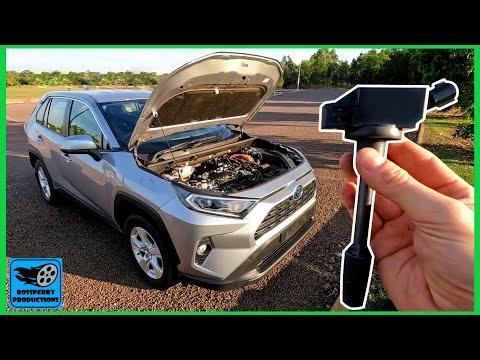







How to Replace Ignition Coils on a 2019-2025 Toyota RAV4 (Trim: Adventure | Engine: Inline 4 2.5L)
Step-by-step DIY guide with tools, parts, torque specs, safety tips, and misfire checks for 2019, 2020, 2021, 2022, 2023, 2024
How to Replace Ignition Coils on a 2019-2025 Toyota RAV4 (Trim: Adventure | Engine: Inline 4 2.5L)
Step-by-step DIY guide with tools, parts, torque specs, safety tips, and misfire checks for 2019, 2020, 2021, 2022, 2023, 2024


🔧 RAV4 - Ignition Coil Replacement
Replacing the ignition coils on your RAV4 is a straightforward job because the coils sit on top of the engine under the plastic engine cover. Ignition coils create the high voltage needed to fire the spark plugs, and a weak coil can cause misfires, rough idle, poor acceleration, or a check engine light.
Difficulty Level: Beginner | Estimated Time: 30-60 minutes
⚠️ Safety & Precautions
- ⚠️ Let the engine cool completely before working near the cylinder head.
- ⚠️ Disconnect the negative battery terminal to prevent accidental electrical shorts.
- ⚠️ Do not pull on wiring harnesses. Press the connector tab and pull the connector body only.
- ⚠️ Keep dirt and tools away from the spark plug wells so nothing falls into the engine.
🔧 Required Tools
You'll need the following tools for this repair:
- 10mm socket
- 3/8-inch drive ratchet
- 3-inch socket extension
- 10mm wrench
- Torque wrench inch-pound range
- Plastic trim tool
- Clean shop towels
- Safety glasses
- Nitrile gloves
🔩 Required Parts
HowToo sells all the parts you need for this repair:
- Ignition coil - Qty: 1-4
- Dielectric grease - Qty: 1 small tube
Tip: Replace only the failed coil, or replace all four if mileage is high and one has already failed.
📋 Before You Begin
- Park your RAV4 on level ground and set the parking brake.
- Turn the ignition off and remove the key/fob from the vehicle area.
- Open the hood and let the engine cool.
- Use a 10mm wrench to disconnect the negative battery terminal. The negative terminal is marked with a minus sign.
- If replacing only one coil, label the cylinder location before removing it.
🔨 Step-by-Step Instructions
Follow these steps in order:
Step 1: Remove the Engine Cover
- Put on safety glasses and nitrile gloves.
- Grip the plastic engine cover with both hands and pull straight upward.
- If it feels stuck, use a plastic trim tool gently near the rubber mounting points.
- Set the cover aside where it will not get stepped on.
- Pull upward, not sideways.
Step 2: Locate the Ignition Coils
- The four ignition coils are lined up across the top of the engine.
- Each coil has one electrical connector and one small hold-down bolt.
- Wipe dust away around each coil using clean shop towels.
- An ignition coil boot is the rubber tube at the bottom of the coil that reaches down to the spark plug.
Step 3: Disconnect the Coil Electrical Connector
- Press the locking tab on the coil connector with your thumb.
- Pull the connector straight back by the plastic connector body.
- If the connector is tight, use a plastic trim tool to gently help release the tab.
- Do not pry hard on old plastic connectors.
- Never pull by the wires.
Step 4: Remove the Coil Hold-Down Bolt
- Use a 10mm socket, 3-inch socket extension, and 3/8-inch drive ratchet to remove the ignition coil bolt.
- Turn the bolt counterclockwise until it is free.
- Place the bolt in a safe spot so it does not fall into the engine bay.
Step 5: Remove the Ignition Coil
- Twist the ignition coil gently left and right by hand to loosen the rubber boot.
- Pull the coil straight upward out of the spark plug well.
- If the rubber boot sticks, keep twisting gently while pulling upward.
- Inspect the old coil for oil, coolant, cracks, burns, or white tracking marks.
- Electrical tracking marks are thin burn lines showing voltage leaked outside the coil.
Step 6: Prepare the New Ignition Coil
- Compare the new ignition coil to the old one before installation.
- Apply a very small amount of dielectric grease inside the rubber boot opening.
- Dielectric grease is a non-conductive silicone grease that helps seal out moisture and makes future removal easier.
- Do not fill the boot with grease. Use only a light film.
- A tiny dab is enough.
Step 7: Install the New Ignition Coil
- Slide the new ignition coil straight down into the spark plug well by hand.
- Push down until you feel the boot seat onto the spark plug.
- Make sure the coil mounting hole lines up with the bolt hole.
Step 8: Tighten the Coil Bolt
- Start the bolt by hand first to avoid cross-threading.
- Use a 10mm socket, 3-inch socket extension, and torque wrench inch-pound range to tighten the bolt.
- Torque to 8 Nm (71 in-lbs).
- Do not overtighten. The bolt threads into aluminum and can strip.
Step 9: Reconnect the Electrical Connector
- Push the electrical connector onto the ignition coil until it clicks.
- Lightly tug the connector body to confirm it is locked.
- Repeat Steps 3-9 for any other ignition coils being replaced.
Step 10: Reinstall the Engine Cover
- Line up the engine cover with the rubber mounting points.
- Press straight down by hand until the cover snaps into place.
- Do not use a hammer or metal tool on the plastic cover.
Step 11: Reconnect the Battery
- Place the negative battery cable back onto the battery terminal.
- Use a 10mm wrench to tighten the terminal clamp snugly.
- Do not overtighten the battery terminal.
✅ After Repair
- Start your RAV4 and let it idle for 1-2 minutes.
- Listen for smooth idle and confirm the engine does not shake.
- If the check engine light was on, it may need to be cleared with a scan tool after the repair.
- Take a short test drive and check for hesitation, rough running, or flashing check engine light.
- If a misfire returns on the same cylinder, inspect the spark plug, connector, wiring, and compression before replacing more parts.
💰 DIY vs Shop Cost
Shop Cost: $180-$650 (parts + labor)
DIY Cost: $45-$320 (parts only)
You Save: $135-$330 by doing it yourself!
Shop labor rates vary but typically run $100-$150/hour. This repair takes a shop approximately 0.5-1.0 hours.
🎯 Ready to get started?
HowToo makes it easy: same-day/2-day shipping on every part, plus all the tools and specialty tools you need! Check out the parts and tools sections below to add everything to your cart.