

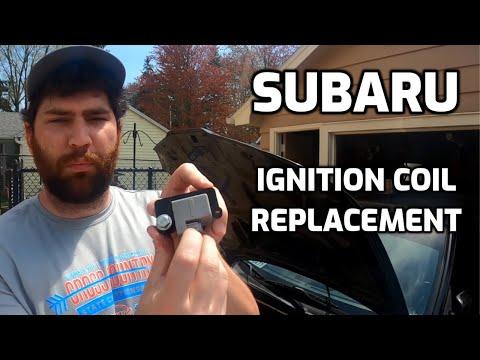





How to Replace Ignition Coils on a 2019-2024 Subaru Forester
Step-by-step DIY instructions with required tools, parts, torque specs, and safety tips for 2019, 2020, 2021, 2022, 2023, 2024
How to Replace Ignition Coils on a 2019-2024 Subaru Forester
Step-by-step DIY instructions with required tools, parts, torque specs, and safety tips for 2019, 2020, 2021, 2022, 2023, 2024


🔧 Forester - Ignition Coil Replacement
The four ignition coils sit directly on the spark plugs, with two on each side of your Forester’s flat-four engine. Replacement involves clearing access around the battery and air-cleaner housing, unplugging each coil, and transferring the rubber sealing boots correctly.
Difficulty Level: Beginner | Estimated Time: 1-2 hours
⚠️ Safety & Precautions
- ⚠️ Let the engine cool completely because the exhaust components are close to the ignition coils.
- ⚠️ Disconnect the negative battery terminal before unplugging the coils.
- ⚠️ Never pull on an ignition-coil wire; press the connector lock and pull the plastic connector.
- ⚠️ Keep dirt and tools out of the openings around the spark plugs.
- ⚠️ Do not start the engine while any ignition coil is disconnected.
🔧 Required Tools
You'll need the following tools for this repair:
- 8mm socket
- 10mm socket
- 12mm socket
- 3/8-inch-drive ratchet
- 3/8-inch-drive 3-inch extension
- 3/8-inch-drive inch-pound torque wrench
- Plastic trim removal tool
- Small flat-blade screwdriver
- Magnetic parts tray
- Mechanic gloves
- Safety glasses
🔩 Required Parts
HowToo sells all the parts you need for this repair:
- Ignition coils - Qty: 4
Use coils matched specifically to your Forester. If only one coil has been diagnosed as faulty, it may be replaced individually; replacing all four is optional unless multiple coils are failing.
📋 Before You Begin
- 📋 Park your Forester on level ground, select Park, apply the parking brake, and switch the ignition off.
- 📋 Allow the engine to cool for at least 30 minutes.
- 📋 Open the hood and keep the key away from the vehicle.
- 📋 Battery registration or programming is not required after reconnection.
- 📋 Note that disconnecting the battery may reset the clock, radio presets, and automatic-window initialization.
🔨 Step-by-Step Instructions
Follow these steps in order:
Step 1: Disconnect the Battery
- Put on safety glasses and mechanic gloves.
- Use a 10mm socket and ratchet to loosen the negative battery-terminal nut.
- Lift the negative terminal from the battery post and position it where it cannot spring back into contact.
- Do not allow the ratchet to bridge between the battery terminals or nearby metal.
Step 2: Remove the Air-Intake Duct
- Use a plastic trim removal tool to lift the center pins from the intake-duct retainers at the front of the engine compartment.
- Use an 8mm socket and ratchet to loosen any intake-hose clamp securing the duct.
- Release the duct carefully and lift it from the engine compartment.
- Place the retainers in a magnetic parts tray.
Step 3: Create Access on the Passenger Side
- Release the metal clips securing the upper air-cleaner cover by hand.
- Use an 8mm socket and ratchet to loosen the intake-hose clamp at the air-cleaner cover.
- Unplug the airflow-sensor connector by pressing its locking tab and pulling on the connector body.
- Move the upper air-cleaner cover and attached hose aside without sharply bending the wiring.
- Lift out the air-filter element and keep it clean.
- If additional room is necessary, use a 10mm socket and ratchet to remove the lower air-cleaner housing fasteners, then lift out the housing.
Step 4: Create Access on the Driver Side
- If your hands and tools can reach both driver-side coils safely, leave the battery installed.
- If more room is needed, use a 10mm socket and ratchet to loosen and remove the positive battery terminal after the negative terminal is already disconnected.
- Use a 12mm socket and ratchet to remove the battery hold-down fasteners.
- Lift the battery straight upward with both hands and set it upright on a stable surface. Batteries are heavy and contain corrosive acid.
- Use a 10mm socket and ratchet to remove the battery tray fasteners if the tray still blocks access.
Step 5: Disconnect the Ignition-Coil Connectors
- Locate the two ignition coils on each side of the engine. Each coil enters the cylinder head horizontally.
- Press each electrical connector’s locking tab and pull the connector straight from the coil.
- Use a small flat-blade screwdriver only if needed to depress a stubborn locking tab. Do not pry against the wires.
- Work on one coil at a time so the connectors remain in their original positions.
Step 6: Remove the Old Ignition Coils
- Use a 10mm socket, 3-inch extension, and ratchet to remove the retaining bolt from the first coil.
- Rotate the coil gently to break the rubber boot’s grip on the spark plug.
- Pull the coil straight outward from the cylinder head.
- Inspect the old coil boot for engine oil, water, cracking, or white electrical tracking marks.
- Oil inside a spark-plug well indicates a sealing problem that should be repaired before installing the new coil.
Step 7: Install the New Ignition Coils
- Compare each new coil with the removed coil. The connector, mounting point, boot length, and sealing surfaces must match.
- Guide the new coil straight over the spark plug and press until the boot seats firmly.
- Start the retaining bolt by hand to prevent cross-threading.
- Use a 10mm socket and inch-pound torque wrench to tighten each ignition-coil retaining bolt to 8.5 Nm (75 in-lbs).
- Reconnect the electrical connector until its lock clicks.
- Repeat this process for the remaining three coils.
- Hand-start every bolt before using the ratchet.
Step 8: Reinstall the Driver-Side Components
- If removed, position the battery tray and start its fasteners by hand.
- Use a 10mm socket and ratchet to tighten the battery-tray fasteners securely without overtightening them.
- Lower the battery into the tray with the terminals in their original positions.
- Install the hold-down and use a 12mm socket and ratchet to tighten it until the battery cannot move. Do not crush the battery case.
- Use a 10mm socket and ratchet to connect and tighten the positive battery terminal first.
Step 9: Reinstall the Passenger-Side Components
- If removed, position the lower air-cleaner housing and start its fasteners by hand.
- Use a 10mm socket and ratchet to tighten the housing fasteners securely.
- Reinstall the air-filter element in its original orientation.
- Seat the upper air-cleaner cover and close its metal retaining clips by hand.
- Reconnect the airflow-sensor connector until it clicks.
- Use an 8mm socket and ratchet to tighten the intake-hose clamp until snug.
Step 10: Reinstall the Intake Duct and Connect the Battery
- Position the intake duct and insert its retainers by hand.
- Press the center pins flush to lock the retainers.
- Use an 8mm socket and ratchet to tighten the duct clamp until snug.
- Use a 10mm socket and ratchet to reconnect the negative battery terminal last.
- Confirm that both battery terminals are fully seated and cannot rotate by hand.
✅ After Repair
- ✅ Check that no tools, loose fasteners, or disconnected plugs remain in the engine compartment.
- ✅ Start the engine and allow it to idle. A slightly uneven idle for a few seconds after battery disconnection can be normal.
- ✅ Confirm that the Check Engine light does not flash and that the engine runs smoothly.
- ✅ If the Check Engine light flashes or the engine shakes strongly, shut it off immediately and recheck every coil connector.
- ✅ Reset the clock and radio presets if necessary.
- ✅ Reinitialize each automatic window if needed by fully closing it, holding the switch up for approximately one second, then fully opening and closing it once.
- ✅ Take a short road test and verify smooth acceleration with no warning lights.
💰 DIY vs Shop Cost
Shop Cost: ₹30,000-₹60,000 (parts + labor)
DIY Cost: ₹24,000-₹50,000 (parts only)
You Save: ₹3,000-₹10,000 by doing it yourself!
Labor rates around Sonīpat vary by workshop. This repair takes a shop approximately 1-1.5 hours, while imported or genuine coil pricing can significantly affect the total.
🎯 Ready to get started?
HowToo makes it easy: same-day/2-day shipping on every part, plus all the tools and specialty tools you need! Check out the parts and tools sections below to add everything to your cart.